How To Update Kitchen Counters {without replacing them!}
This post on how to update kitchen counters without replacing them has been sponsored by Giani Granite. I was sent a free countertop transformations kit in exchange for my unbiased opinion. Read my full disclosure policy here.
This post may contain affiliate links for your convenience. Read our disclosure policy.
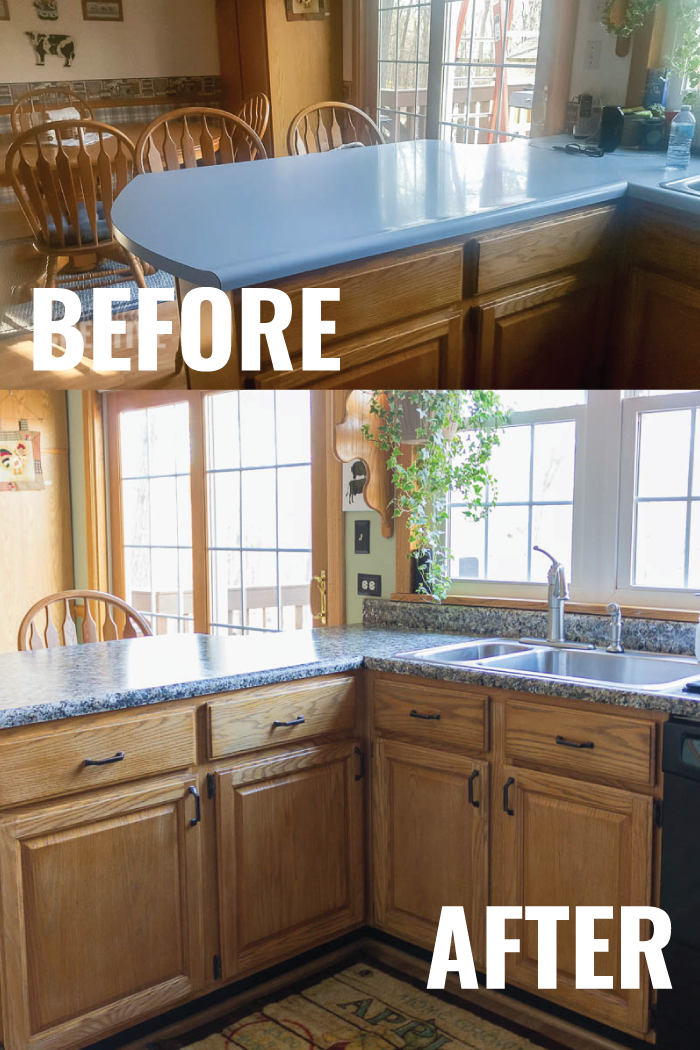
If you’ve been hanging around the blog for the last few weeks, or over on Instagram, you know that I recently gave my parent’s dated kitchen a complete overhaul (on a budget of course!)
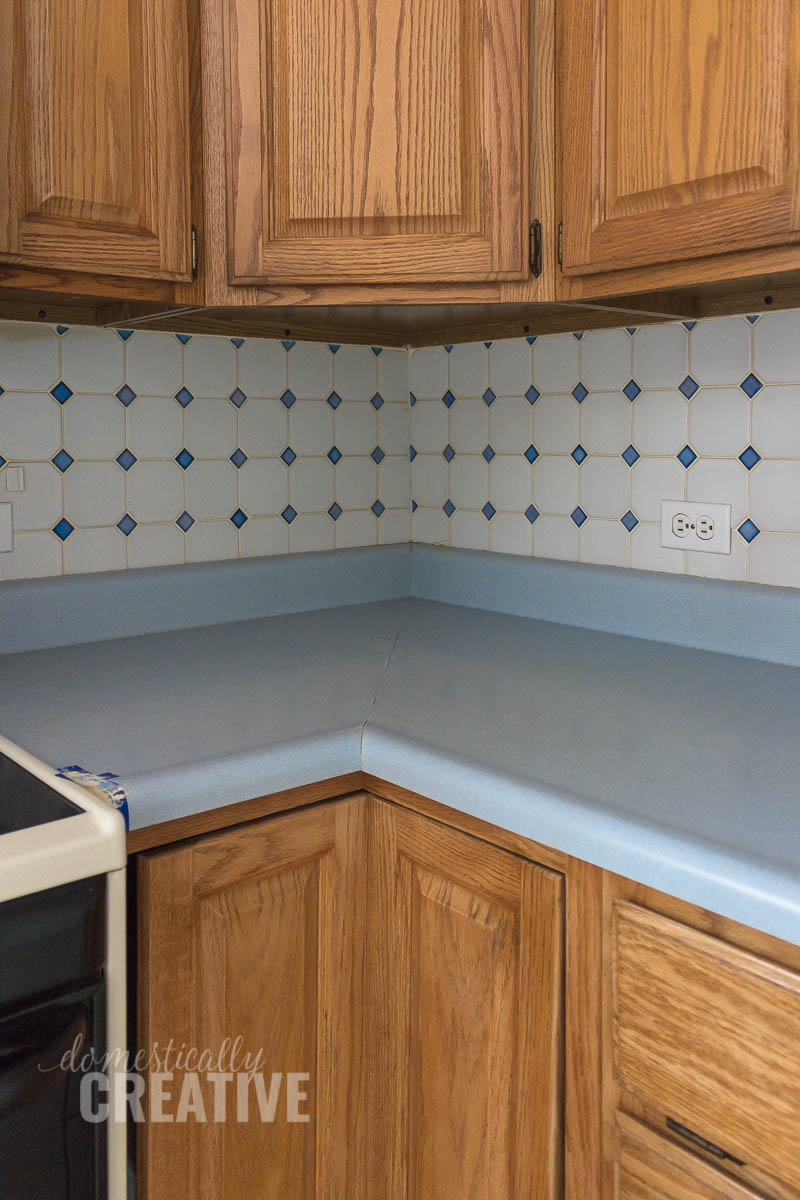
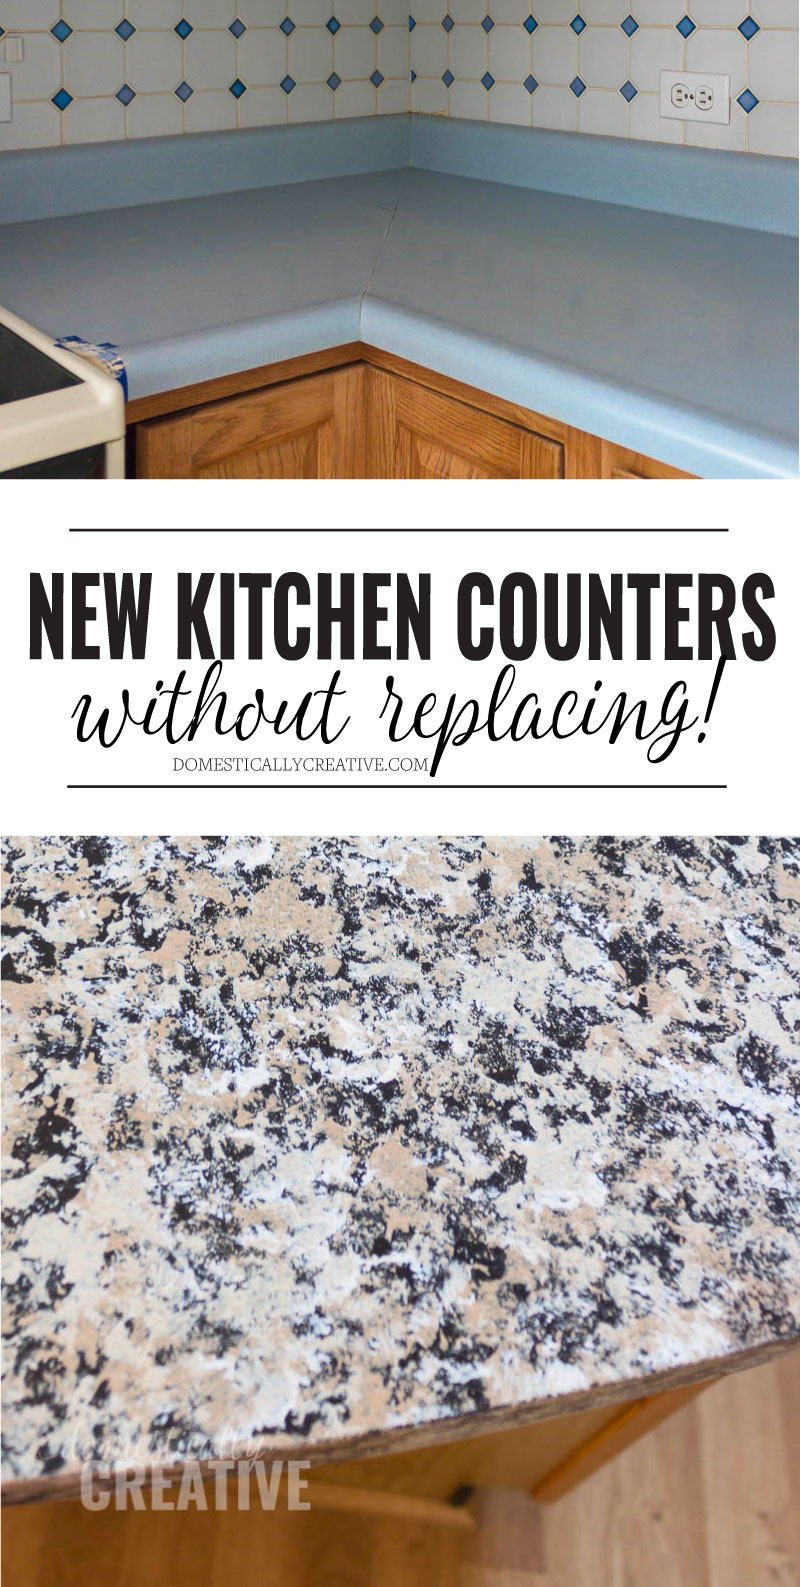
One of the major areas I transformed were their checked country blue counter tops. Every time my mom and I would try to come up with a plan to update their kitchen, we would run into a road block with how to tie in those blue counters. Every color scheme we came up with, every paint color my mom liked would just clash with those counters, and replacing them was completely out of the budget. Maybe one day they may spring for a solid surface, but for now we had to work with what was there.
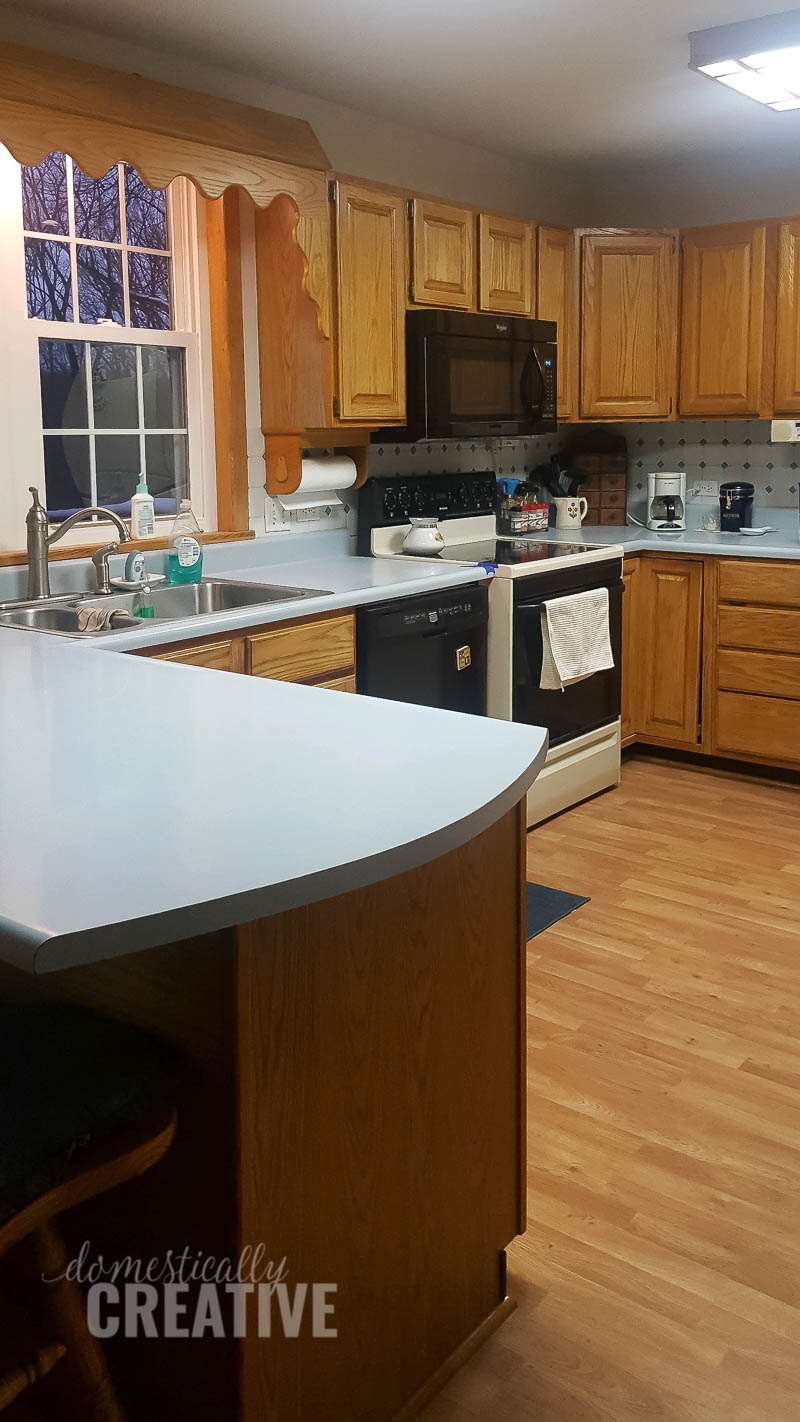
See what I mean?
So I brought up the subject of painting the counters to see if I would immediately be met with a firm “no way!” like I was when I mentioned painting the cabinets. Surprisingly mom was completely on board with the idea!
I was so excited to try out Giani Granite because I have seen so many other people have great success in giving their spaces a face lift for not a lot of money or effort.
How to update kitchen counters without replacing them!
Item’s You’ll Need:
- Giani Granite countertop kit
- Latex gloves
- Small stiff bristle paint brush
- Paper plates or bowls
- Frog Tape
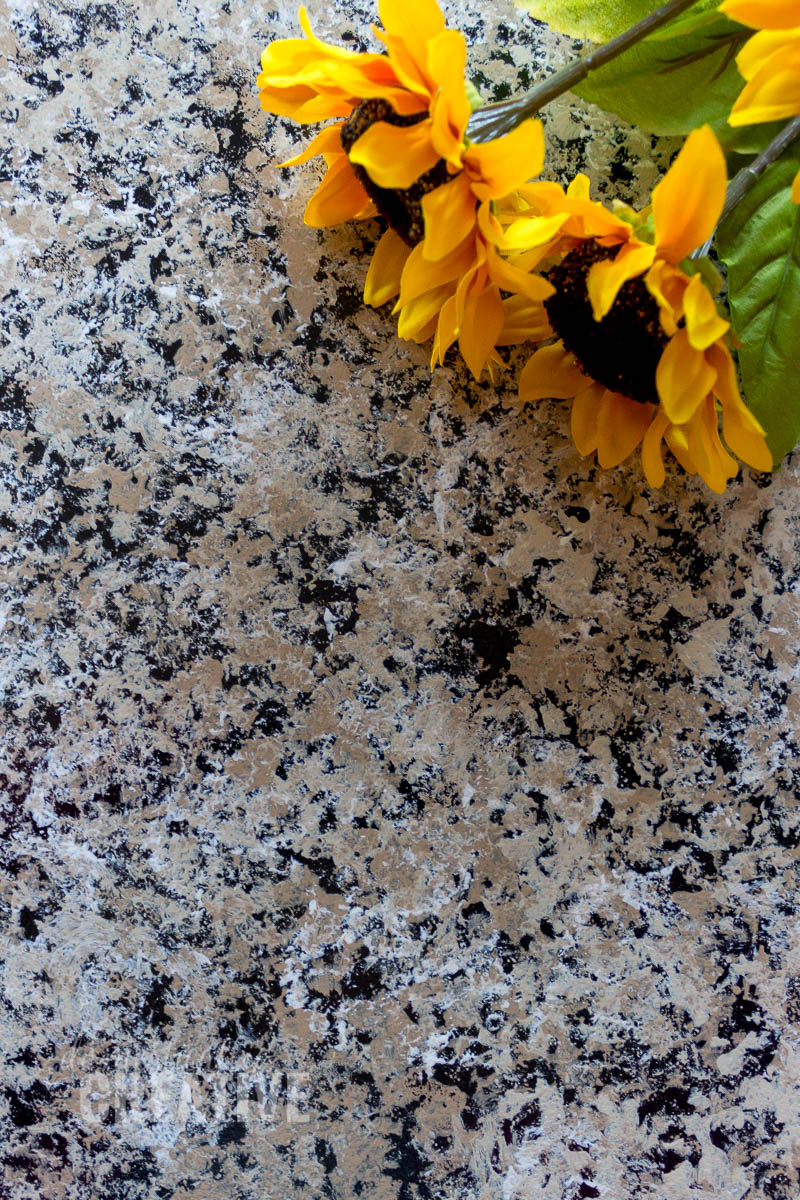
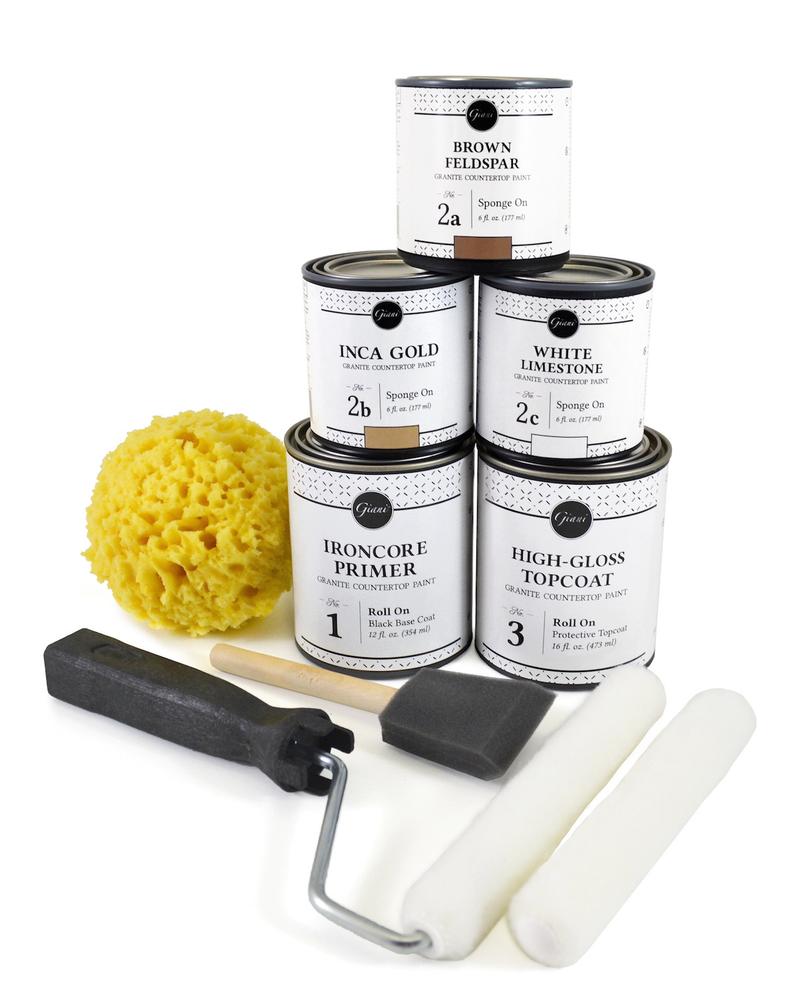
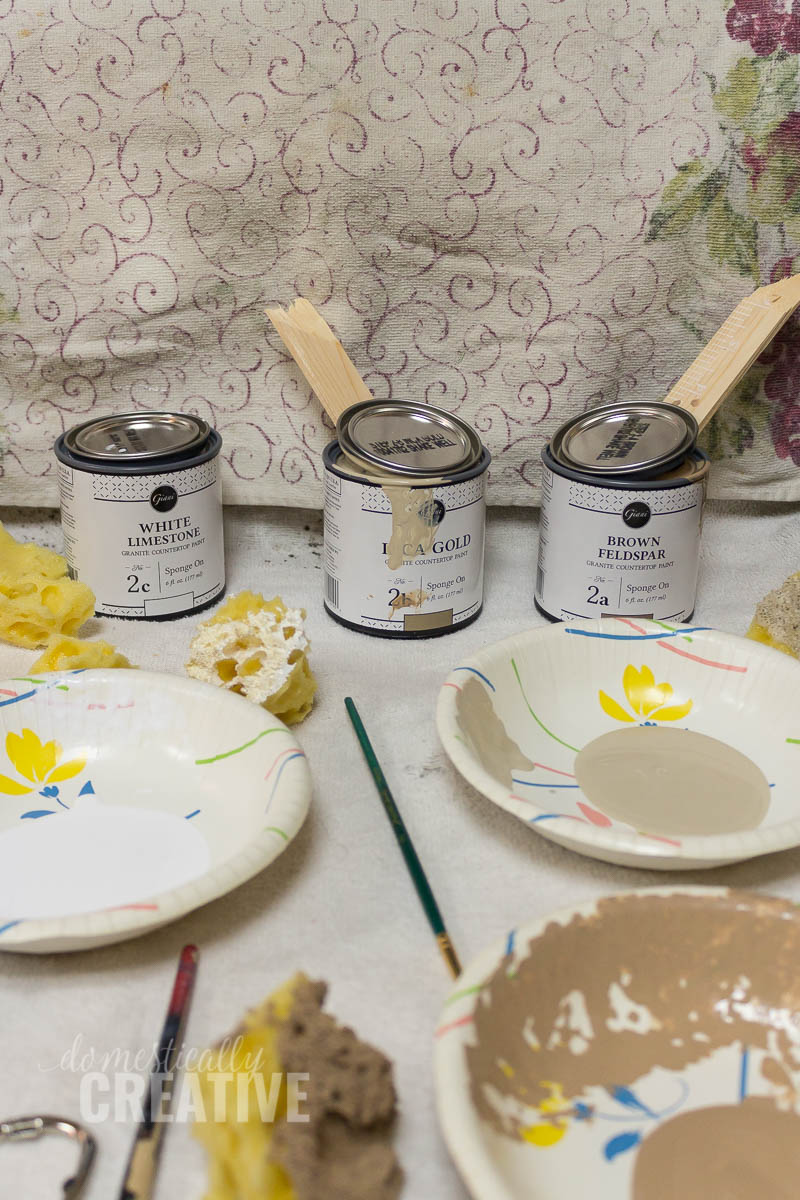
The color we chose for the counters is called Sicilian Sand, which has a lot of earthy undertones. Each kit comes with a can of primer, 3 mineral colors, a can of acrylic top coat, a foam brush, roller and 2 covers, and large sponge. They also give you a small piece of black cardstock to practice sponging on the mineral paints which was very helpful. The kits cover 35 sqft of counters each, so since mom’s was about 40 sqft Giani graciously sent us two kits to make sure we had plenty.
Before getting started I watched their online video tutorials and read the instruction manual completely. They have some great tutorials on their Youtube channel! Giani recommends removing any caulk you may have around backsplashes or sinks, and repairing any large cuts or dings in the counters before starting.
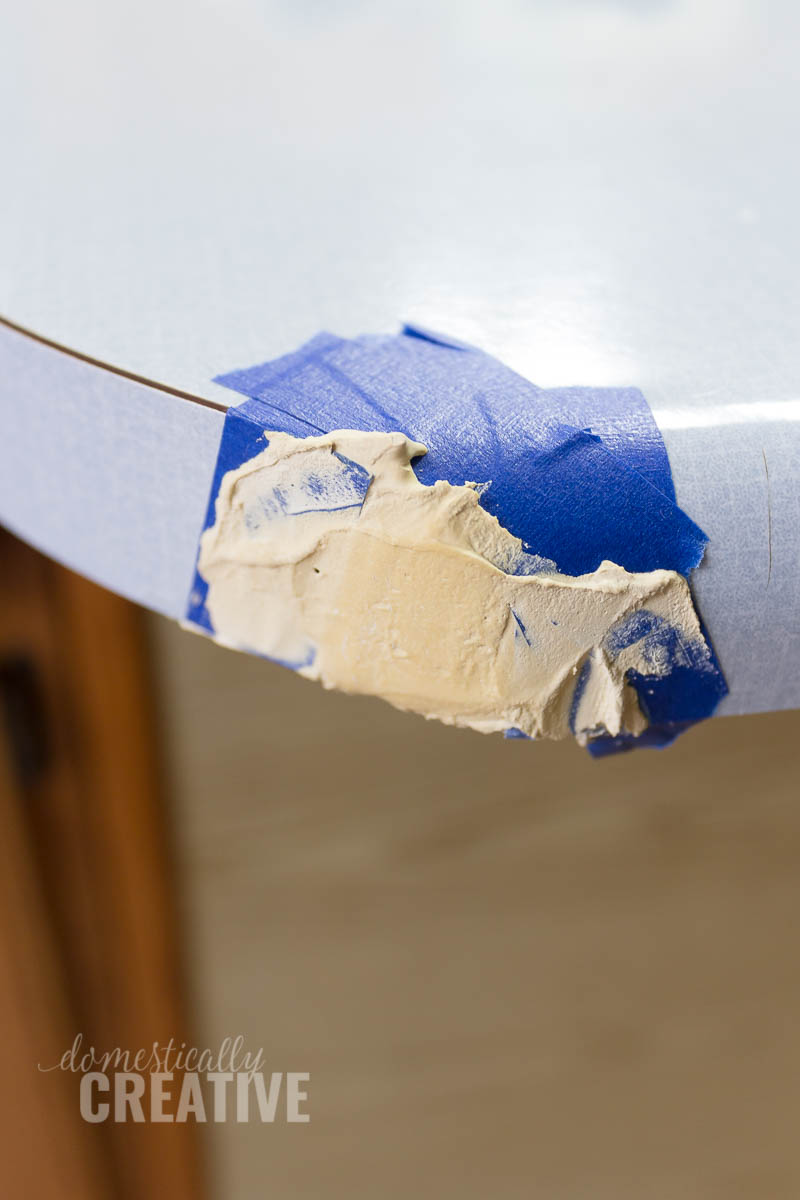
Now, I will say for being probably original to the house and at least older than I am, those counters were still in pretty good shape. There was some wear on the island area where the counters get the most use, and a few knicks and cuts, but for the most part those counters were in great condition. The only problem area was where the previous stove had overlapped the counters so there was a small notch on each side. There was also a small part on one of the corners of the island that had chipped off. My dad filled those and sanded them all down for me.
The next very important step is to clean those counters really really well. I used just soap and water with some steel wool first to get anything that was really stuck on loose, then went back over that twice more to get rid of all the particles.
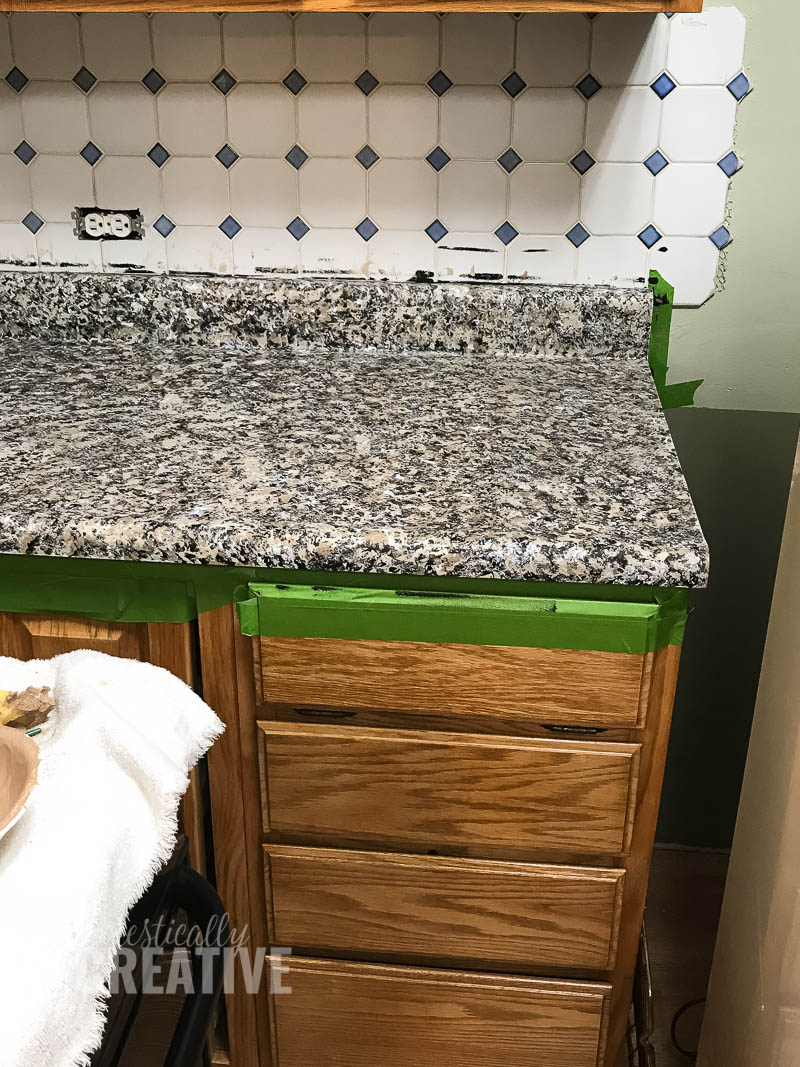
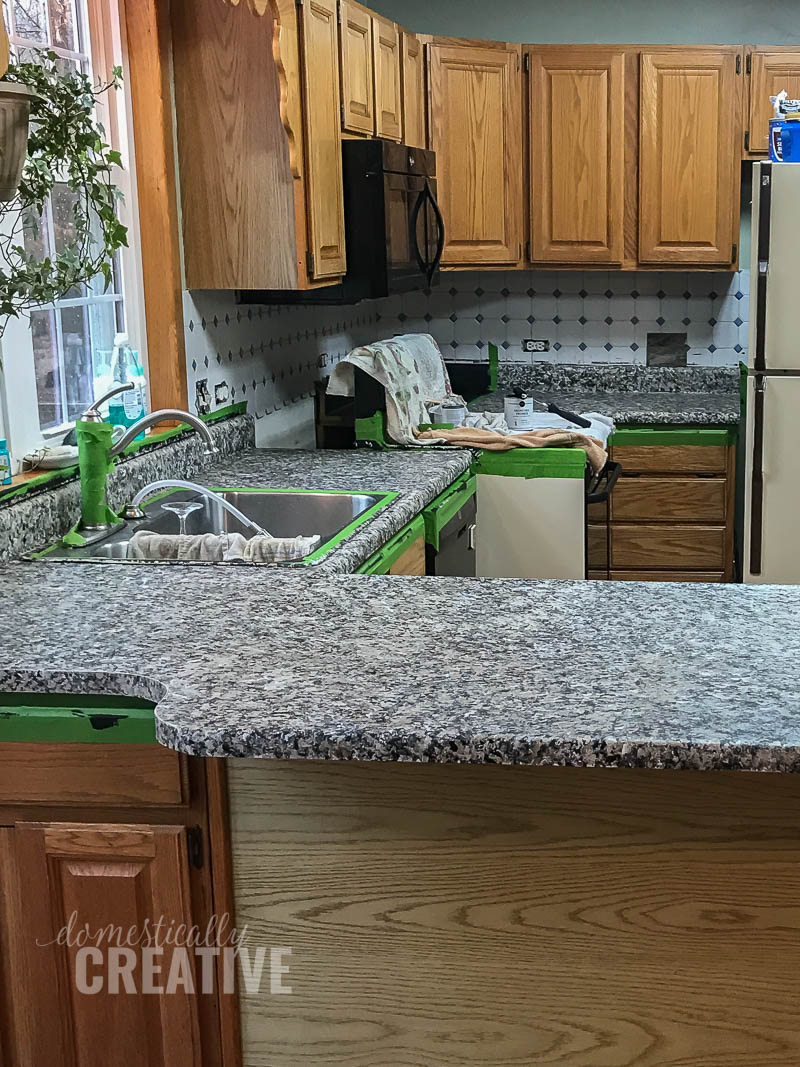
Then tape off around the cabinets, backsplash and sink with FrogTape to make sure you don’t get paint on any of those. I didn’t tape off the tile backsplash because we were planning on covering that anyway. The hardest part to cover up was their window trim work and the sink.
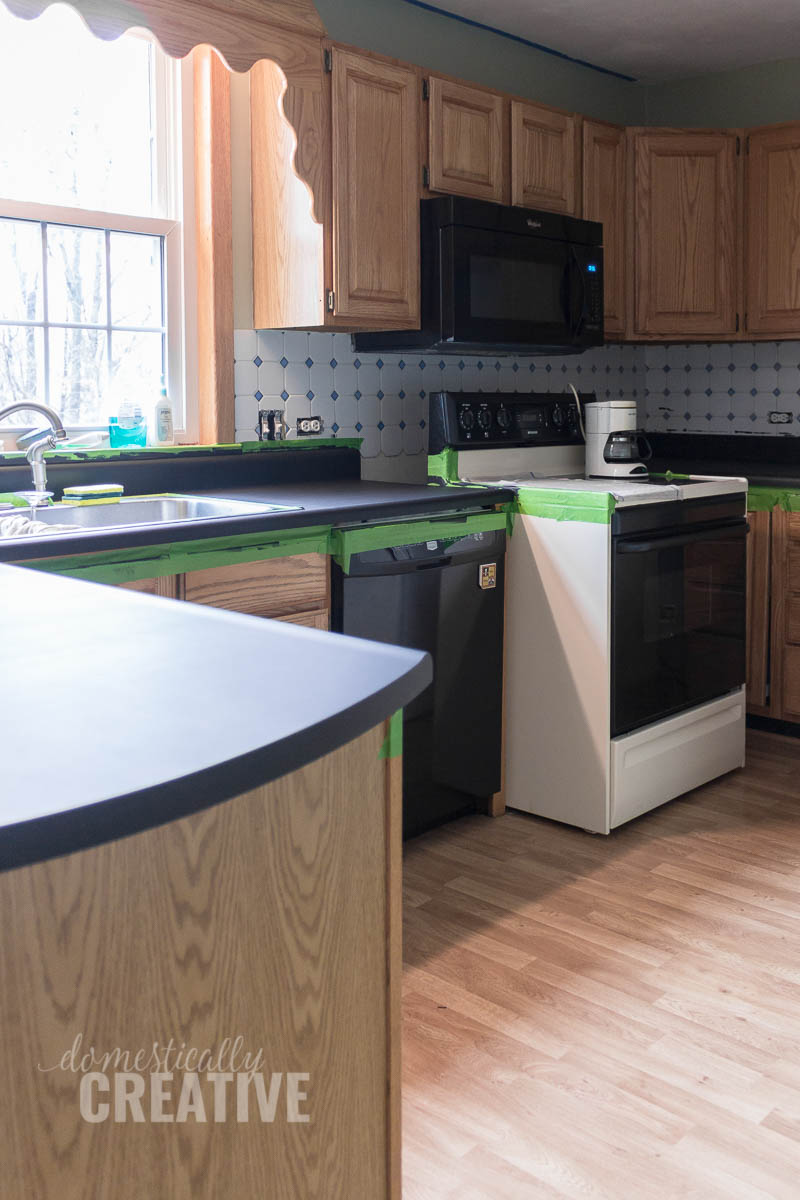
I painted the primer/base layer on after dinner so that it could dry completely overnight. The instructions say to let the base coat dry and cure for at least 8 hours before moving on to the mineral paints. Be sure to roll the primer on in 2’x 2′ sections (their instruction videos explain this) so you always have a wet edge when rolling. You can see in the photo below that I did end up with some paint lines, however, once the mineral paint went on, you can’t see those lines. Since the original counters were so light, I did two coats of the primer, letting the first layer completely dry to the touch before doing the second.
The next morning I set up a sponge painting area (the stove) with paper bowls of each mineral color and small pieces of sponge. The kit comes with a large sponge that you can cut into sections so you can have some for each color. The mineral paint cans are pretty small, but don’t worry you will have plenty to do all of the counters.
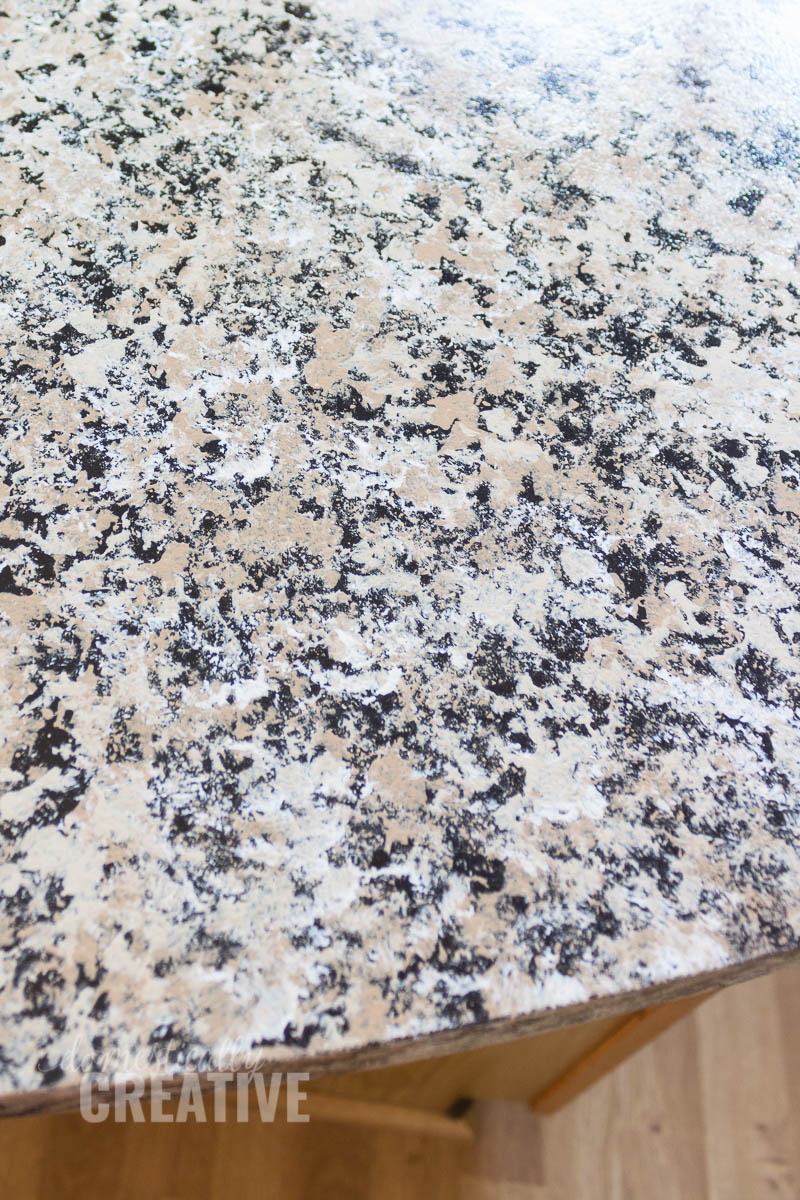
Again working in 2′ x 2′ sections, start with the can that reads 2a and sponge lightly onto the counter. Make sure you don’t press down hard on the sponge or you will get blobs. Also, be sure to sponge randomly and not in rows or lines. Use the small brush to get into the tight corners.
While the first color is still wet, move on to the 2b color. Do the same sponging technique, being sure to overlap the two colors. Do not blend by rubbing the sponge, or blotting the intermingling colors. Let them do their thing. Repeat the process for color 2c.
For these counters I purposely left more black showing through than the sample kit shows and also didn’t use as much of the white to give the counters a bit of a darker look. If after sponging you see some spots that maybe blended too much, or some areas that look like a big blob of one color, you can go back with the base color and lightly sponge over it to get your desired look.
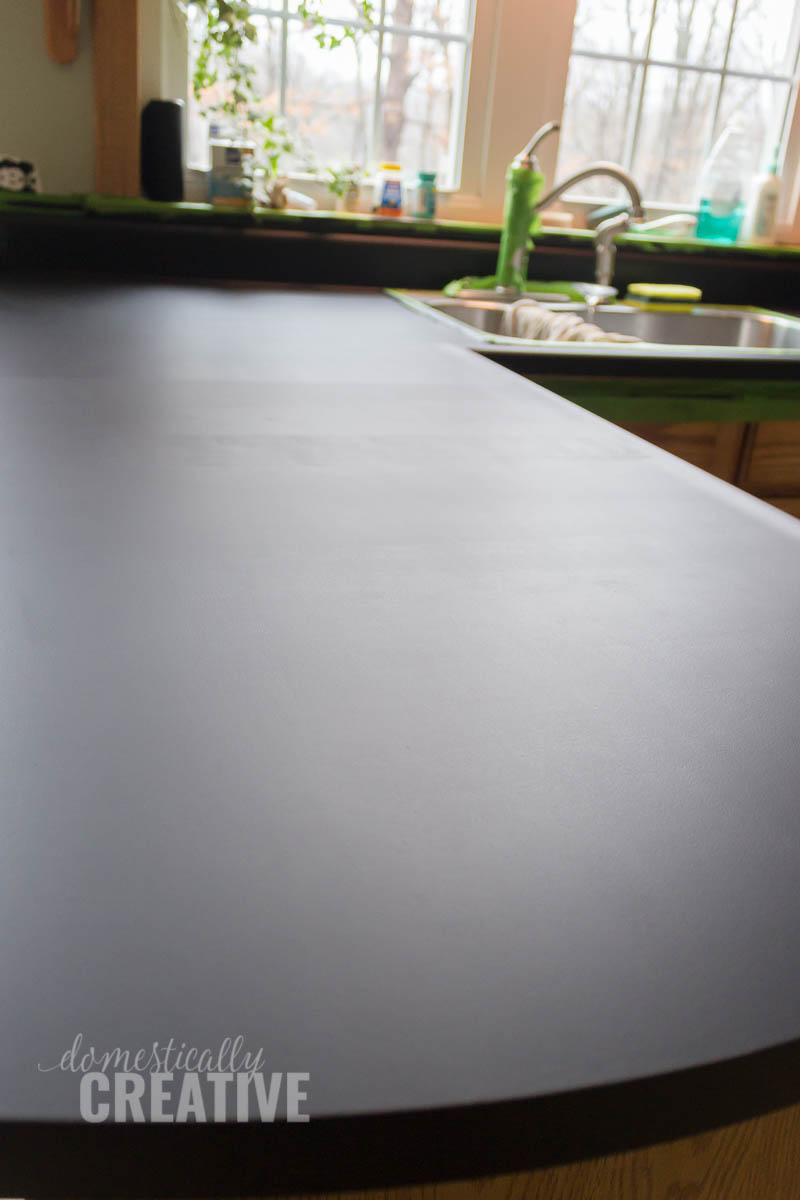
Once all of the counters have been painted, let it dry for at least 4 hours. I let ours dry overnight again before applying the top coat. You apply the top coat just like the base coat, but this is where you definitely do not want any paint lines. It dries with a sheen and you will see those lines once it dries. Speaking from first hand experience!
I ended up going over a section of the counter a third time because those paint lines were driving me absolutely insane. The third coat really seemed to do the trick, however that section of counter seems to have a slight texture to them that the rest of the counters do not. I assume it was that last coat of acrylic as Giani’s instructions only call for two. It’s really not that big of a deal though.
Once the top coat is on, it needs to cure for 24 hours before placing anything on the counters and 4 days before placing any heavy appliances like a microwave on them.
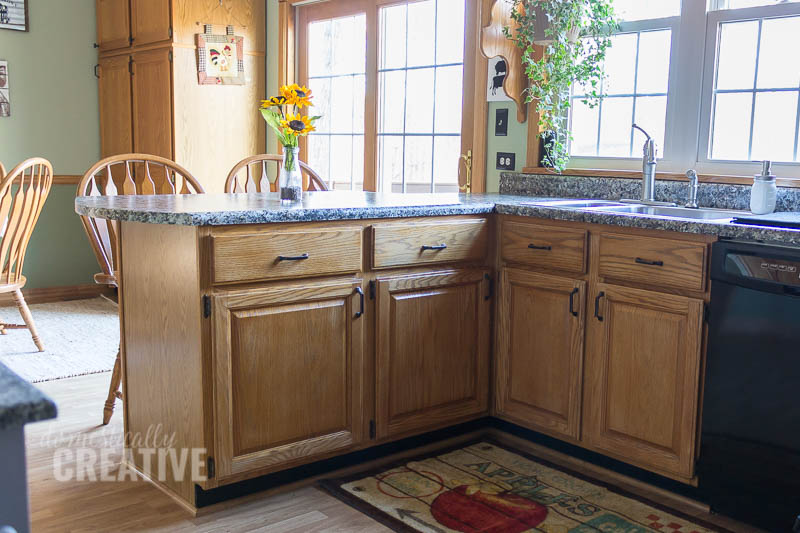
My parents were shocked at the transformation Giani Granite gave their kitchen! Of all the updates we did to the the space, this by far had the biggest impact!
Not having the budget to completely replace your counter tops doesn’t mean that you are stuck with them until you can! Check out Giani Granite on their Instagram, Pinterest, Facebook and Youtube to see more inspiring spaces transformed with just a little bit of paint. They even have kits for cabinets, appliances and more!
See more inspiring kitchen ideas:
- Budget Friendly Kitchen Upgrades
- Modern Farmhouse Kitchen Makeover on a Budget
- Budget Friendly Kitchen Makeover Plan
Love this? Pin it for later!
This is the coolest thing ever! I can’t wait to give it a try. We did a cabinet door replacement recently and love the look of our cabinets, but we definitely want to update the countertops now and this so far looks like the best way to do it on a budget. Thank you for sharing.
Wow, such a great transformation. I have been brainstorming ideas for my laundry room countertops and this could be an awesome option to consider!
awesome idea and I love that this tip will save money by updating and re-using
come see us at http://shopannies.blogspot.com
Thank you Angie! It’s such a great solution when you can’t replace your counters.
That is pretty impressive. I would not have thought it could look so good.
The sheen on the new counter top is just lovely.
Thank you so much Julie! My mom is so happy with how it turned out.
I wanted to let you know I am featuring this great project at #merrymonday this week. I hope you will check it out when you have a chance! https://ourcraftymom.com/15-quick-and-easy-diy-projects-to-refresh-your-home/
Thanks Michelle!
Amanda! Those counters look like granite in the pictures. You put a lot of work in to your parents ‘new kitchen’ It looks fabulous. Giani Granite is obviously a good product.
Aww thank you so much Shirley! I am just so happy that my mom loves the finished product (which she does!) and yes, the whole kitchen would not have come together without Giani!
Awesome job! Look so great I bet your parents are so thrilled! Great post. Pinned & Sharing #MM
Kim