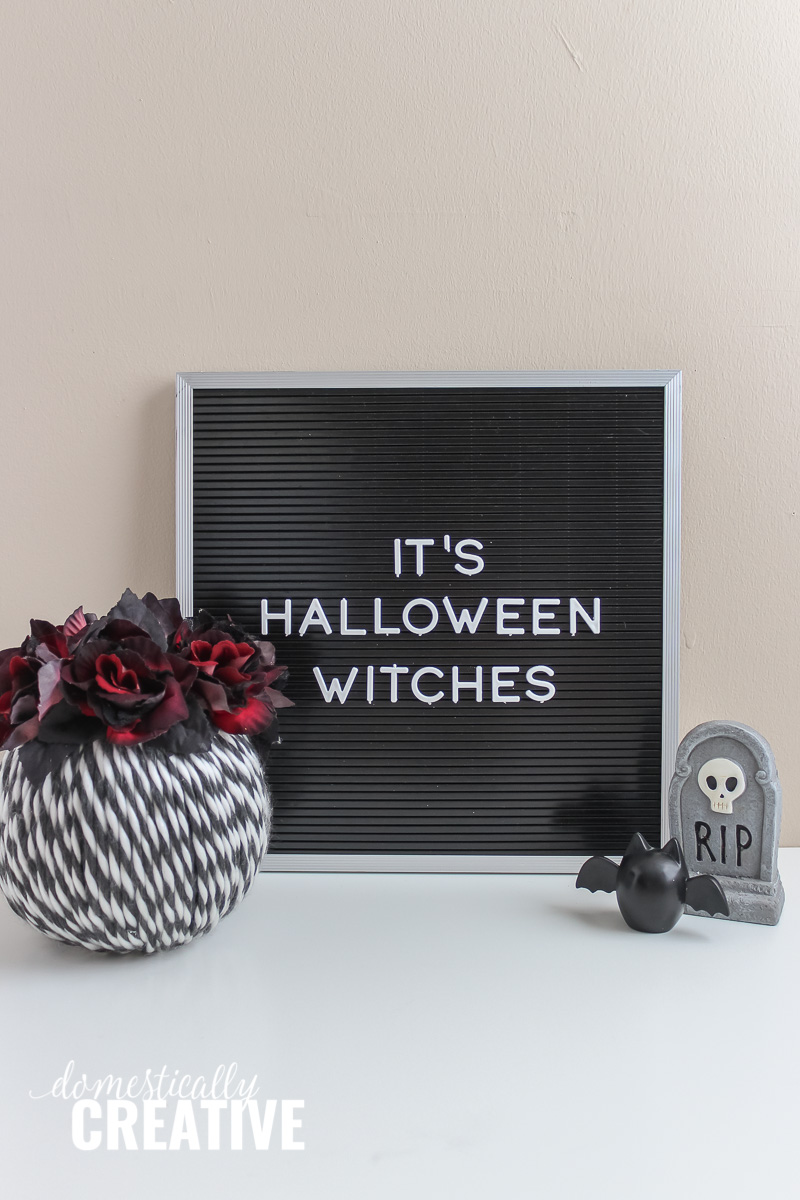
DIY Halloween Yarn Pumpkin
Get your Halloween decorating on with this easy to make DIY Halloween Yarn Pumpkin. You only need a few simple supplies!
This post may contain affiliate links for your convenience. Read our disclosure policy.
Would you believe that I’ve had the idea to make a yarn pumpkin for the last few years, I’ve just never actually found the time to do it? This year I was determined to make this idea a reality, and have had it on my editorial calendar for months. Yes, months. All I needed was to wait for the craft stores to put out their Fall pumpkins.
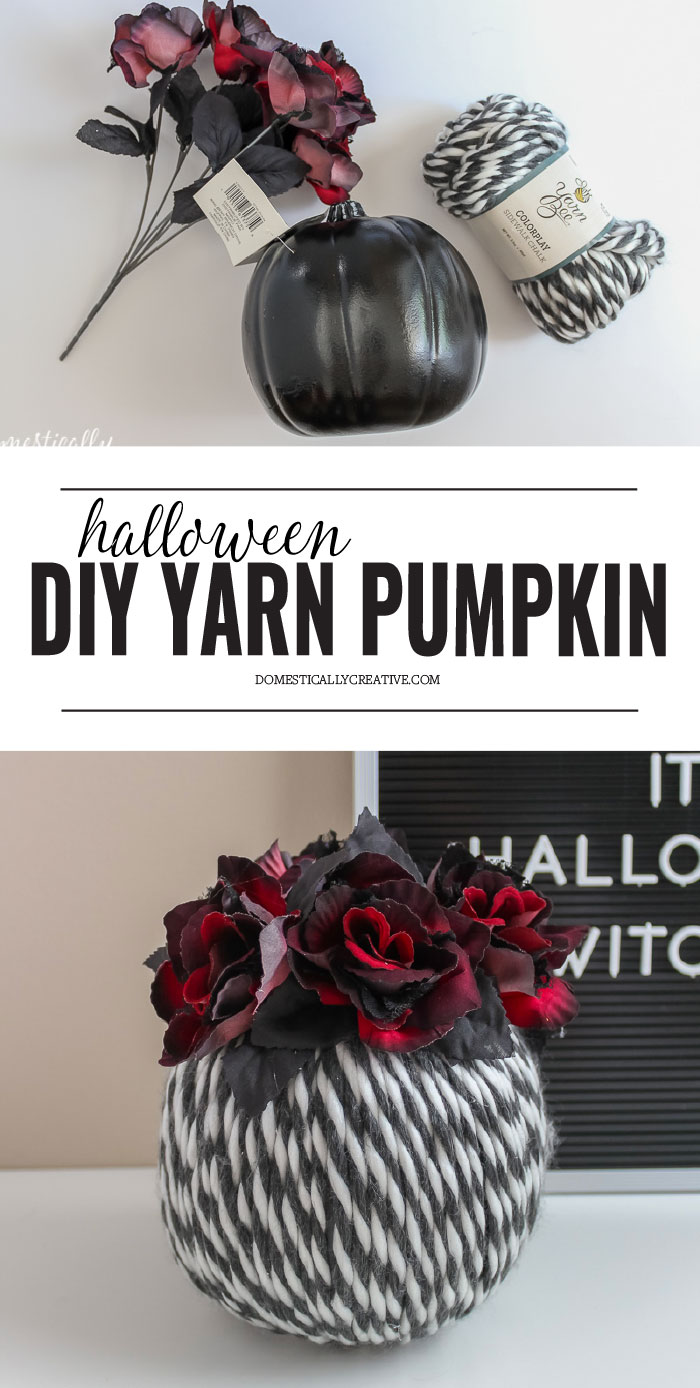
Originally, I was going to keep this Halloween yarn pumpkin as just a Fall pumpkin. Then I saw these black and burgandy rose florals in the Halloween section at Michael’s and immediately decided to go the Halloween inspired route. I don’t generally decorate for Halloween, but I just couldn’t resist with this project.
DIY Halloween Yarn Pumpkin
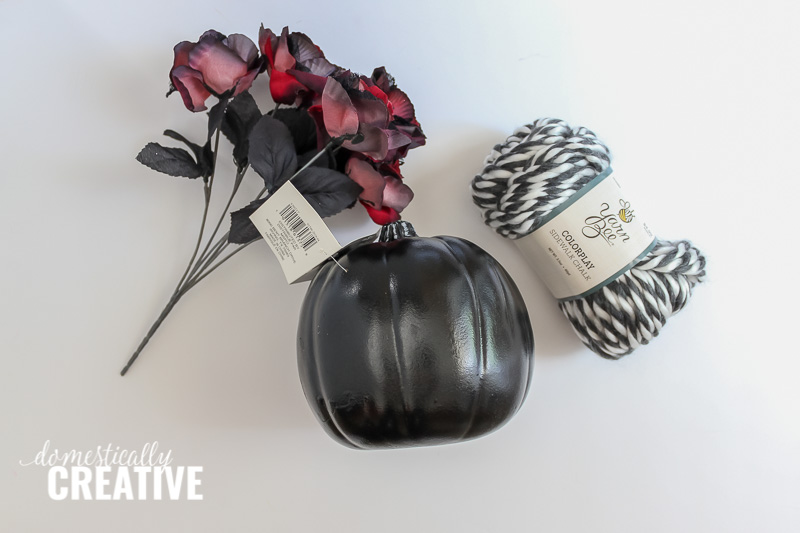
Supplies You’ll Need:
- Craft Pumpkin
- Yarn (similar)
- Hot Glue Gun/Sticks
- Scissors
- Halloween Floral
- Wire Cutters
- Finger Caps (optional but highly recommended!)
This project doesn’t take a lot of supplies, but it does take a little bit of patience!
The first step is to start covering the craft pumpkin in yarn. Be sure to use a larger diameter yarn to make covering the pumpkin easier and quicker.
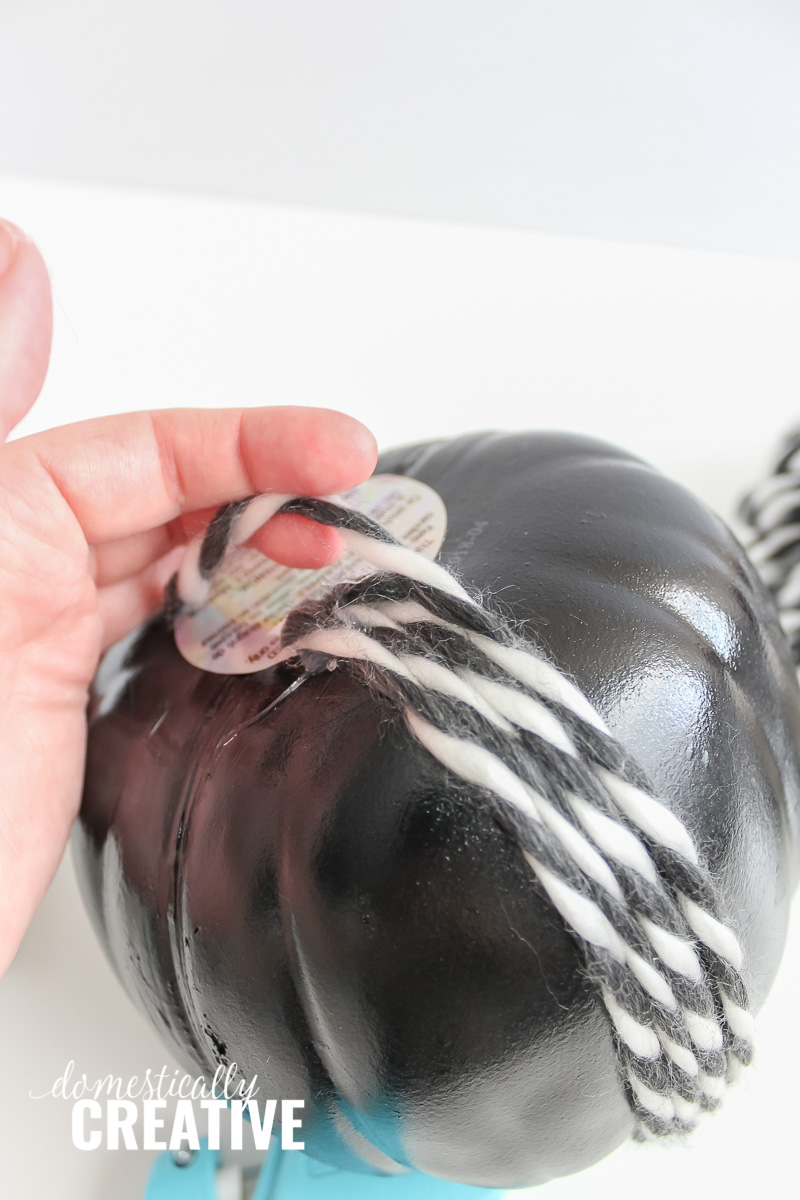
Start by putting a small amount of hot glue at the top of the pumpkin right up against the stem, in one of the natural “creases” of the pumpkin. Press the end of the yarn into the glue to secure it. This is where those finger caps come in handy so you don’t burn your fingers!
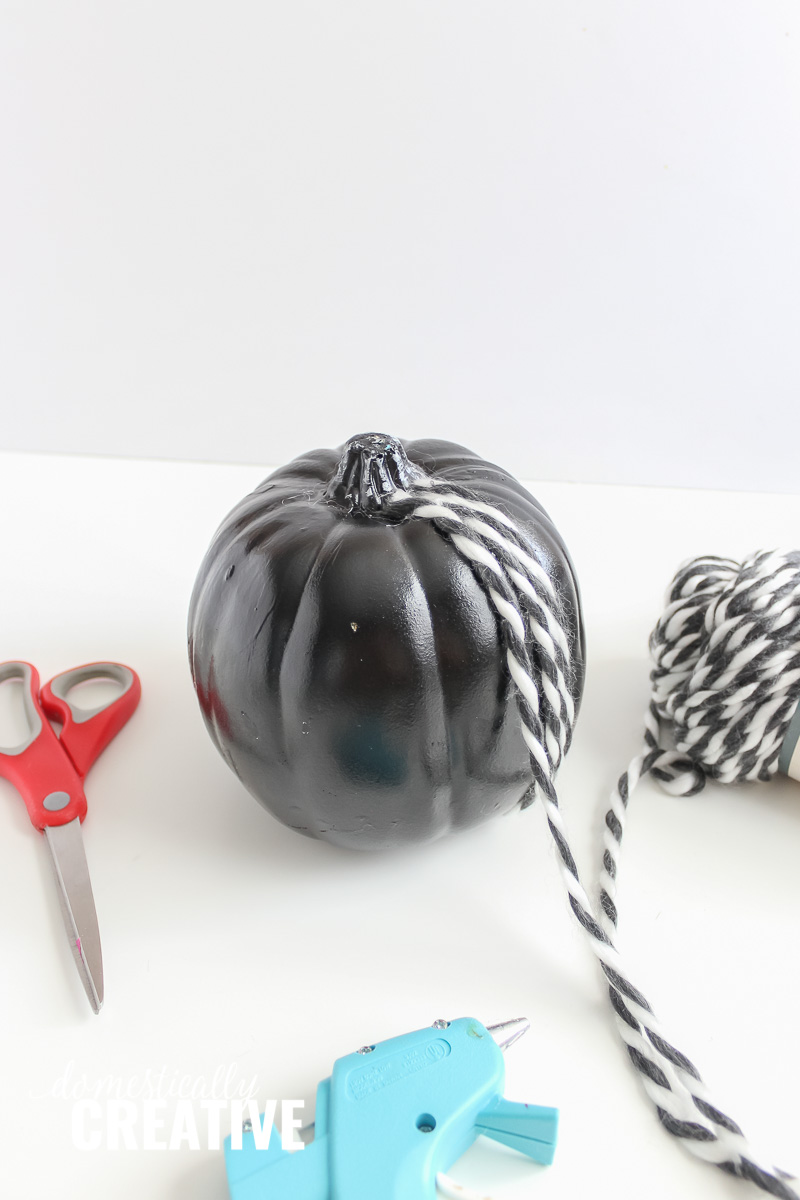
Pull the yarn down over the pumpkin, tight but not super tight, to the bottom. Place a drop of glue on the bottom and press the yarn into it. Cut the end of the yarn.
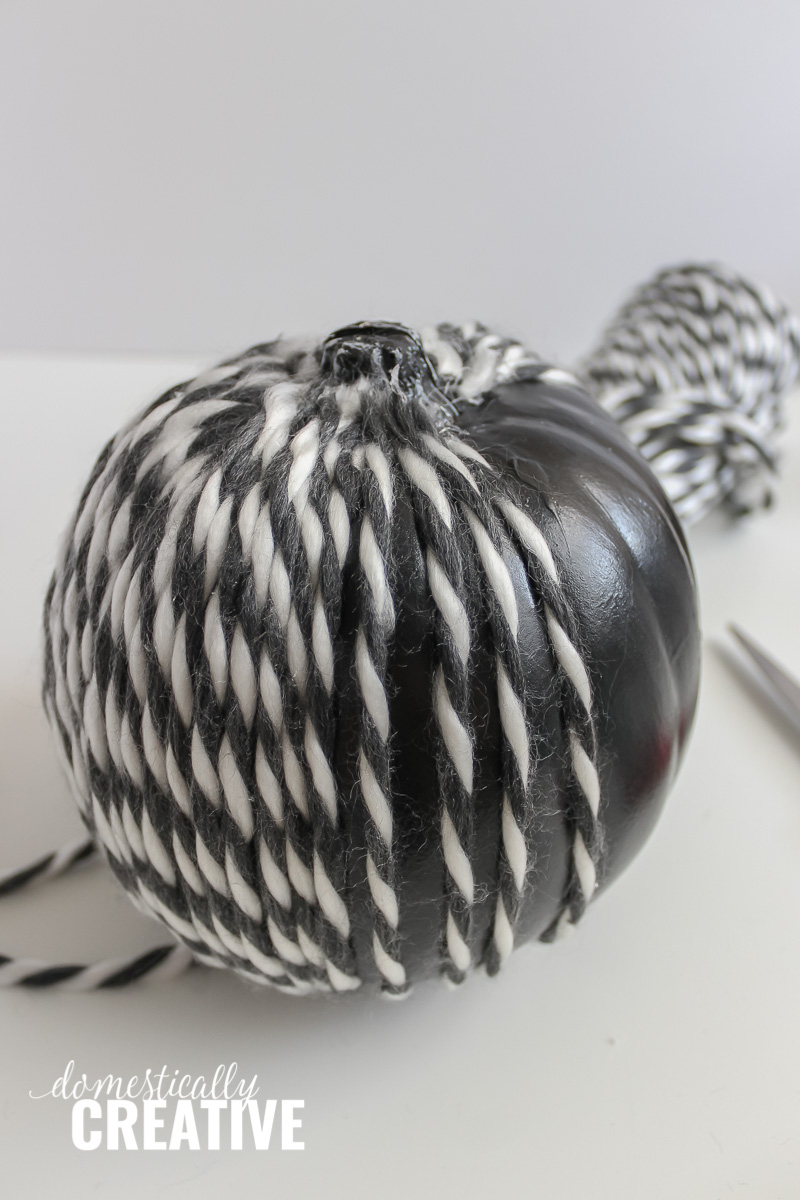
Repeat these steps until the pumpkin is completely covered!
To avoid letting the yarn look bulky around the stem of the pumpkin, here is the best method to placing the yarn. Work in sections, and start with placing yarn in the creases of the pumpkin.
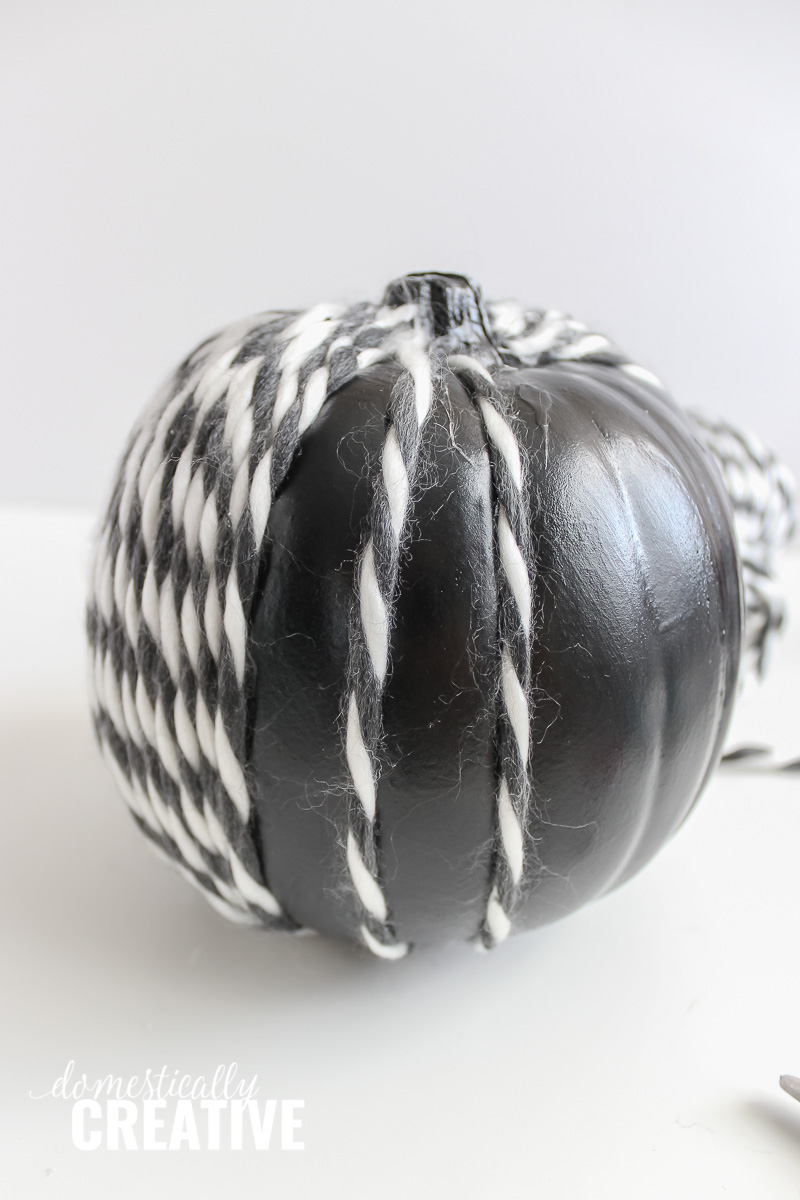
Then go back and fill in with more yarn, tucking ends of the new pieces in under the first ones. This will hide the ends while also not allowing a ton of bulk up towards the stem of the pumpkin. Do the same thing at the bottom to avoid the pumpkin from sitting lopsided.
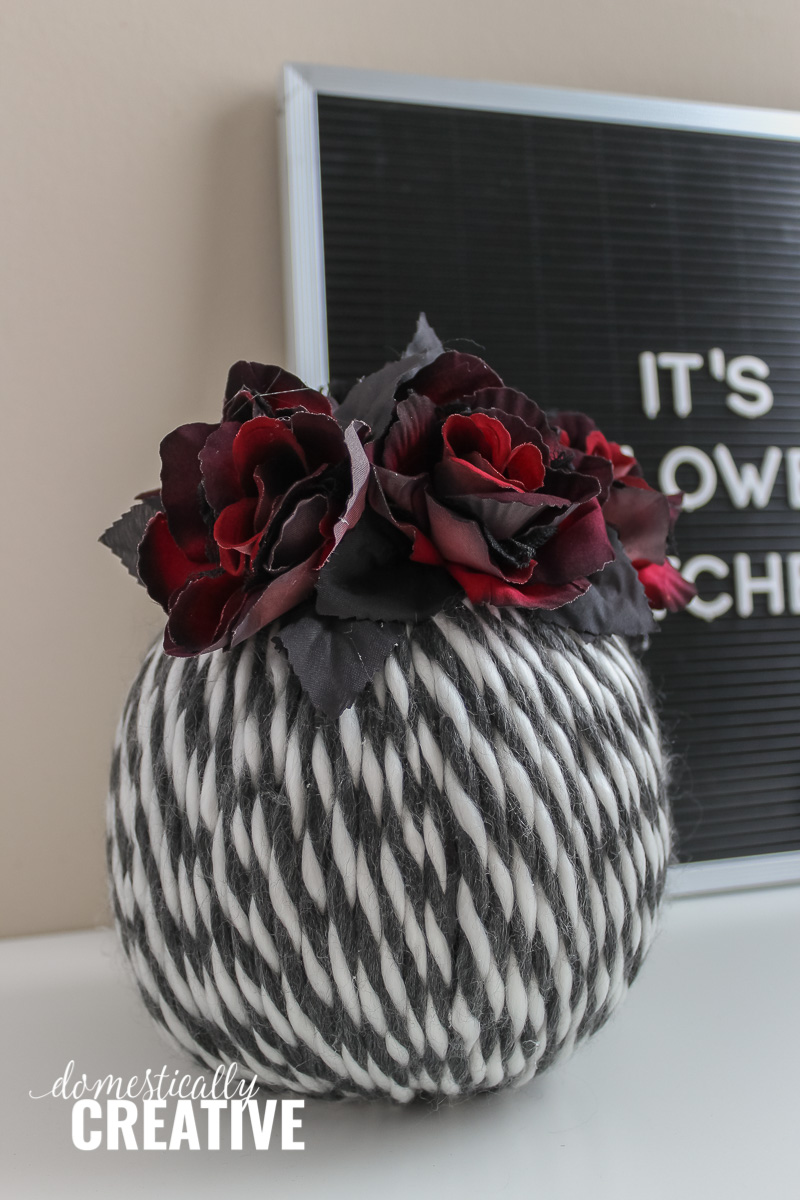
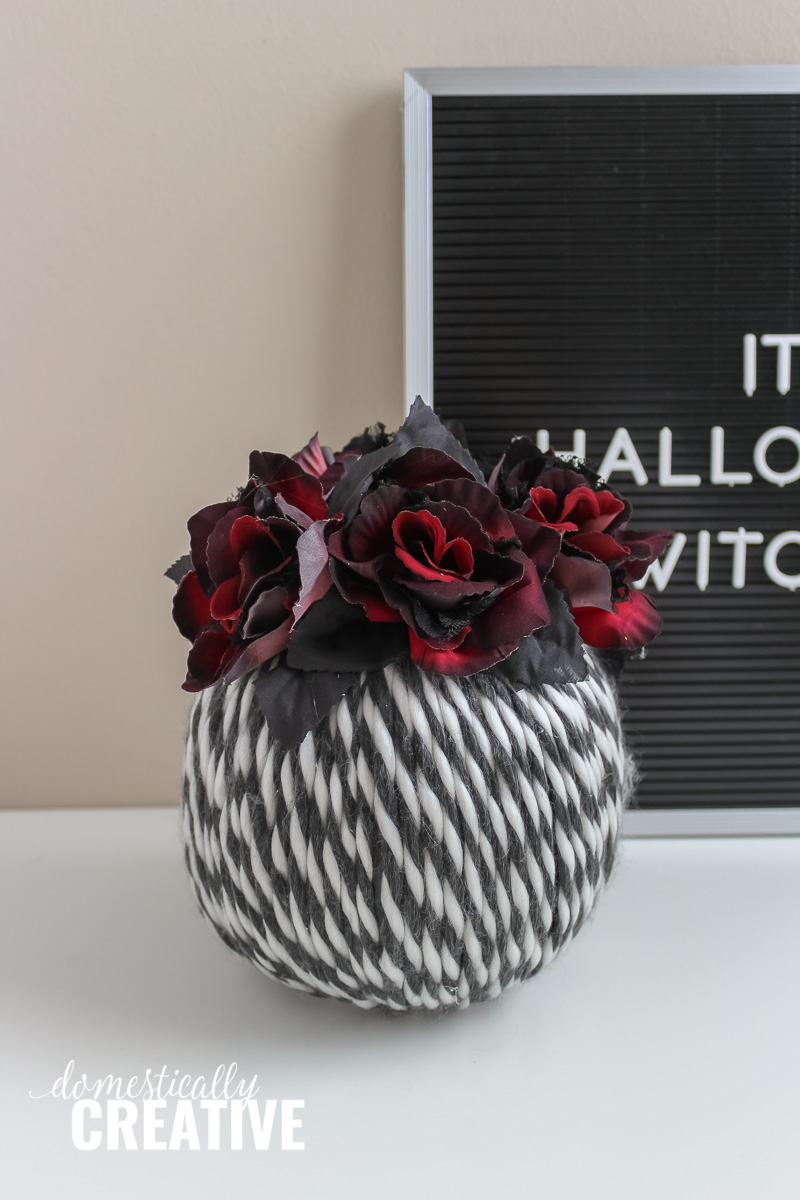
Once the entire pumpkin is covered in yarn, cut the stems off of the Halloween flowers using wire cutters.
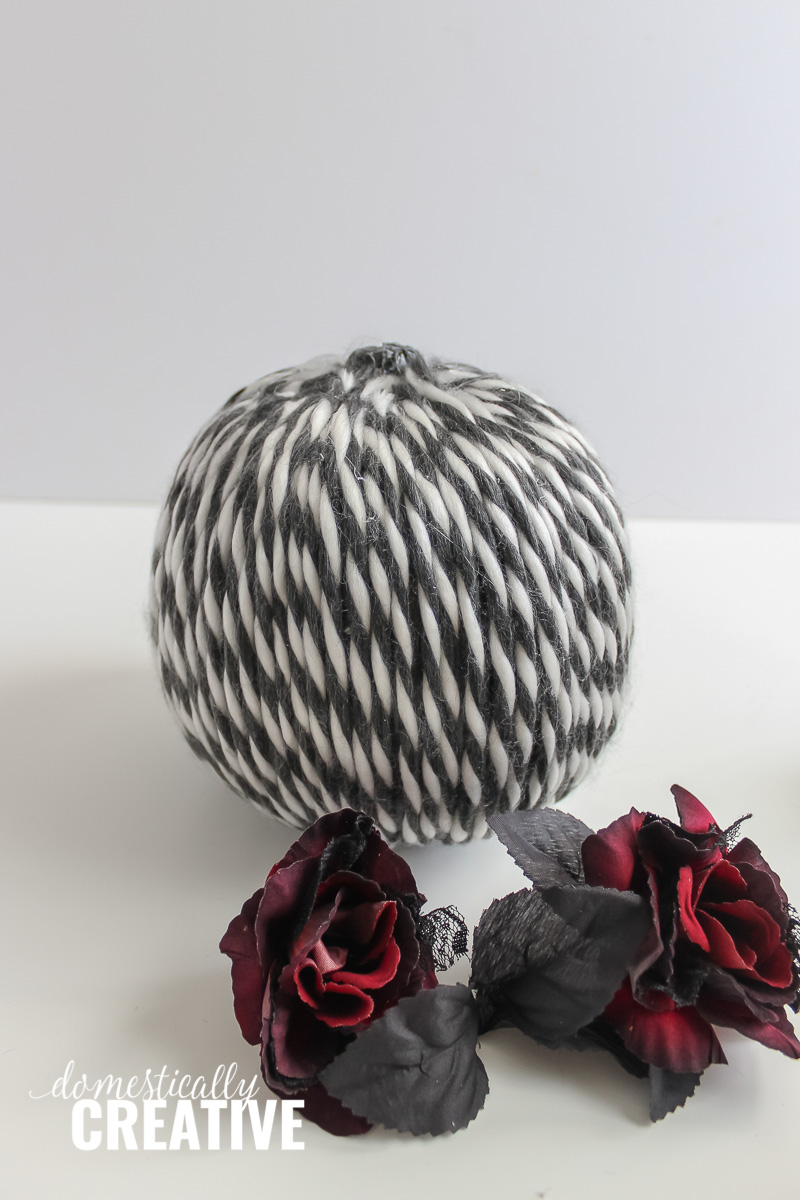
Glue the florals in place around the stem of the pumpkin. Be sure to fluff up the flowers before and after gluing them into place.
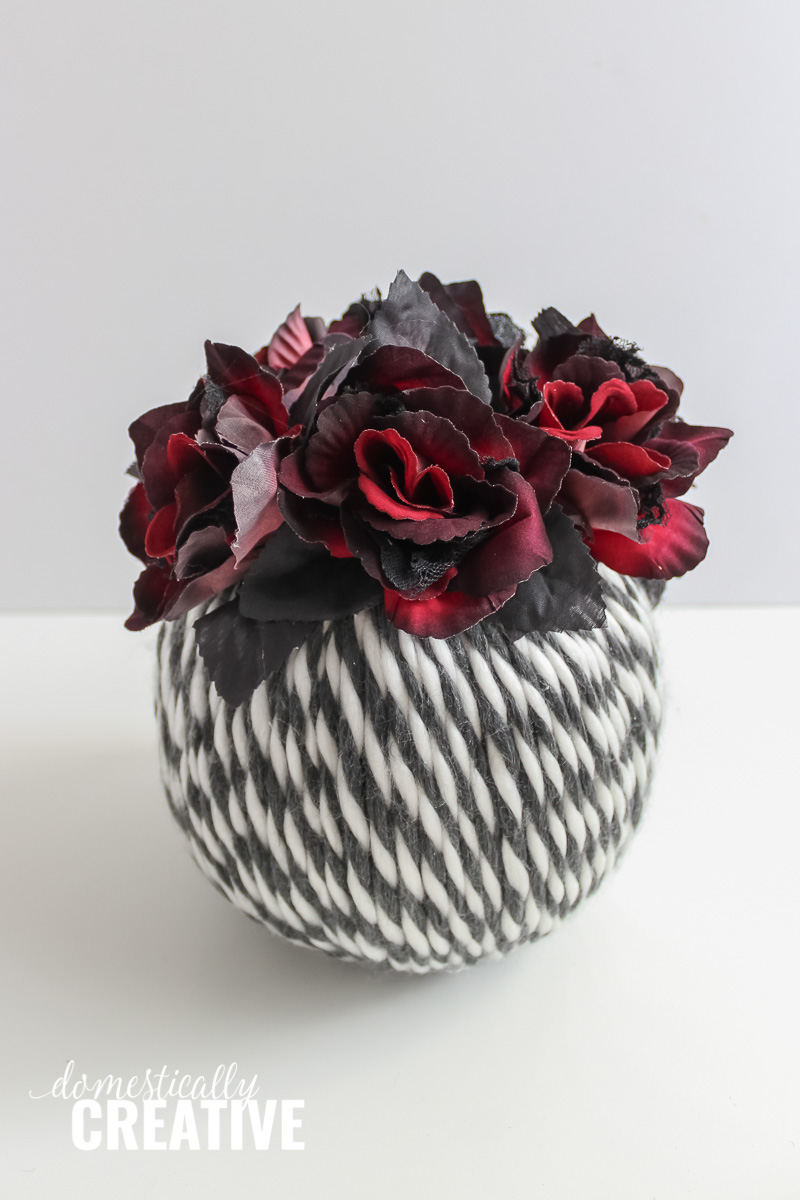
You could also glue the flowers down the sides, or haphazardly around the yarn pumpkin. Either way it’s sure to look amazing!
I think I may make a few more of these both Fall and Halloween! There were some pretty purple and black roses at Michael’s as well!
How are you decorating for Halloween?
More Halloween inspired crafts:
- Halloween Washi Tape Pumpkins
- How to Make Apothecary Jars and FREE Printable Labels
- Easy Mini Halloween Wreath
Love it? Pin it!
Such a cute idea! You were one of my features at this week’s Best of the Weekend Party! Stop by to see the other features and grab your “Featured” button. We would love to have you link up again this week too!
Shelley
Thank you SO much Shelley!
Very fun craft …and a great way to use up any remaining yarn! Love the black and white. Visiting from Best of the Weekend party.
I never thought to use yarn to cover a pumpkin. This might be fun to do for a fall pumpkin and change out the flowers.
I agree this would be so pretty in a variety of colors! I’m excited to make some more!