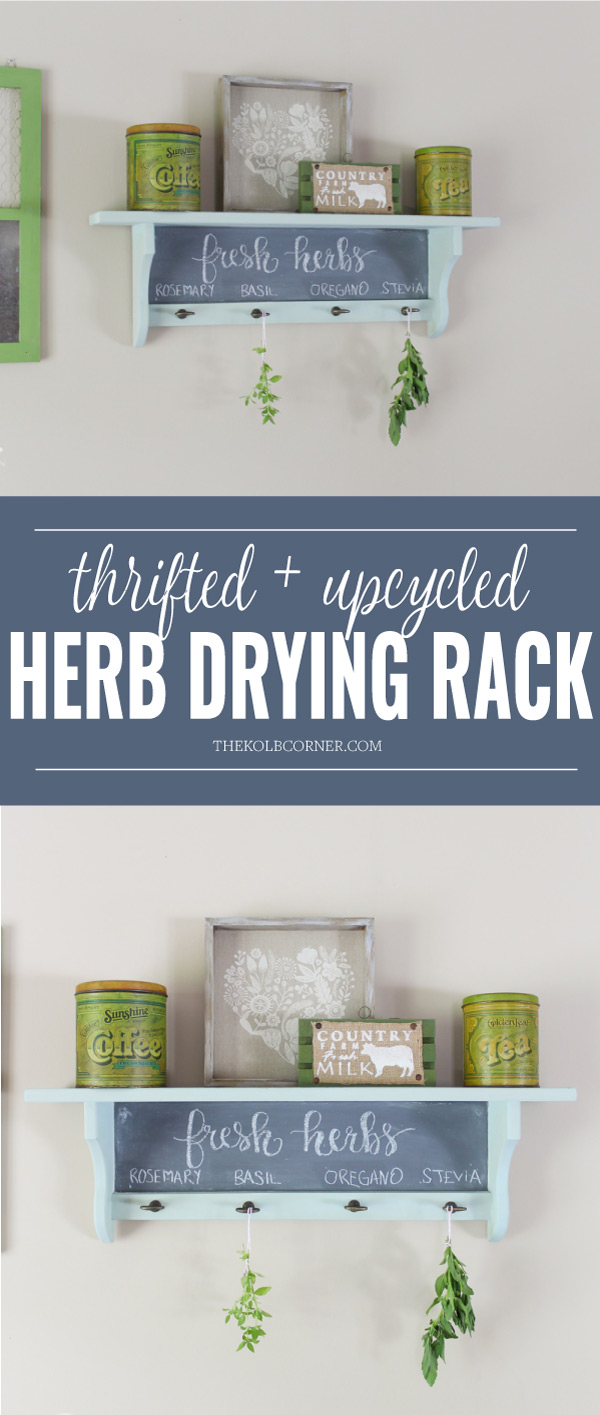
Upcycled Herb Drying Rack
Summer will be winding down before we know it, and with that comes harvesting the garden. I grew a few herbs this year, and will be needing a place to hang them to dry soon. When I was thinking of this month’s thrift store challenge, I knew that I wanted to make some sort of herb drying rack that would be functional, yet decorative. So when I was perusing the many many aisles at my local thrift store, I spotted the perfect shelf that I could convert into exactly what I had in mind.
This post may contain affiliate links for your convenience. Read our disclosure policy.
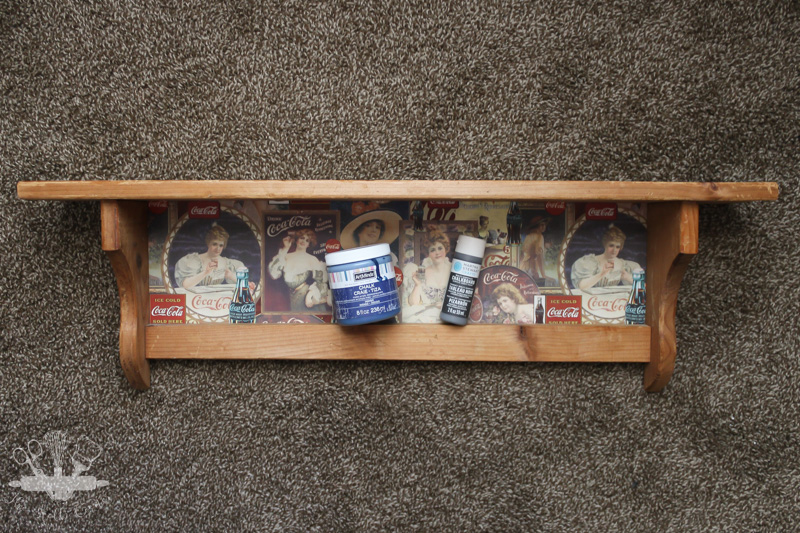
The before was just plain honey colored wood, with a decoupaged a vintage Coca-Cola paper on the back portion. My first thought was to find some vintage seed packet papers online to add to the back, but I decided to keep it simple. I may change my mind in the future, but for now I love how my herb drying rack turned out. Scroll to the bottom to check out the after and the full tutorial!
How to Make an Herb Drying Rack
Items You’ll Need:
- Thrifted shelf
- Sand paper
- Chalky paint
- chalkboard paint
- Clear wax
- paint brush
- frog tape
- drawer pulls
- drill/drill bit
- chalk/eraser
- baker’s twine
As a kid I remember my mom having this really rustic, worn shelf that she would hang fresh herbs from to dry. I can still picture her cooking a meal, and running over to the shelf to grab some dried herbs for seasoning. She still has it and uses it to this day! There are always dried herbs hanging, ready to be used in a delicious recipe.
I grew my own herbs this year, and am in desperate need of somewhere to hang them to dry. That’s where the idea for this upcycled herb drying rack came to mind. It really is a simple project that anyone can mimic, and if you can’t find the perfect shelf from the thrift store, you can get an unfinished one at the craft store.
As with any of my thrift store finds, I first like to clean them really really well to get all of the dust and grime off. I’ve picked up some really dirty things in the past so cleaning is a must!
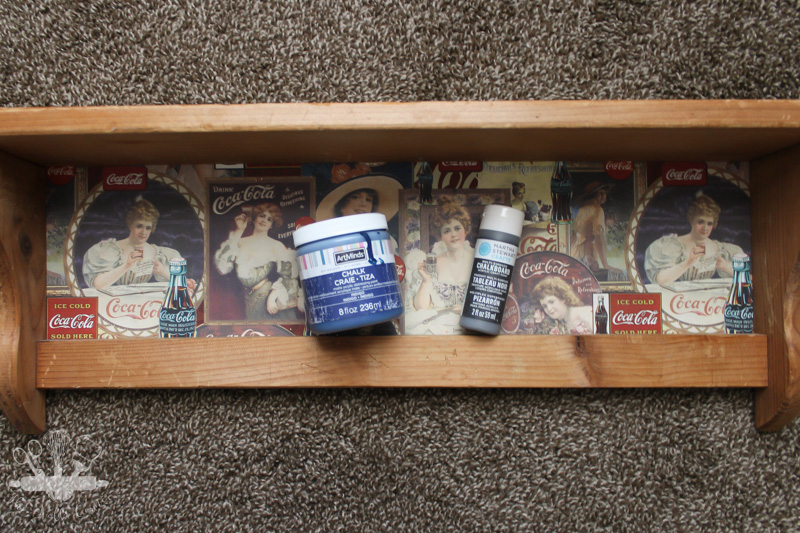
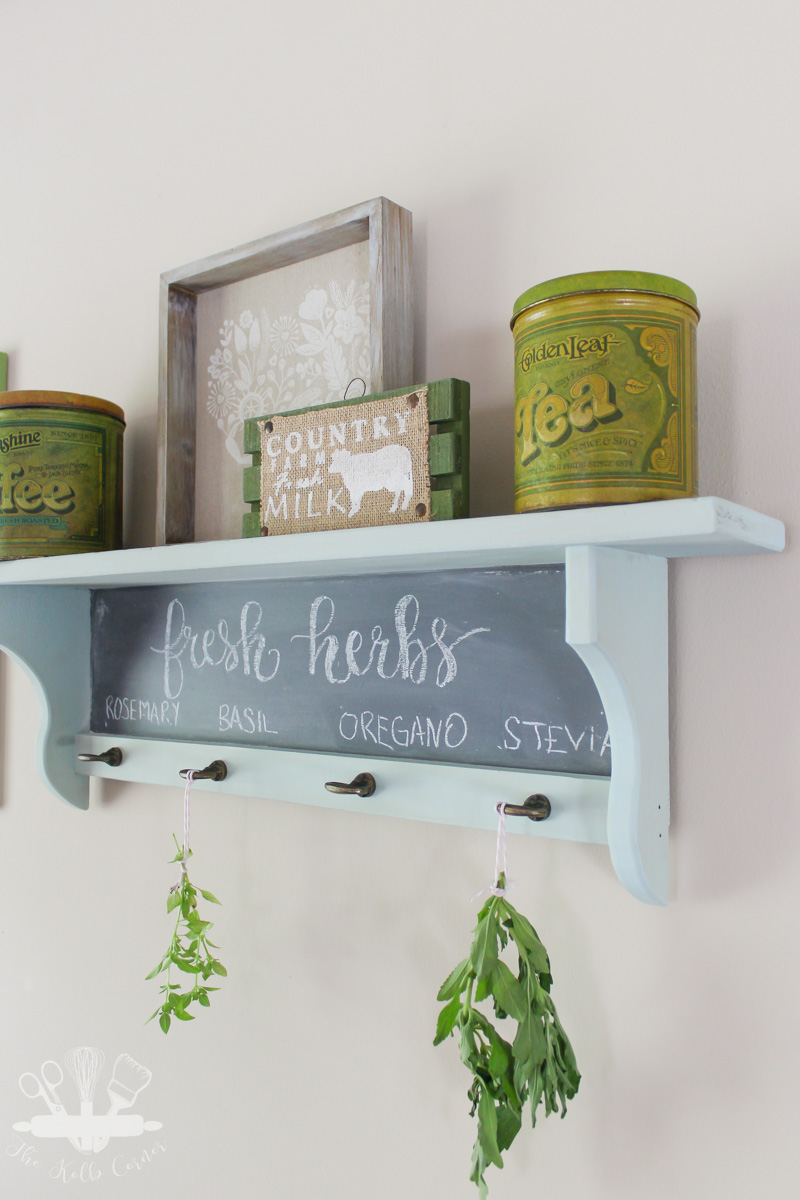
After cleaning, prep the wood for paint by giving it a light sanding. This is just to make sure the surfaces are even and there are no rough spots in the wood. Next, paint 2 layers of gray chalkboard paint onto the back portion (where mine had the Coca-Cola graphics). After it dries, tape off the area with Frog Tape so that you don’t get the chalky paint on that area in the next step.
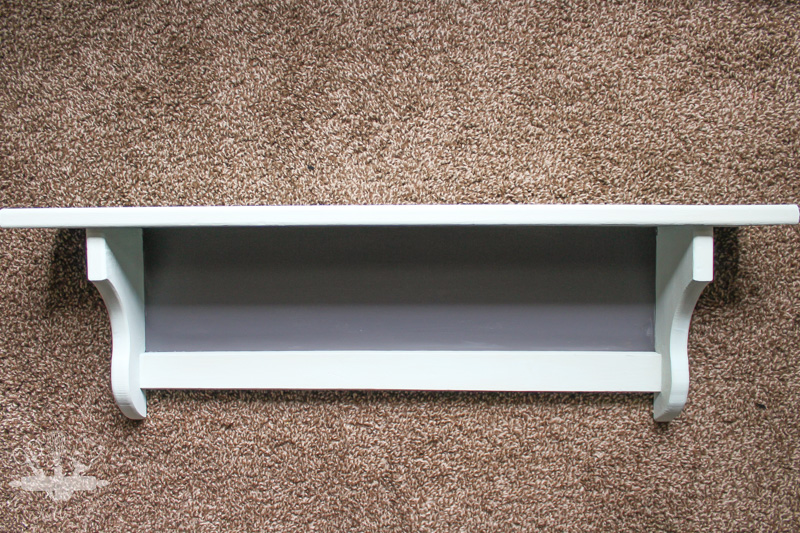
Paint two to three layers of chalky paint onto the whole shelf. I only did two on mine, but I like how you can see brush strokes and some of the original wood grain showing through the chalky paint.
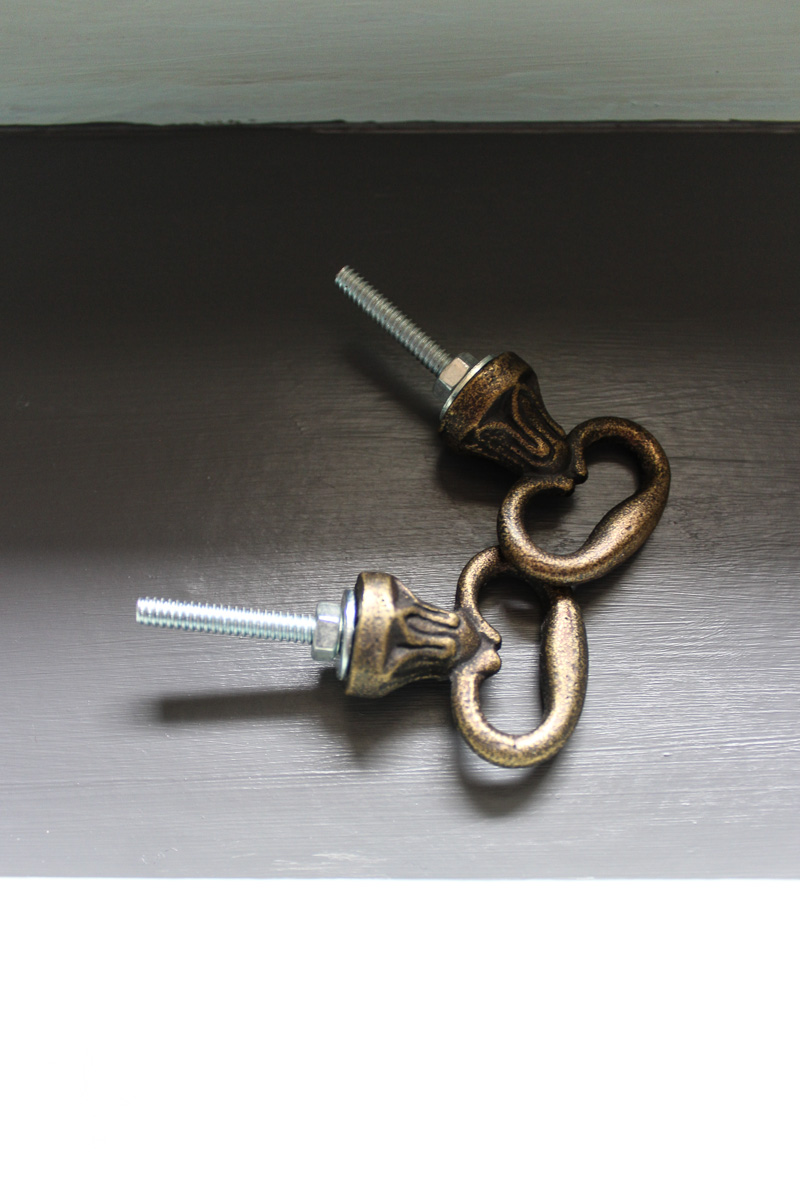
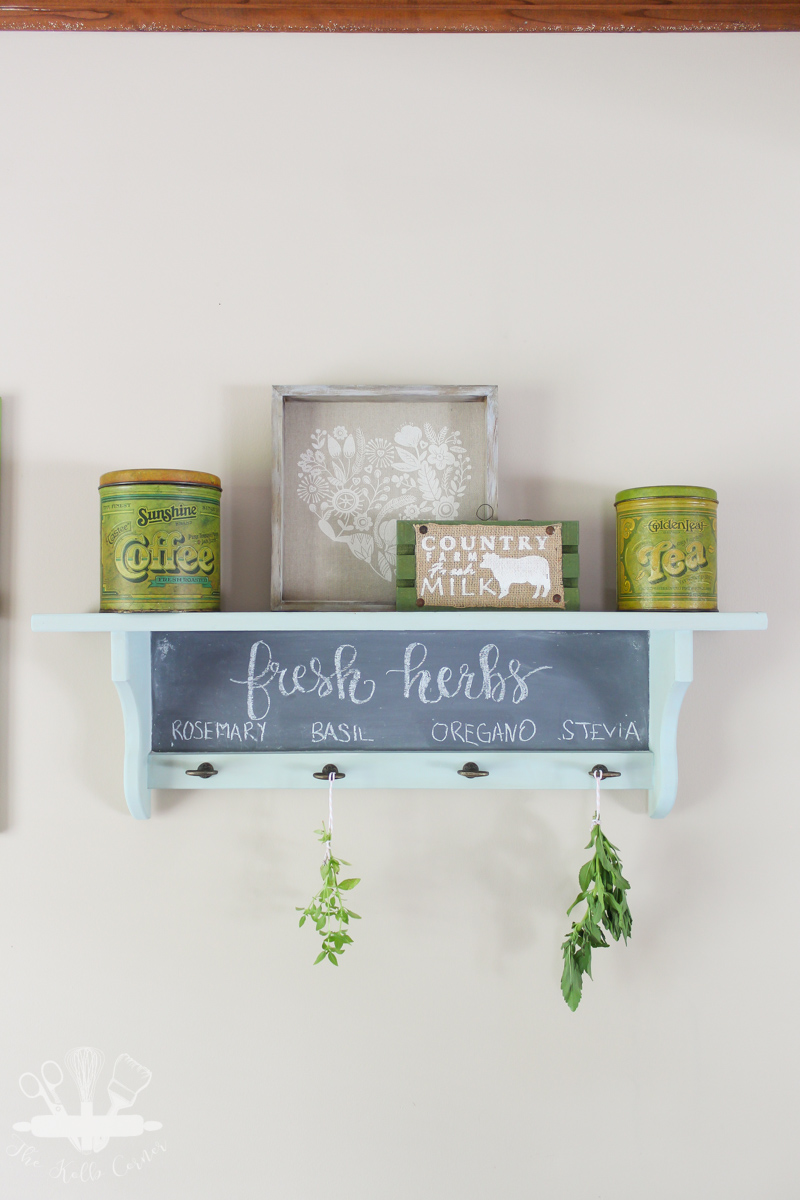
Once all of the paint dries, drill four holes for the drawer pulls. I actually picked mine up at Hobby Lobby! I wanted pulls that I could loop a piece of twine through to hang the fresh herbs.
Also, I must mention that since I’m pretty fly by the seat of my pants when it comes to DIY, I didn’t measure or make sure my pulls were level. I just eye-balled it and went for it. Don’t be like me! Measure, and make sure those holes are level, because if they aren’t it will bug you to no end!
After drilling the holes, attach the drawer pulls. Then loop a piece of twine through each pull so they are ready to hang herbs!
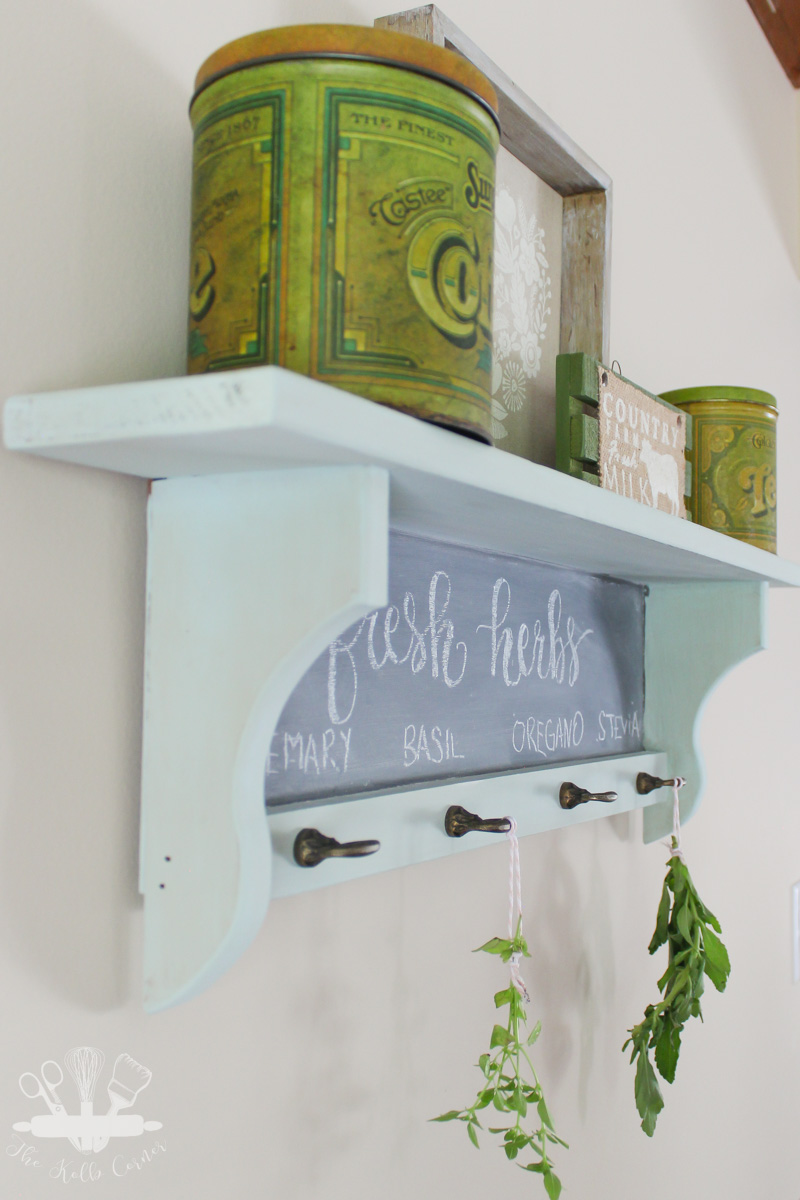
Prime the chalkboard portion by rubbing a piece of chalk all over, then erase. Write the name of each herb you hang so you can keep track. Using a chalkboard is great because if you grow different plants next year you can just change up the labels!
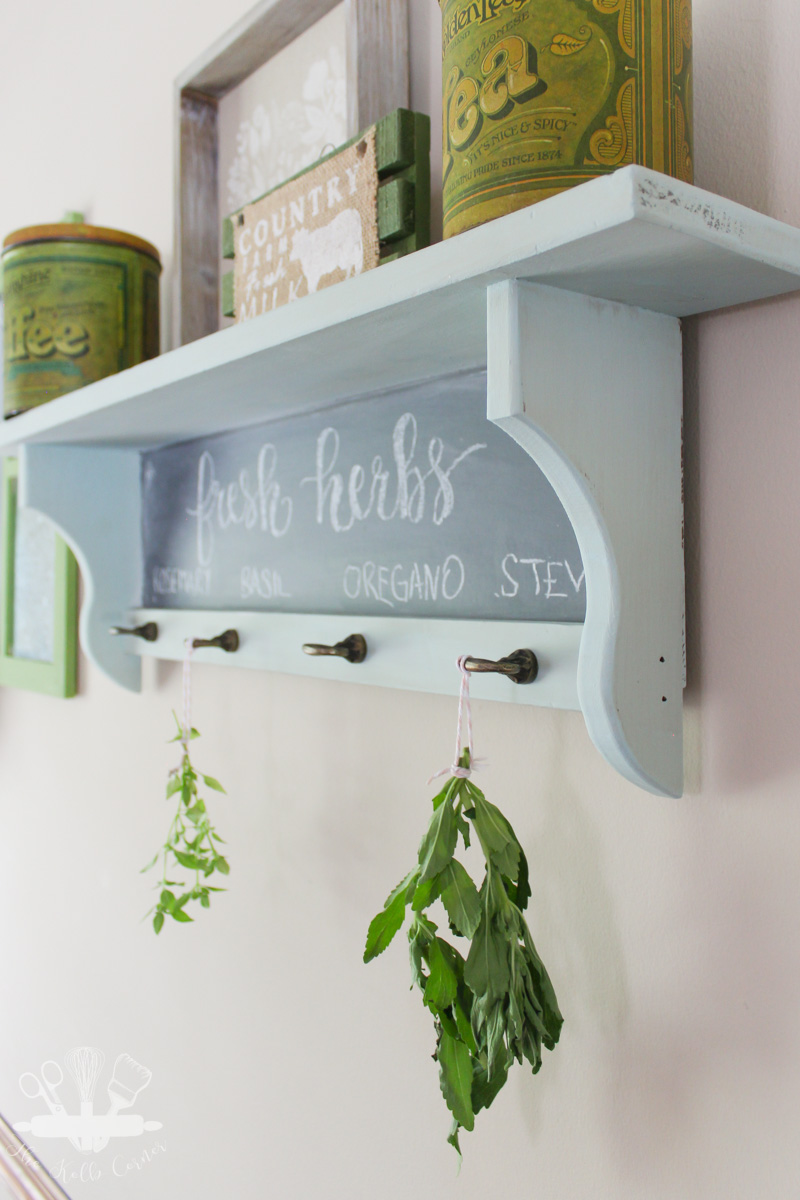
Those vintage tins actually came from my mom. She had the whole set–flour, sugar, tea and coffee–and gave them to me. The sugar and flour tins are actually being used in my pantry, but the tea and coffee tins go great on top of the new shelf.
This shelf turned herb drying rack makes me miss the shelves I made for our kitchen in our first home. I dismantled a pallet to make shelves and put all of my vintage crocks and gadgets on them. They looked so nice and added a great rustic touch to the kitchen. That was back before the farmhouse style craze, so you could say I was almost a trend setter 😉
And now for more thrifty goodness!
Check out what my fellow upcyclers created below!
This is so timely because I was just thinking about drying fresh herbs. I like that you can write down what herb it is as I would probably forget.
This is such a clever way to hang herbs for drying. We are so glad you shared your post with us at the #HomeMattersParty last week. Be sure to link up with us again when the party opens this Friday.
This is an awesome thrift store project! It came out awesome!
Thank you Kate!!
Amanda this turned out so cute. Those shelves were super popular back in the day. The color you chose is perfect and I love the chalkboard. Now you can hang your herbs with pride just like your mom!
Thank you Michelle!
This turned out lovely. I have a similar shelf in my basement and now I know what to do with it. 🙂
Thank you Colleen!
That is such a cool idea! And the color you painted it compliments the green of the herbs so well!
Thank you Chelc! I love it!
This is such a great update!! Absolutely love the color and the chalkboard! Thanks for hosting!
Thank you Michelle!
I love it! That is so creative and inspired! How you think of these, I don’t know! I love that you even made a chalk board on it and the color is beautiful! I wish my decor was farmhouse just to have one like this!
Jeannee
Thanks Jeannee! You are too sweet.
I simply love this drying rack! I was thinking about making one for myself too, but yours look so good that I’m going to have to copy it. Thank you for the instructions!
Thank you Sean! Copy away!
Hi Amanda! It’s interesting that we, as daughters, often do what our Mamas did, and so you are with the herb-drying. I have never dried herbs, but then again, the only one I’m growing is mint. Love your shelf rack! Looks like it works perfectly for your needs, and I love the chalkboard on it too. Also love the fact that the shelf is actually big enough to display other stuff on.
BTW, I’m Florence, visiting from the Challenge. Enjoying everyone’s projects. This is my first time to be in it. I’m the one with the upside down sconce planter.
Thank you Florence! I always loved when she would bring in fresh herbs and hang them up because it filled the kitchen with yummy smells. Thank you for joining our thrift store challenge!
This shelf is fabulous. The chalkboard paint and the subtle blue colour work fabulously together. Great find.
Thank you!
This is a great display piece to dry herbs. Or if you are like me and can’t grow herbs, you can use it to hang other things.
Yes! Multi functional 🙂
Oh my gosh this came out so great! I love you made the bottom a chalkboard. Super cute makeover.
Kim
Thank you Kim!
Amanda this is awesome! Such a pretty way to display your herbs 🙂 Those vintage cans on the top are super cool too!
Thank you Angela!
Love the look of your new herb drying rack, that is my kind of color. Your hand writing is so beautiful!
Thank you Pili!
Great transformation Amanda! It looks like something from a catalog!! Visiting from Thrift Store Challenge.
How sweet for you to say! Thank you!