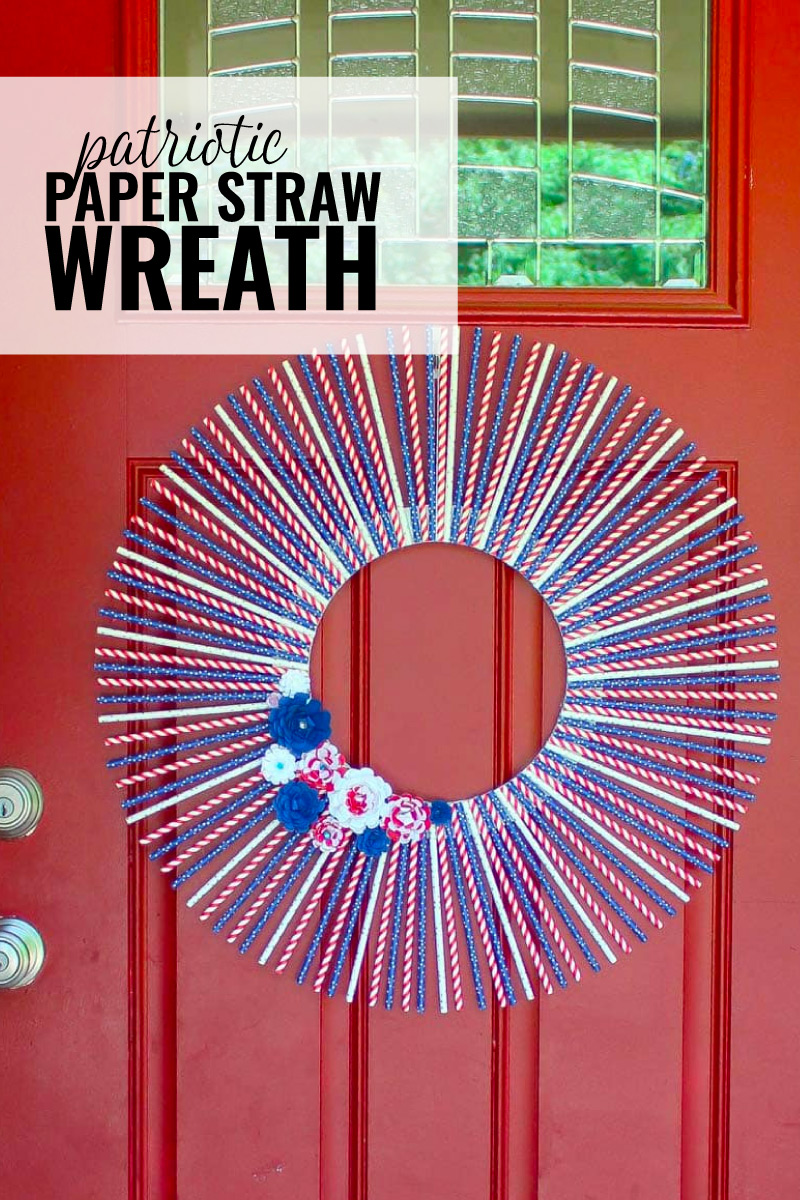
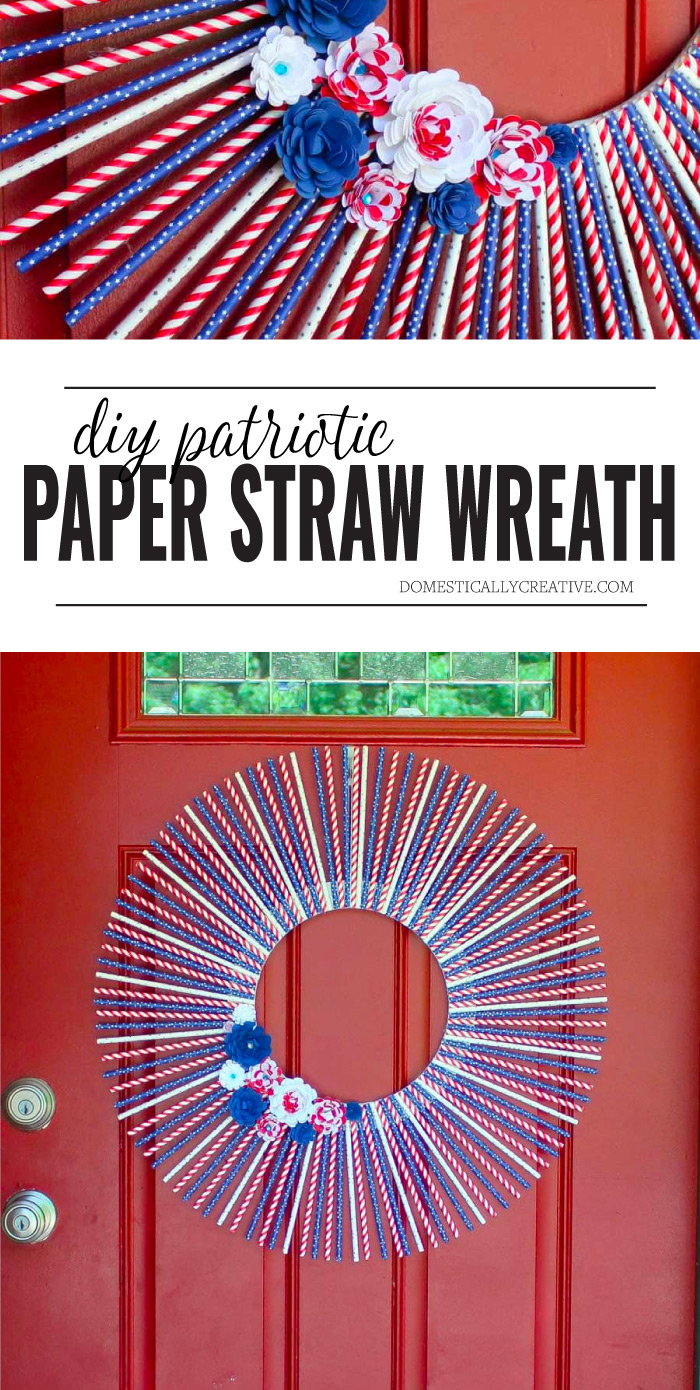
Patriotic Straw Wreath with Paper Flowers
Looking for an easy, quick and inexpensive patriotic wreath for the 4th of July? Make your own patriotic straw wreath to hang proudly on your front door in just a few steps.
This post may contain affiliate links for your convenience. Read our disclosure policy.
I was at Target the other day, perusing their Dollar Spot and found some really cute patriotic paper straws. Surely, I can’t be the only one that collects tons of cute, seasonal paper straws right? I mean every time they have a new color or style in the Dollar Spot, I scoop up a set or two to add to my collection.
Not knowing exactly what I would use those patriotic paper straws for, I took a pack in each color home to think. After walking around aimlessly at Michael’s (because it’s conveniently right next to Target) I spotted those chipboard floral craft rings.

Immediately I was inspired to make a cute patriotic straw wreath for our red front door. Of course, my measly 3 packs of straws would never cover the whole thing, so back to Target I went. Sadly, by the time I made it back to Target, all of the white straws were gone. So, I picked up a pack each of the blue and red and hoped I would have enough to cover it. Spoiler: I did!
Want to make your own patriotic straw wreath? It was SO easy!
How to Make a Patriotic Straw Wreath
Supplies you’ll need:
- 125-Red, white and blue paper straws (Target dollar spot!)
- 12″ Chipboard craft ring
- Hot glue gun
- White craft paint
- paint brush
- Silhouette Cameo or another cutting machine (or cut out shapes by hand)
- Red, white and blue cardstock
- Scissors
- Pencil
- Twine
Step 1
Paint chip board craft ring white and let dry.
Step 2
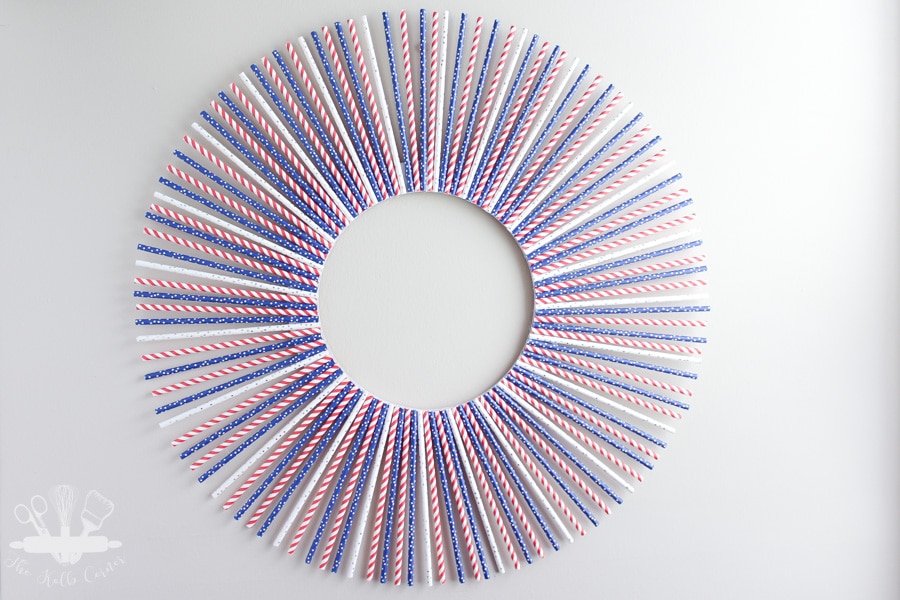
While the paint is drying, decide on the pattern you’d like to do with the straws. I had twice as many blue and red straws than I did white, so I chose to do an alternating pattern with half as many white straws as red and blue. 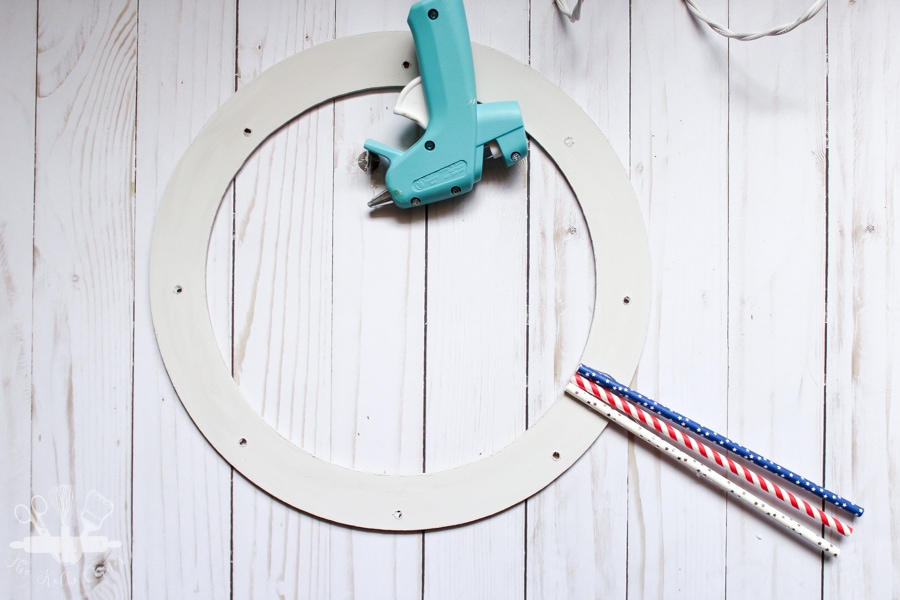
Step 3
Start gluing the straws down with hot glue to the craft ring in your chosen pattern. Be sure to line the ends of the straws up with the inside edge of the craft ring. Also, the straws need to be glued very close together, but slightly angled. Meaning the start of the straws will touch, but will fan out away from the previous straw. This is how you will get a sunburst look when it’s finished. See the photo below.
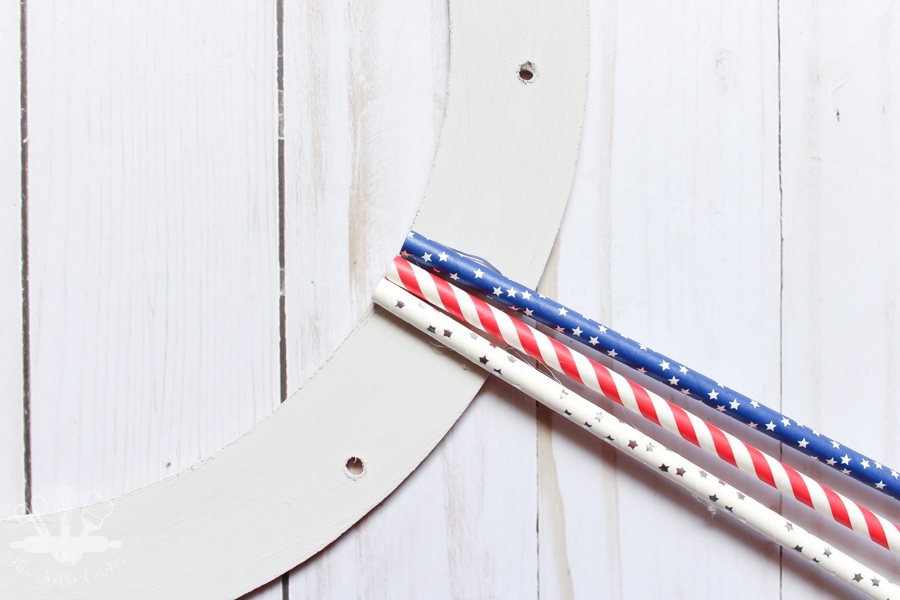
Continue gluing the straws down until the entire craft ring is covered.
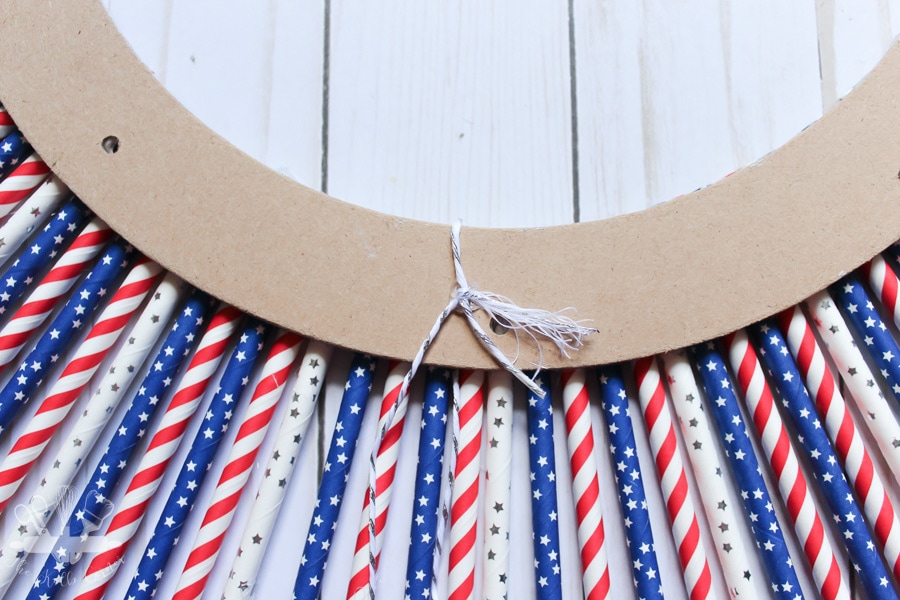
Step 4
Cut a piece of baker’s twine to roughly 8″ and loop it around the craft ring. Tie the ends in a double knot to secure it and glue the knot down to the craft circle.
Step 5
For the flowers follow this tutorial, cut them out on the Silhouette and use hot glue to place them.
You could also cut the shapes out by hand if you don’t have a Silhouette machine. Make them in varying sizes to give a little dimension and add as many or as little as you’d like.
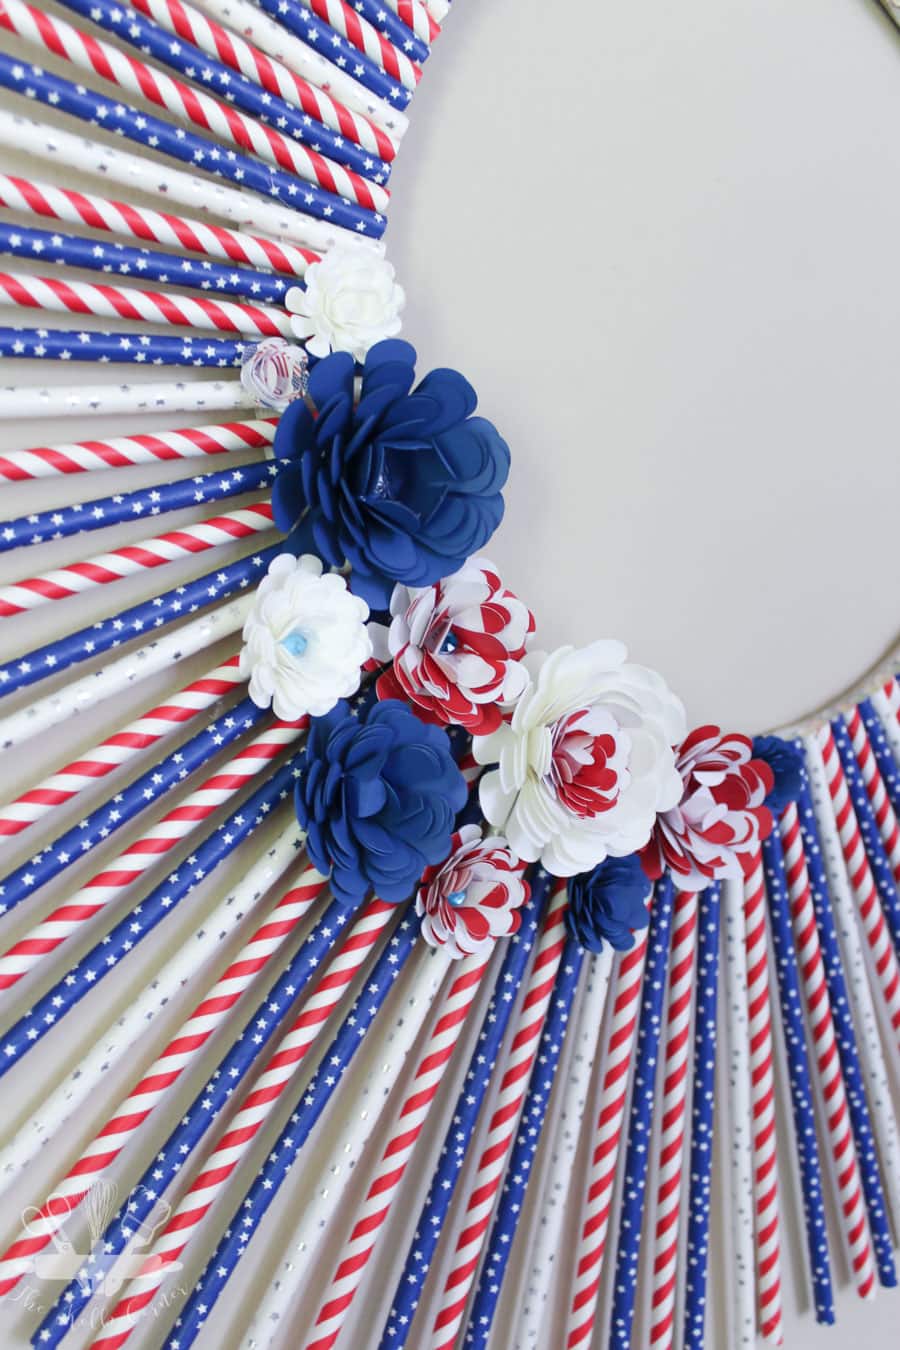
I preferred mine arranged in a small little cluster, but you could have enough flowers to go around the entire inner ring.
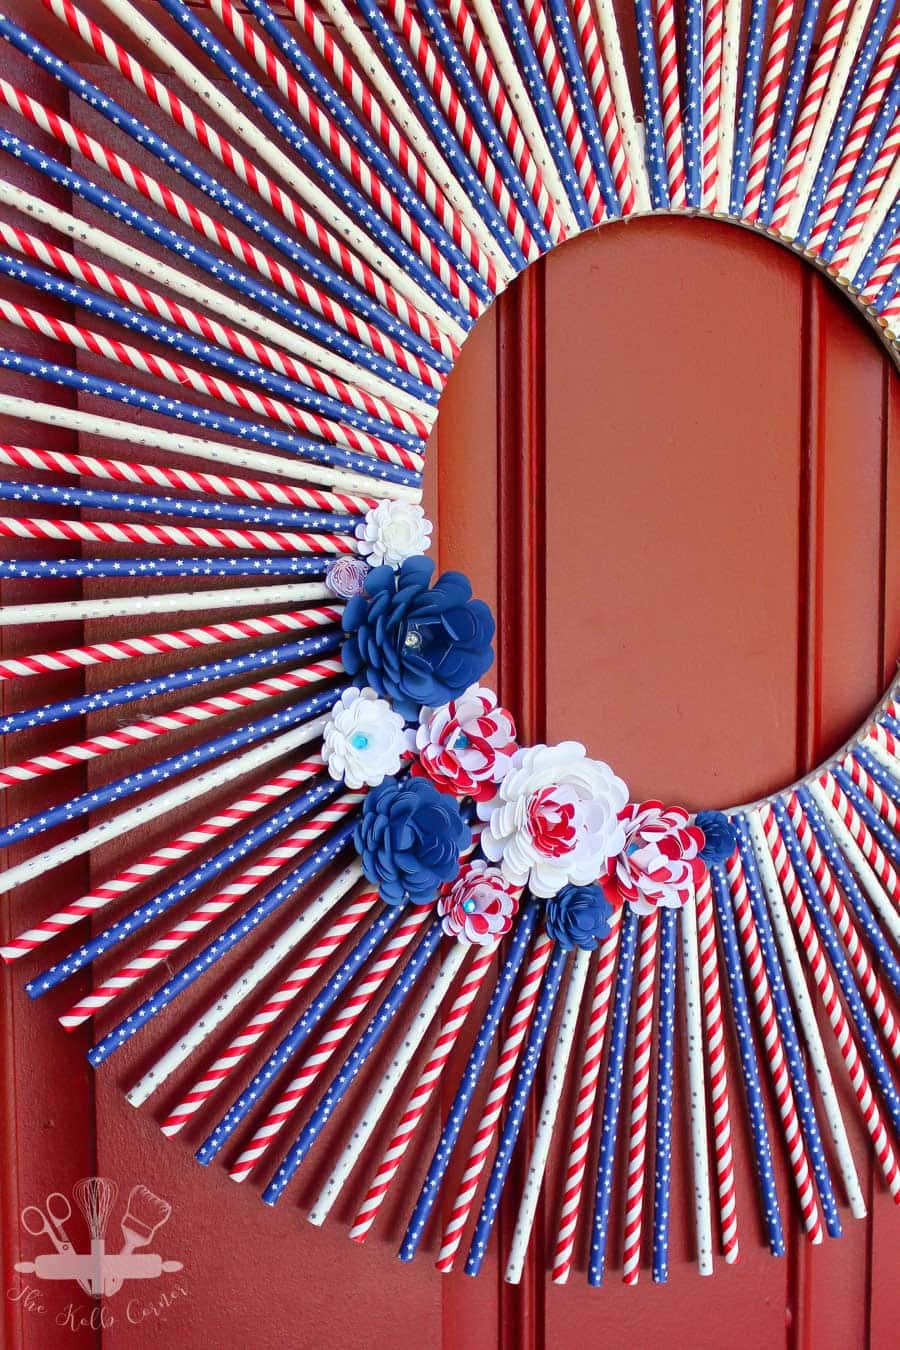
It really looks festive hanging up on the red front door doesn’t it? You could even use it as a wall decoration for a 4th of July party, or hang it above a summer mantel!
Other patriotic ideas to inspire you:

Don’t forget to pin it!
I wonder what we could use to weather proof the paper straws? Maybe some spray acrylic? Thanks for any ideas.
It’s beautiful! I love the way the colors work together. Glad I found this at Morning Cup of Joe 😉
Wow! Great job, AMANDA! I have an experience on front door fall wreath but never work on patriotic straw wreath. Really, Love your patriotic-straw-wreath. Hope, I also make patriotic straw wreath ASAP. Thanks
I have never even thought about making things from paper straws, but this is such a cute wreath.
I love this! The flowers add just the right touch to your wreath. I would never guess it was made out of straws.
Thank you Marie!!
Super cute! Love the flowers. Visiting from Merry Monday party.
Thank you Victoria!