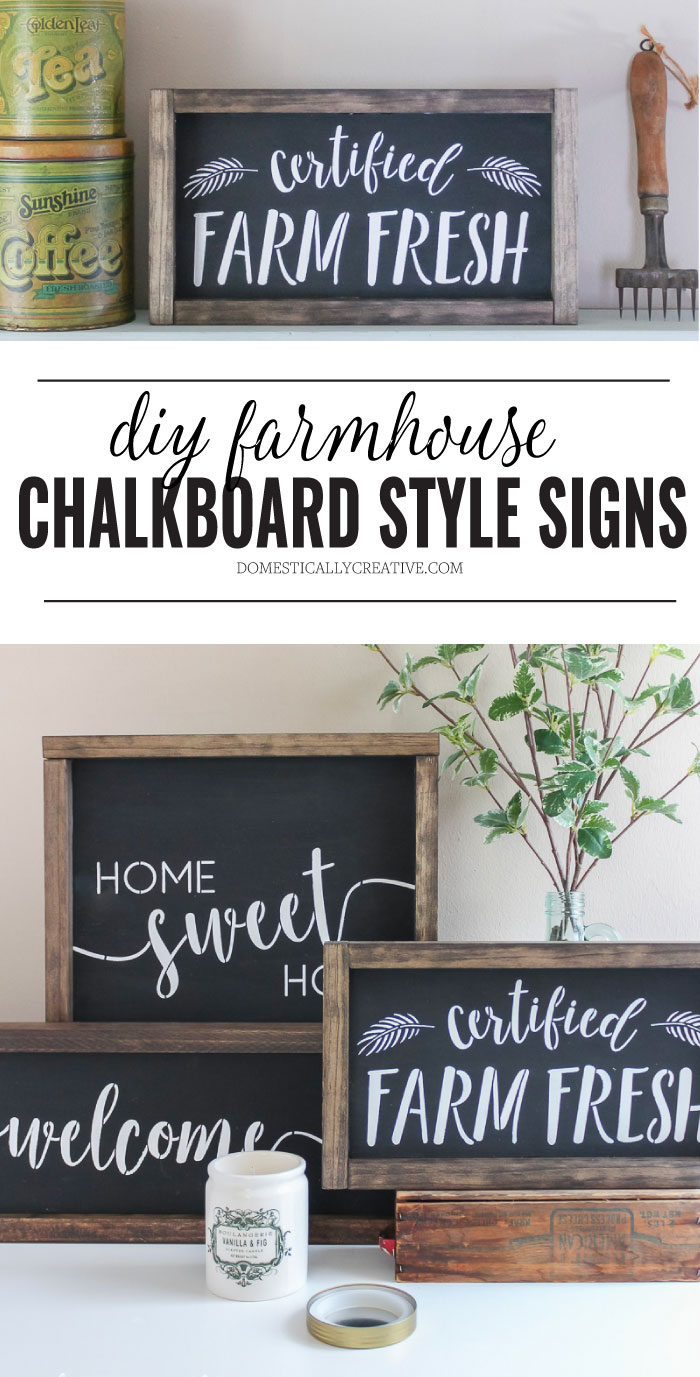
DIY Farmhouse Chalkboard Style Sign
You can easily create a farmhouse style and get that rustic look in your home with this simple DIY Farmhouse Chalkboard Style Sign tutorial.
This post may contain affiliate links for your convenience. Read our disclosure policy.
This post is sponsored by I Like That Lamp and their brand new home decor stencil line, but my opinions remain unbiased as always! You can read my full disclosure policy for more info on sponsored content.
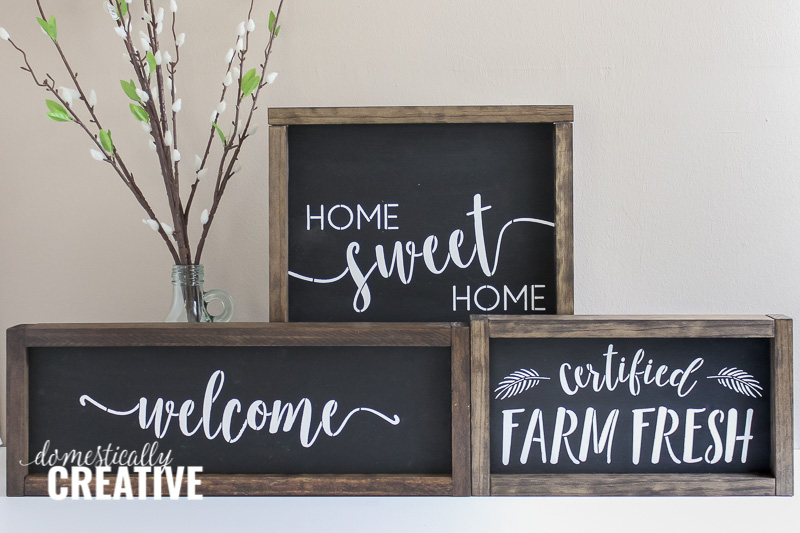
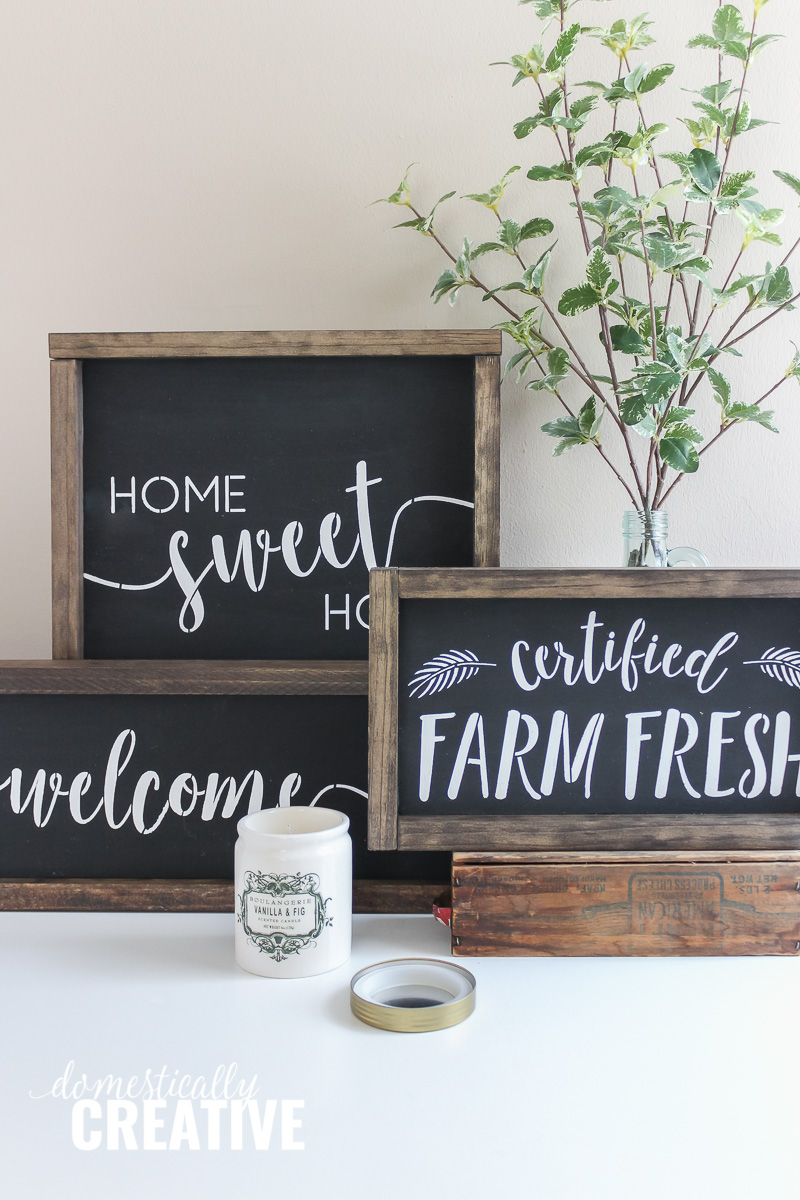
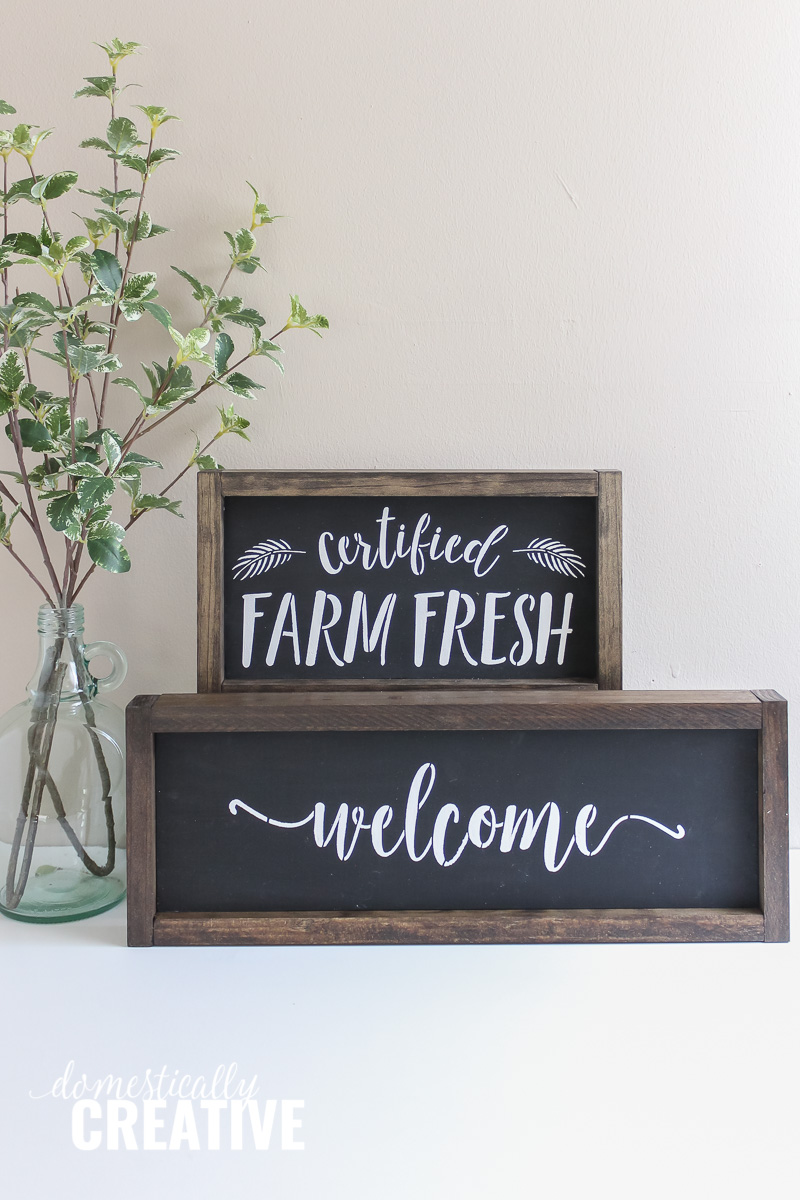
Love the farmhouse style, but don’t know how to incorporate it into your own home? These farmhouse chalkboard style signs are the perfect way to add a bit of rustic charm to your house without a ton of money or time!
I Like That Lamp has a new line of home decor stencils to help you get started too! There are a variety of different styles available to choose from, but for this tutorial I chose 3 of my favorites; “Home Sweet Home”, “Certified Farm Fresh”, and a simple “Welcome”. I chose to give these signs a chalkboard look without using chalk and it’s crazy easy to do! The hardest part of these DIY farmhouse signs is cutting the frames and even that isn’t difficult! You could probably even get them cut wherever you buy your lumber!
DIY Farmhouse Chalkboard Style Sign
Items you’ll need:
- Plywood (you can buy precut/measured craft plywood from craft stores!)
- 1″x2″ pine board (length will depend on the size of sign)
- Miter saw, jigsaw or circular saw (ours are all Ryobi brand!)
- Fine grit sandpaper
- Wood stain
- Sponge brushes
- Old rag or blue shop towels
- Black and white chalky paint
- Stencils
- Stencil Adhesive
- Polyacrylic Sealer (optional)
- Wood Glue
- Clamps
**For these signs, I bought precut craft plywood at 6″x12″, 12″x12″ and 6″x18″. You could also buy a sheet of plywood and have it cut down to size in store (Home Depot and Lowe’s both do it), or if you have a table saw you could do it at home.
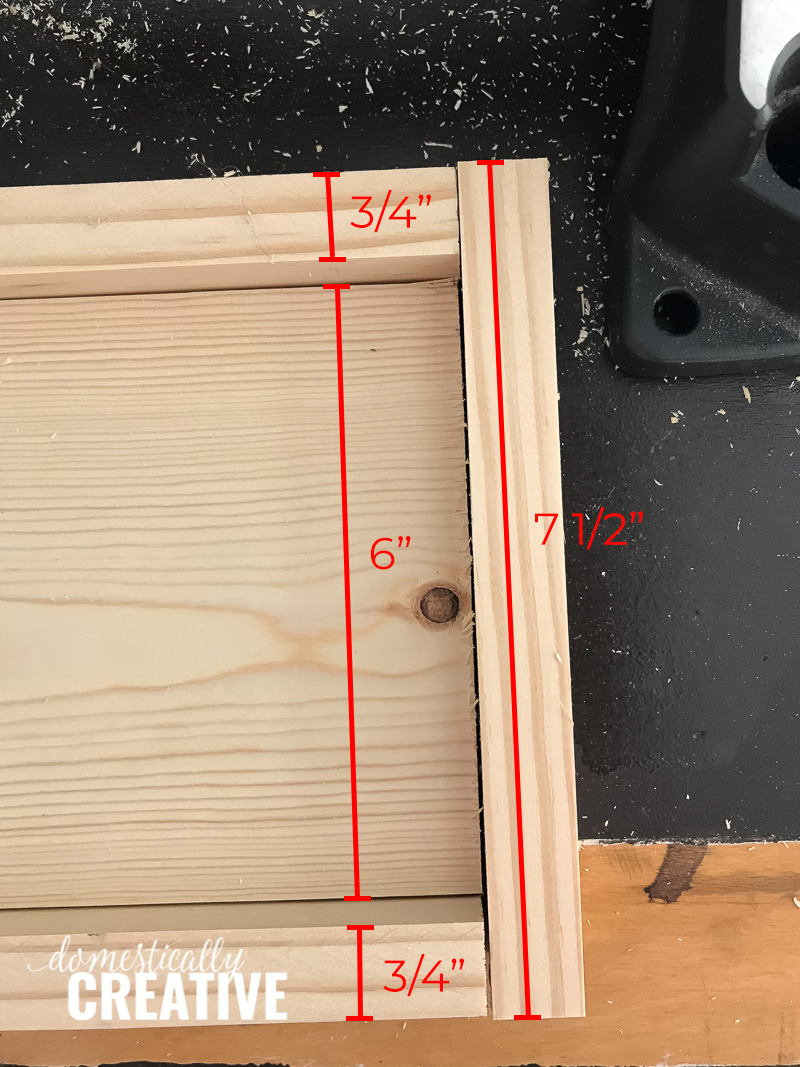
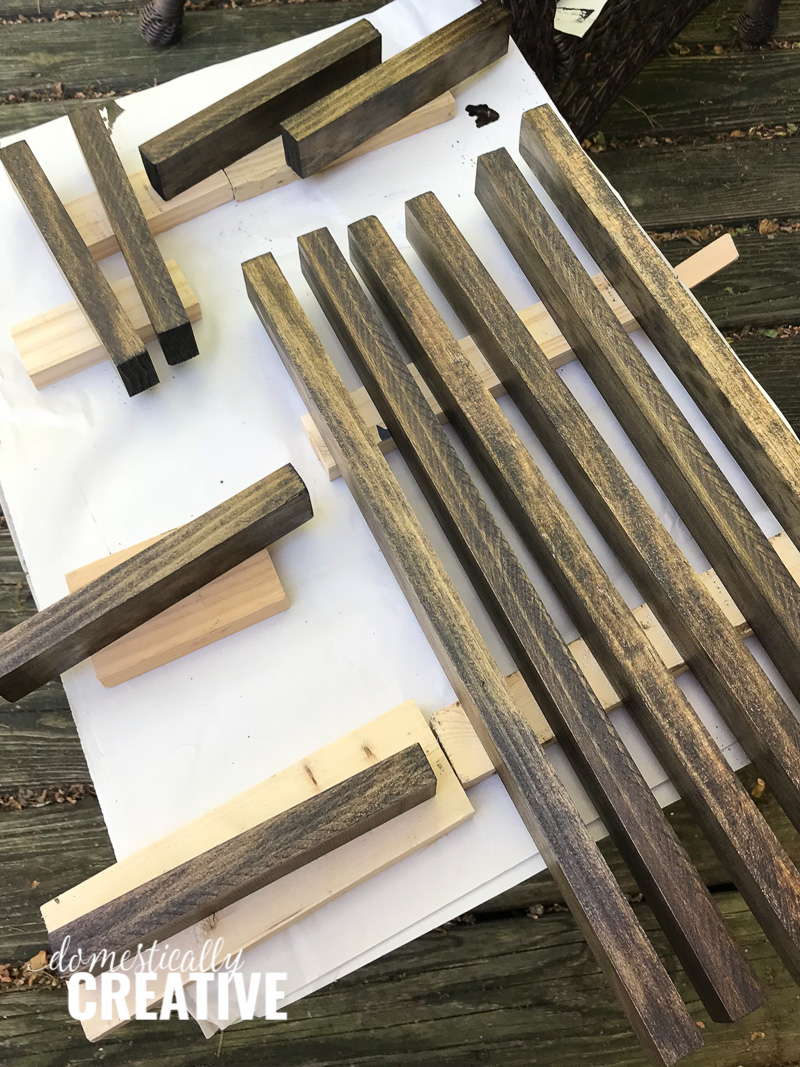
Start by cutting two sections of 1×2 to the length of the long side of the craft plywood. For the 6″x18″ sign, cut two sections 18″ long. The side pieces need to be cut to the length of the short side of the plywood PLUS the thickness of the two 1×2’s cut for the long sides. This means for a 6×18 sign, cut the short sides to 7 1/2″ each (6″ + 3/4″ + 3/4″) If math makes your head spin, you can always just hold the 1×2 up to the sign and first two pieces you cut and measure that way 😉 Here’s what it should look like:
Ok, that really is the hardest part of this whole tutorial I promise! Once all of the pieces are cut give them a light sanding, just enough to smooth out any rough areas. Don’t sand too much or the pieces will not fit as snuggly!
Apply a coat of stain to all of the sides of the 1x2s for the frame (I used Minwax Dark Walnut). Wipe off the excess and let them dry completely before handling. I set mine up on scrap pieces of wood to make the process a bit faster.
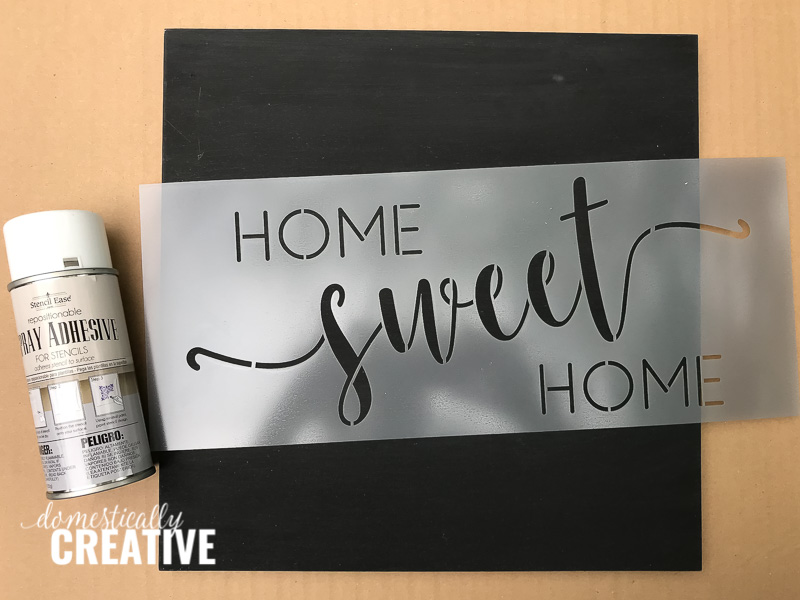
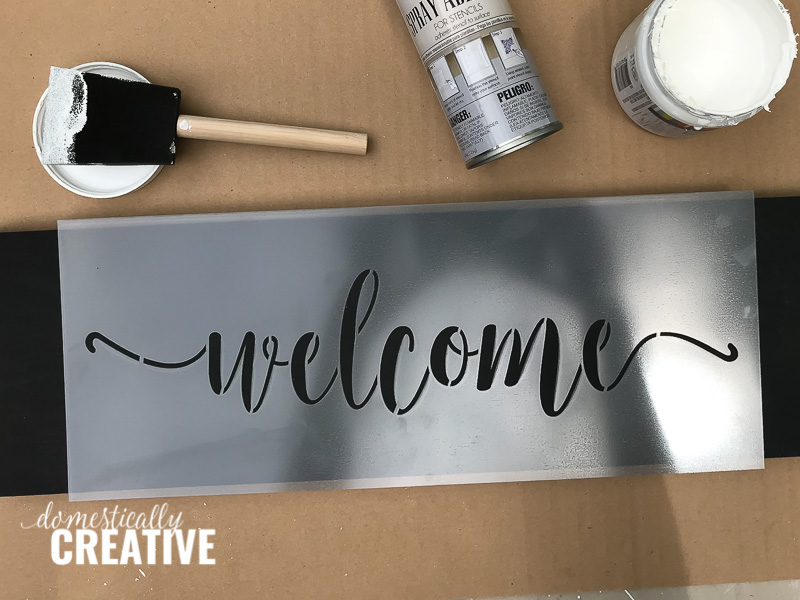
While the stain is drying, paint the plywood in a few coats of black chalky paint. Once it’s dry, give it a really light sanding to smooth it out for the stencil. This will also give it a worn down look that really resembles a chalkboard!!
Now for the fun part; adding the stencils! Spray a light coat of stencil adhesive spray on the back of the stencil and let it dry for a few minutes. Position the stencil centered on the sign and smooth it on. These stencils from I Like That Lamp are very sturdy and smoothed on easily. There was no worrying about creases or bubbles with the material!
Using a foam brush or pouncer, lightly add white chalky paint to the sign following the stencil. Make sure to brush off any excess paint before putting it over the stencil to prevent bleed through. Once the paint has dried completely, carefully pull up the stencil. Wash the stencil with soap and water afterwards to remove the stencil adhesive and paint. It will be good as new for the next project!
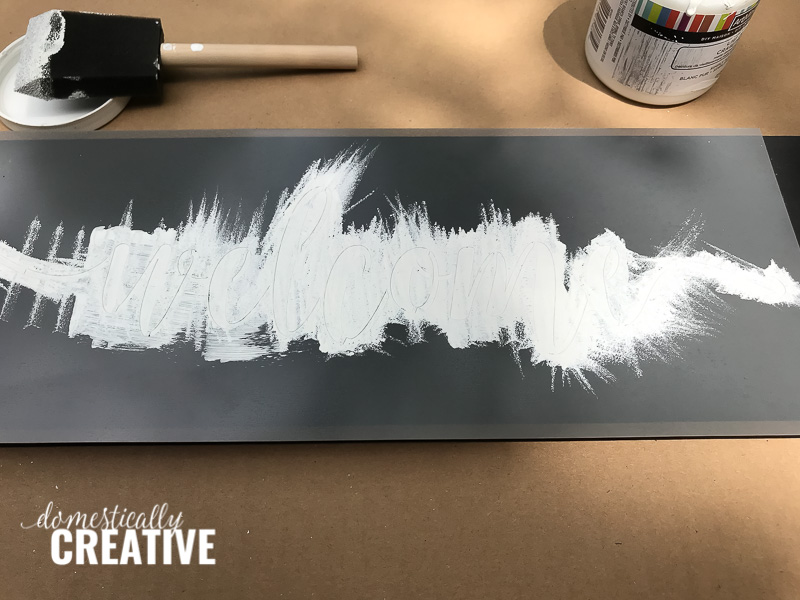
Lightly sand over the white chalk paint to give it a slightly distressed look creating that chalkboard style!
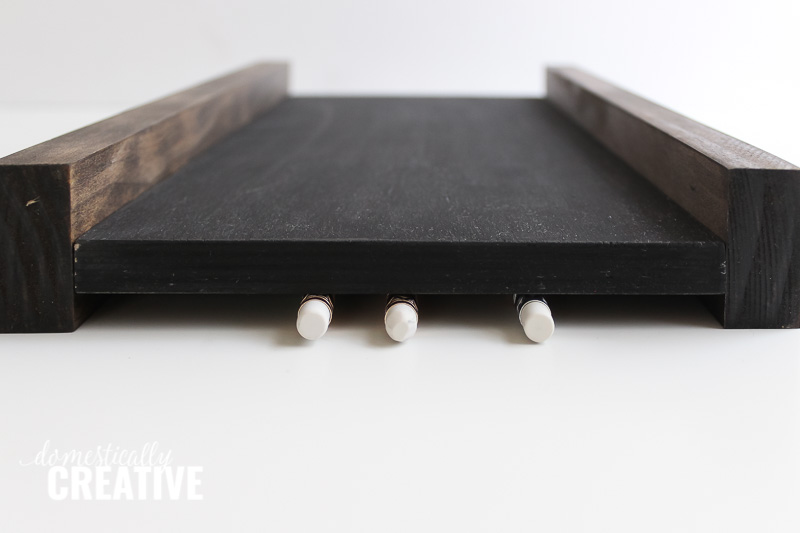
Attach the 1×2 frame pieces to the new chalkboard sign by using a high quality wood glue. To center the plywood sign on the 1×2 frame, prop it up on some paint sticks or a few pencils. This will give it a little lip on the back to hang the finished chalkboard style sign too.
Next, add a small amount of glue to the sides of the plywood sign, align the frame pieces and keep in place until the glue has dried. Using clamps is a must in this project to ensure a tight fit on the frame.
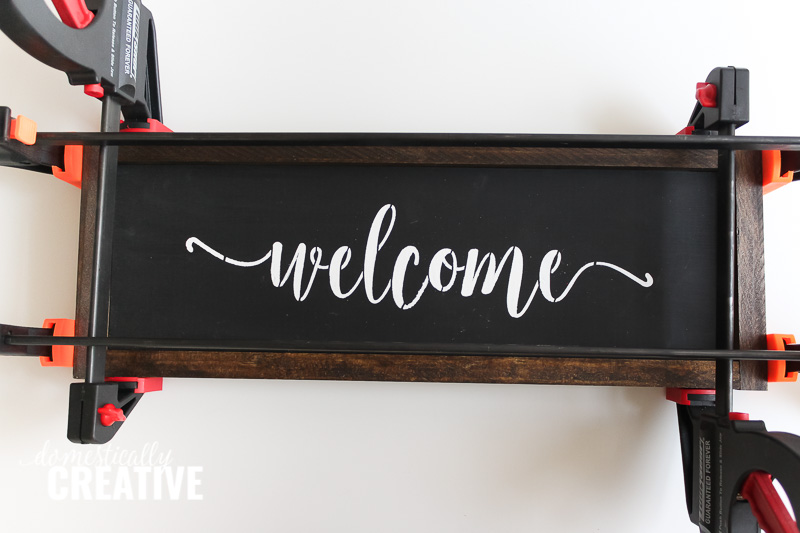
Make sure the corners line up well and sit as flush as possible!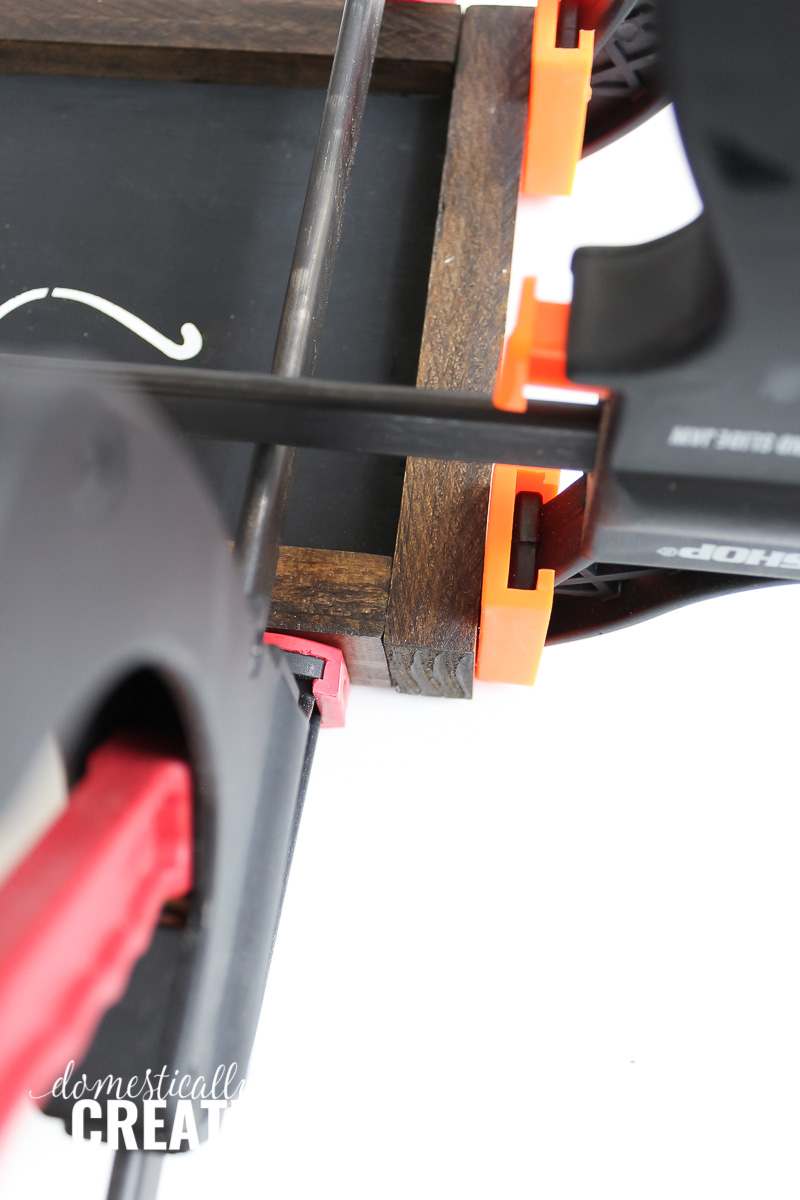
The last step (optional) is to give your brand new DIY farmhouse chalkboard style sign a coat of polyacrylic to seal it from any scratches or peeling!
You can add some picture hangers or twine to the back of the signs to hang or just two nails will do the trick since there is a bit of a lip on the back.

Doesn’t this one look great on my Herb Drying Rack? I absolutely love these new stencils from I Like That Lamp! I think I’ll even surprise my mom with chalkboard style signs using these Certified Farm Fresh and Farmhouse stencils. Won’t it go perfectly with her new kitchen??
Which stencil would you use to make your own chalkboard style sign? Let me know in the comments!
Love this? Pin it!
These are so adorable!!! I would love to make some of these for my kitchen! Thanks for the cute idea!
Very clear Tutorial using your new stencils Amanada. Pinning. Thanks for sharing!
Joy
Thank you so much Joy!
Super cute & I need to make some. I will be featuring it this Sunday at Merry Monday!
Thank you so much Jenny!
Very cute!, I make similar ones with the 1×2 stained framing but have never made chalkboard looking ones.
seeing these super cute ones I must give it a try
Such cute ideas! We recently moved, and I’ve been wanting to add these kinds of accents to our home!
Thank you Pam! These signs would be such an easy DIY for your new home!
I had no idea that stencils were available for these projects!
Yes! Those stencils make the whole project so easy!
What great DIY’s i love that you made the frames. The brown and black look great together. Pinned & Sharing! #MM
Kim