Wood Planked End Table
I’ve paired up with 19 other talented ladies to bring you a monthly Thrift Store Decor Upcycle Challenge. Each month we will create a new home decor piece from an item(s) we’ve found at a thrift store, yard sale, resale shop etc. There is no budget or specific theme so we are free to let our creativity run wild!
This post may contain affiliate links for your convenience. Read our disclosure policy.
Meet the Hosts

Amanda | The Kolb Corner Chelc| Inside the Fox Den
Erlene | My Pinterventures Kim | Made in a Day Sara | Twelve on Main
Debra | Shoppe No. 5 Shirley | Intelligent Domestications
Marie | DIY Adulation Lindsay | Crazy Organized Michelle | Our Crafty Mom
Julie | Live From Julie’s House Dru | Polka Dot Poplars
Maureen | Red Cottage Chronicles Pili | Sweet Things Channell | Hobnail House
Colleen | Life on Kaydeross Creek Ann | Duct Tape and Denim
Paula | Virginia Sweet Pea Sherry | Savvy Apron Stacy | Anastasia Vintage
You can also follow our board on Pinterest for more upcycled decor inspiration!
The following tutorial includes affiliate links to products used for this project. Purchasing an item from a link in this post helps keep this blog running at no additional cost to you! And don’t worry; I only recommend products I have personally used and loved. You can read my full disclosure policy here for more information
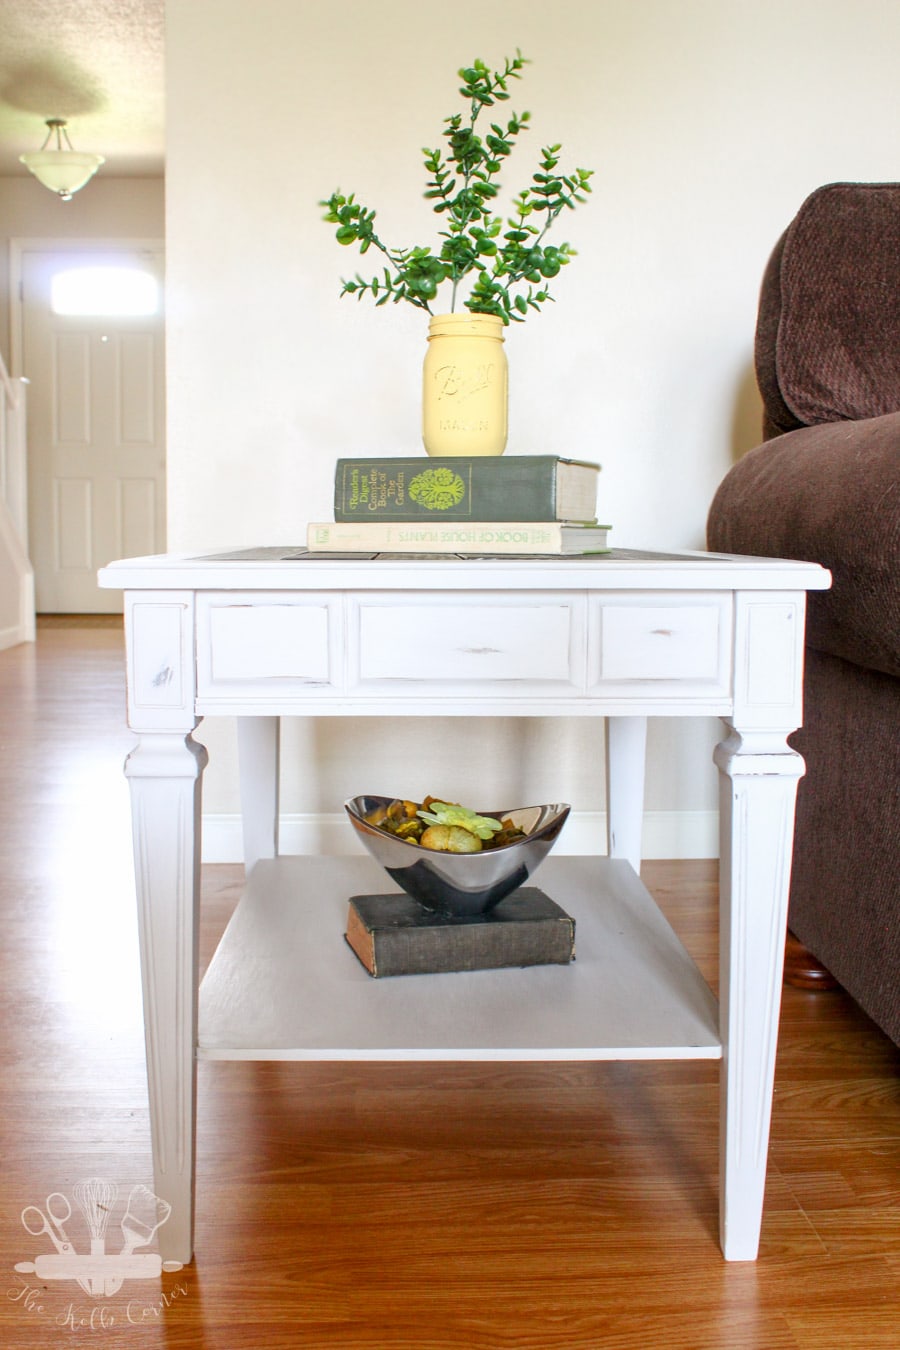
Wood Planked End Table
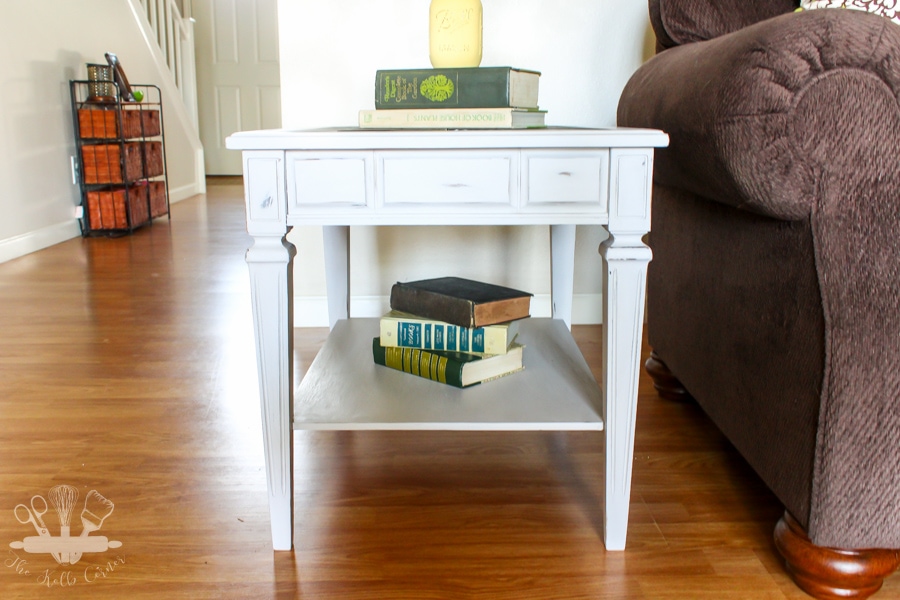
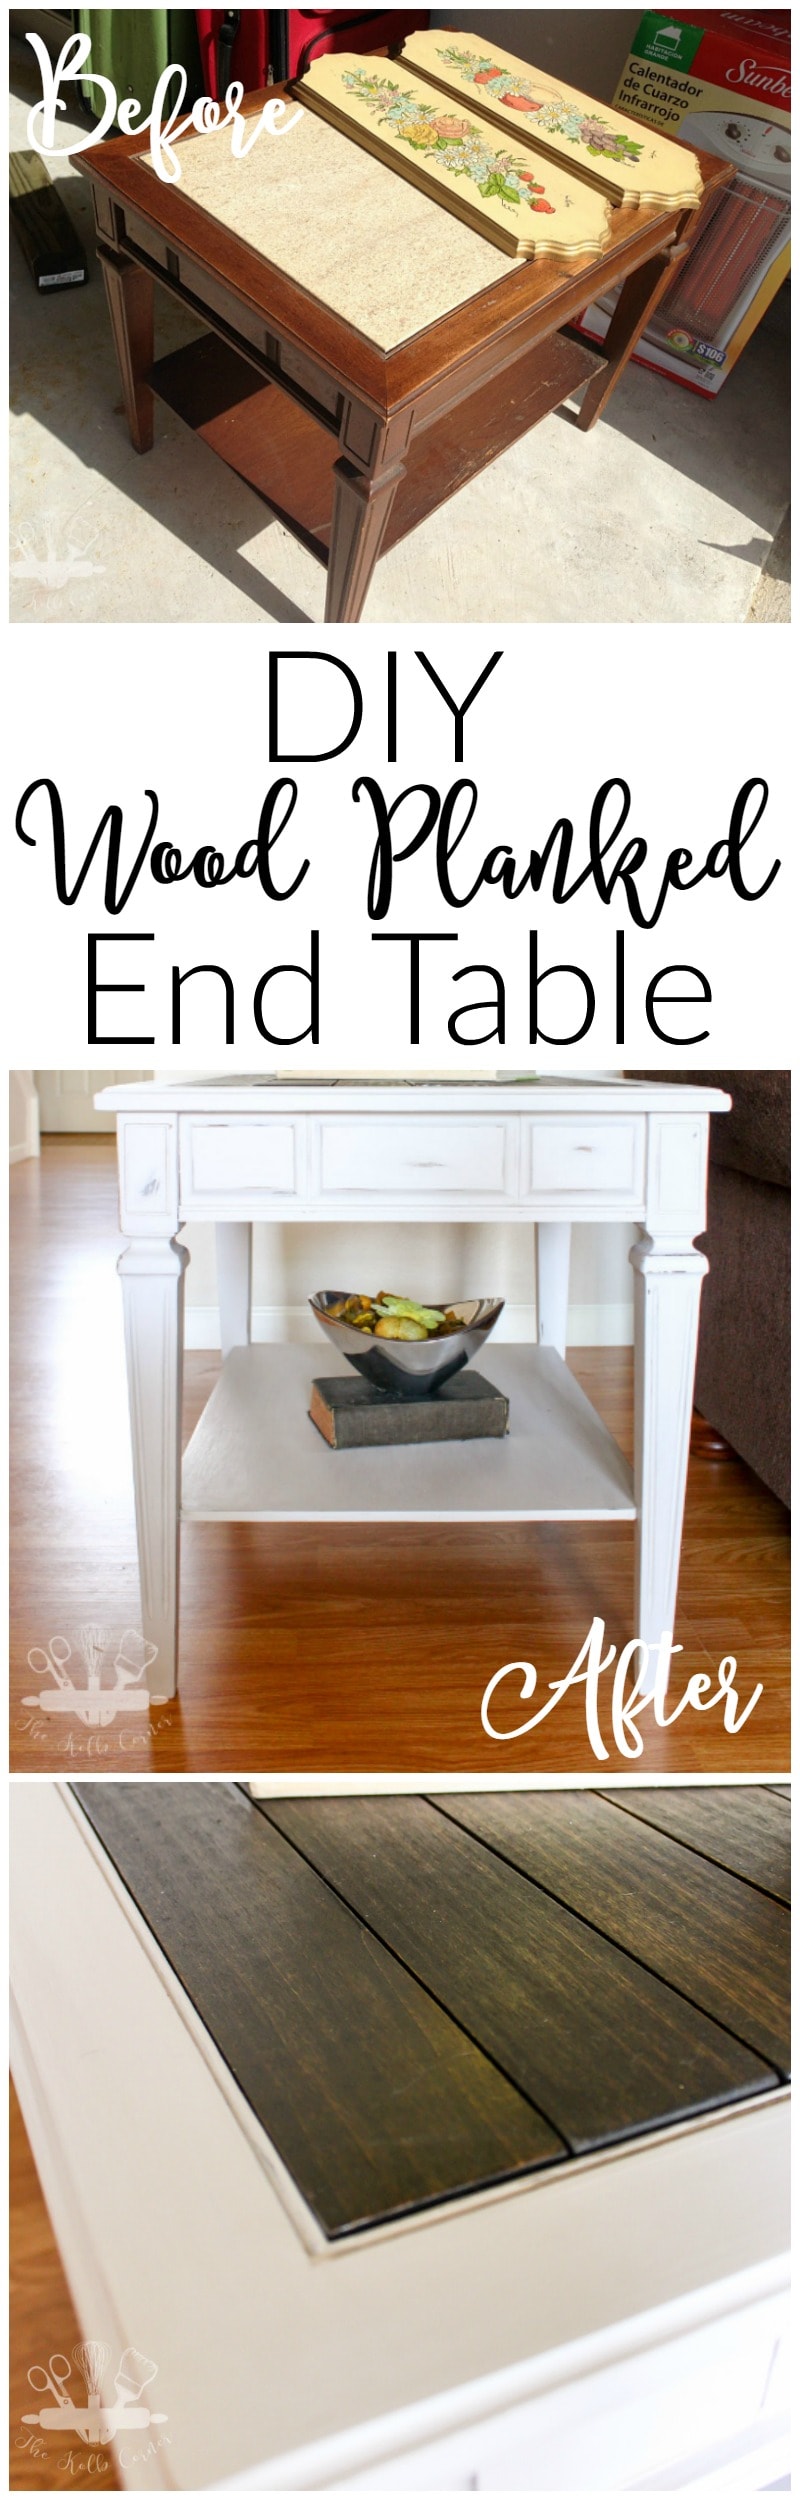
What started out as an ugly beat up end table, turned out to be a beautiful wood planked end table that really makes a statement in any room.
Believe it or not, I picked this end table up at a Salvation Army in Mississippi for $2.50! It was tucked away in the corner, with piles of junk on top of it, covered in cobwebs. To this day, I’m still positive this little end table was priced wrong, but when I brought it up to the cashier, she didn’t even look twice. Score for me!
Embarassingly enough, I’ve had this table sitting in my living room for a year and half now. It was pretty beat up and not very pretty to look at, but I’ve just been lacking the time and motivation to tackle this project. (See what I made with those hand painted plaques here) 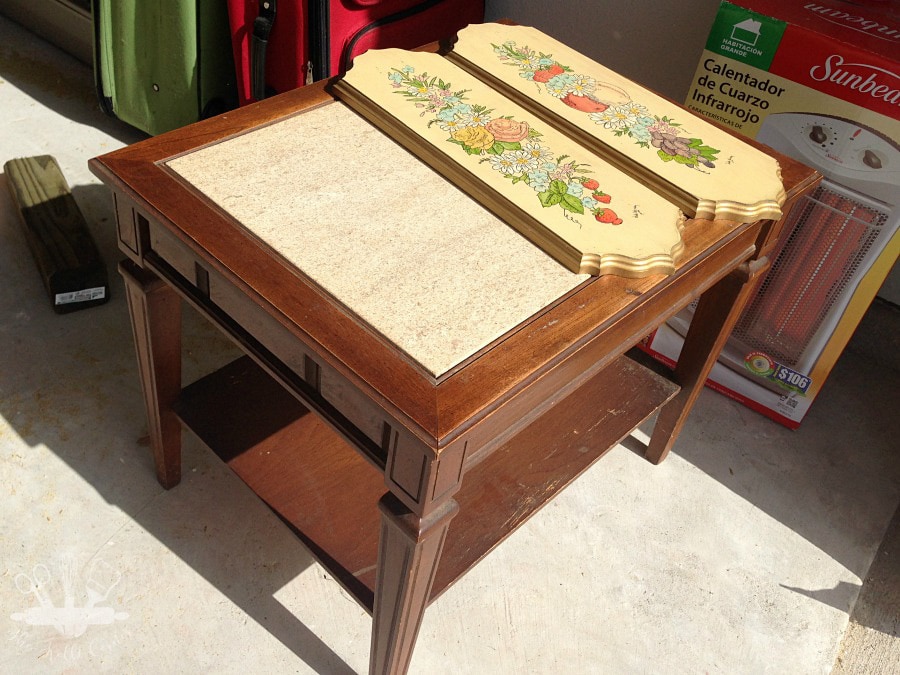
The main reason for the procrastination is that I had no idea what I was going to do with the stone insert. I hated how scratched up it was, and I couldn’t think of a way to incorporate it into the makeover I had in mind. So my dilemma was, what should I put in it’s place? Sure a piece of glass would have probably been the easy solution, but with cats that think they can sit/lie on top of anything I wasn’t exactly excited about the idea. Plus, nothing else in my house has a glass top and I thought it would really look out of place in my living room.
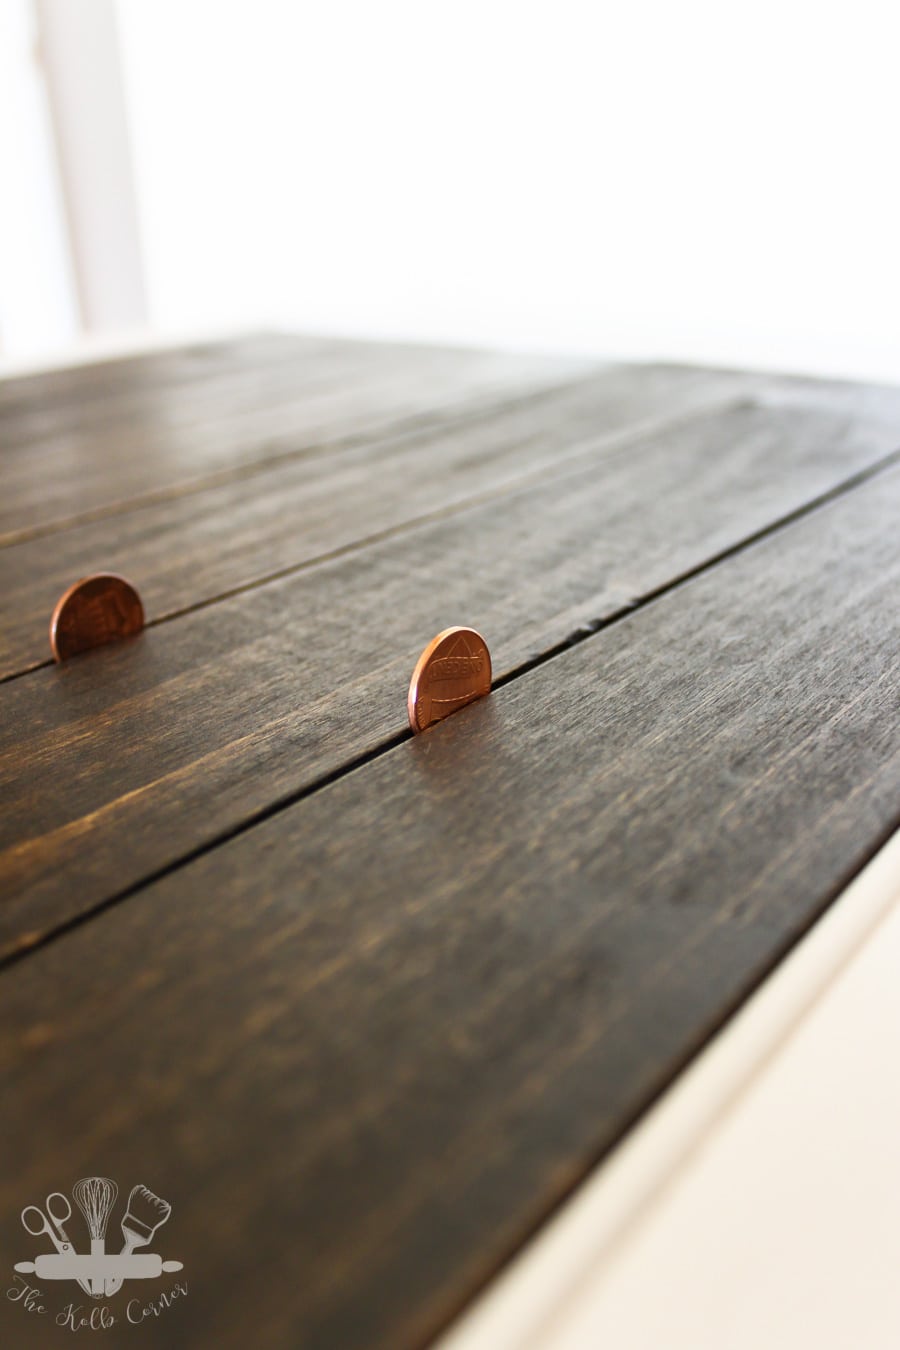
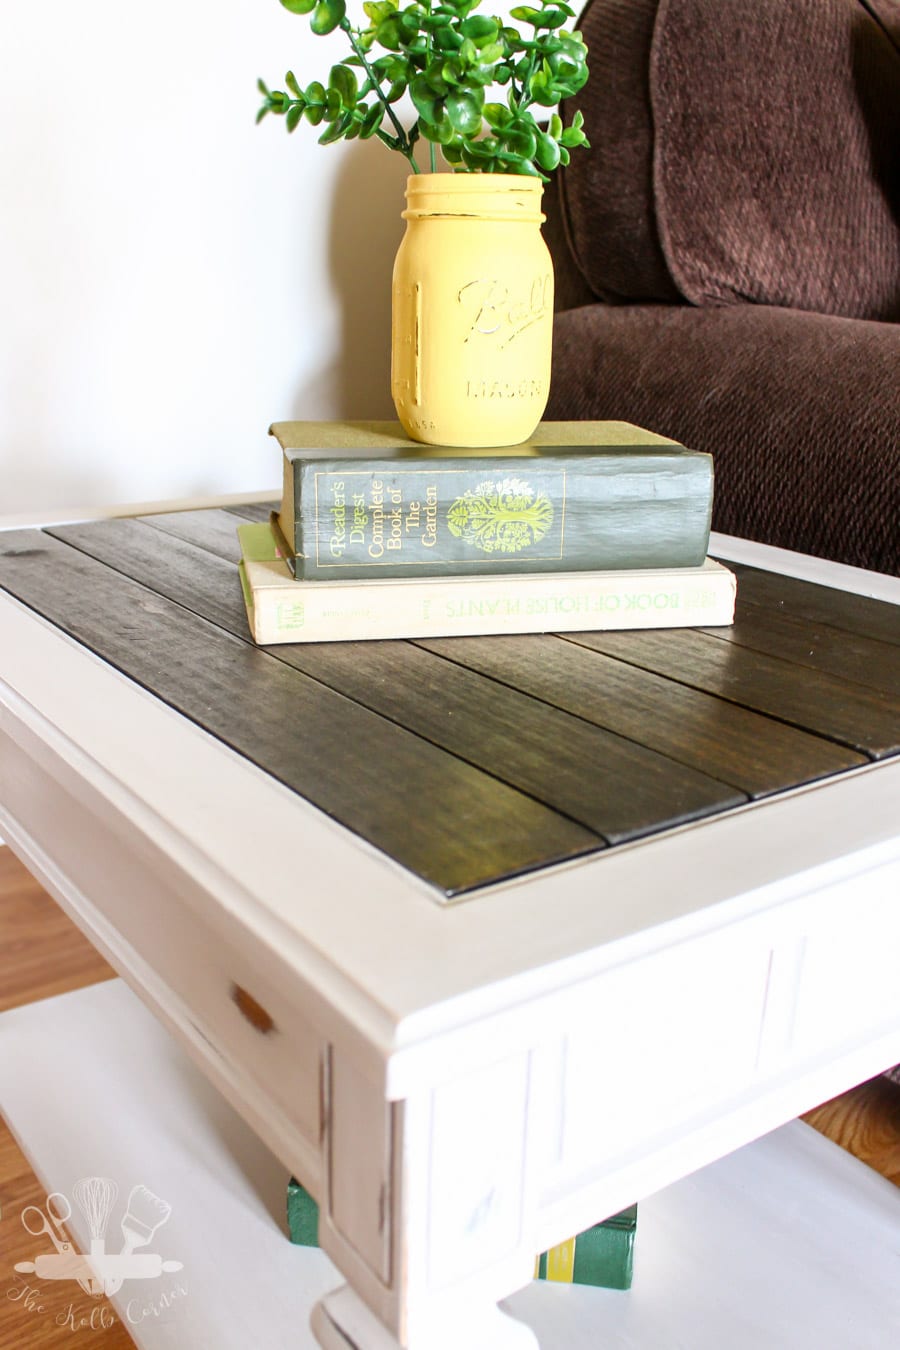
I decided to make this into a wood planked end table, by replacing the stone insert with a planked top. Simple enough right? Well, not really. I didn’t want to spend a lot of money on the wood so I ended up buying cheap poplar boards from Home Depot. Once I had cut them to size, I layed them out just to see how I liked them. Because they were cheap, and only 1/4″ thick, there was no way the wood would have been sturdy enough to hold a drink, let alone a 15lb cat.
Yes, it’s sad that I have to even consider that, but let’s be honest they sort of do whatever they want.
After racking my brain on what I could do to add more support, I stumbled across a 1/4″ thick piece of MDF in the garage. Not only would it add more support, but it would actually make the wood planks level with the rest of the table. Something I didn’t take into account when I purchased the 1/4″ thick poplar. Oh well, live and learn right?
Using my jigsaw I was able to cut the MDF to fit where the stone insert was. Might I mention that when using your jigsaw, make sure you are paying attention instead of trying to also have a conversation with your husband, or else you will end up with one mangled up mess. At least it will be covered by the wood planks 😉

I used the same process to beat up and stain the poplar wood planks as I did on my farmhouse dining table. After my frustrations with this project, it felt good to beat up those boards!
After the planks were stained and dry, I used wood glue to attach them to the MDF. I didn’t want to use nails because they would poke through the other side, and I was afraid of splitting the very soft wood.
Since the boards together were about 3/8″ short of covering the entire width, I left a tiny gap between each board. To make sure the gaps were all even, I stuck a penny between boards to act as a spacer. Then I stacked a bunch of heavy books on top and let the wood glue dry overnight.
Painting the actual table was so easy compared to figuring out the top. I used this chalk paint from Michael’s in Oyster which has a great gray undertone, and sealed it with a clear wax. Of course, I did some distressing before sealing it, but that kind of goes without saying, doesn’t it?
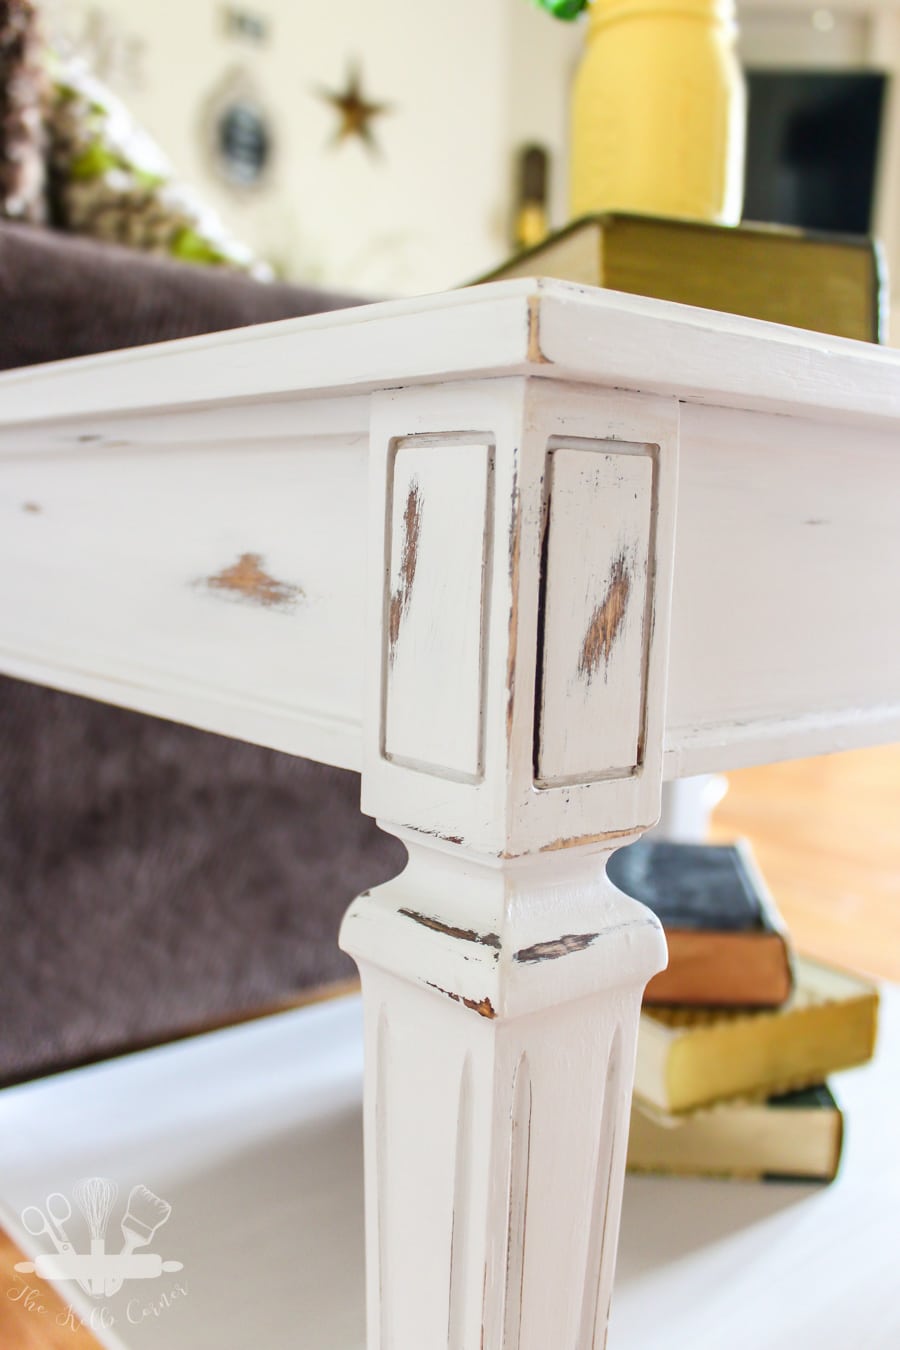
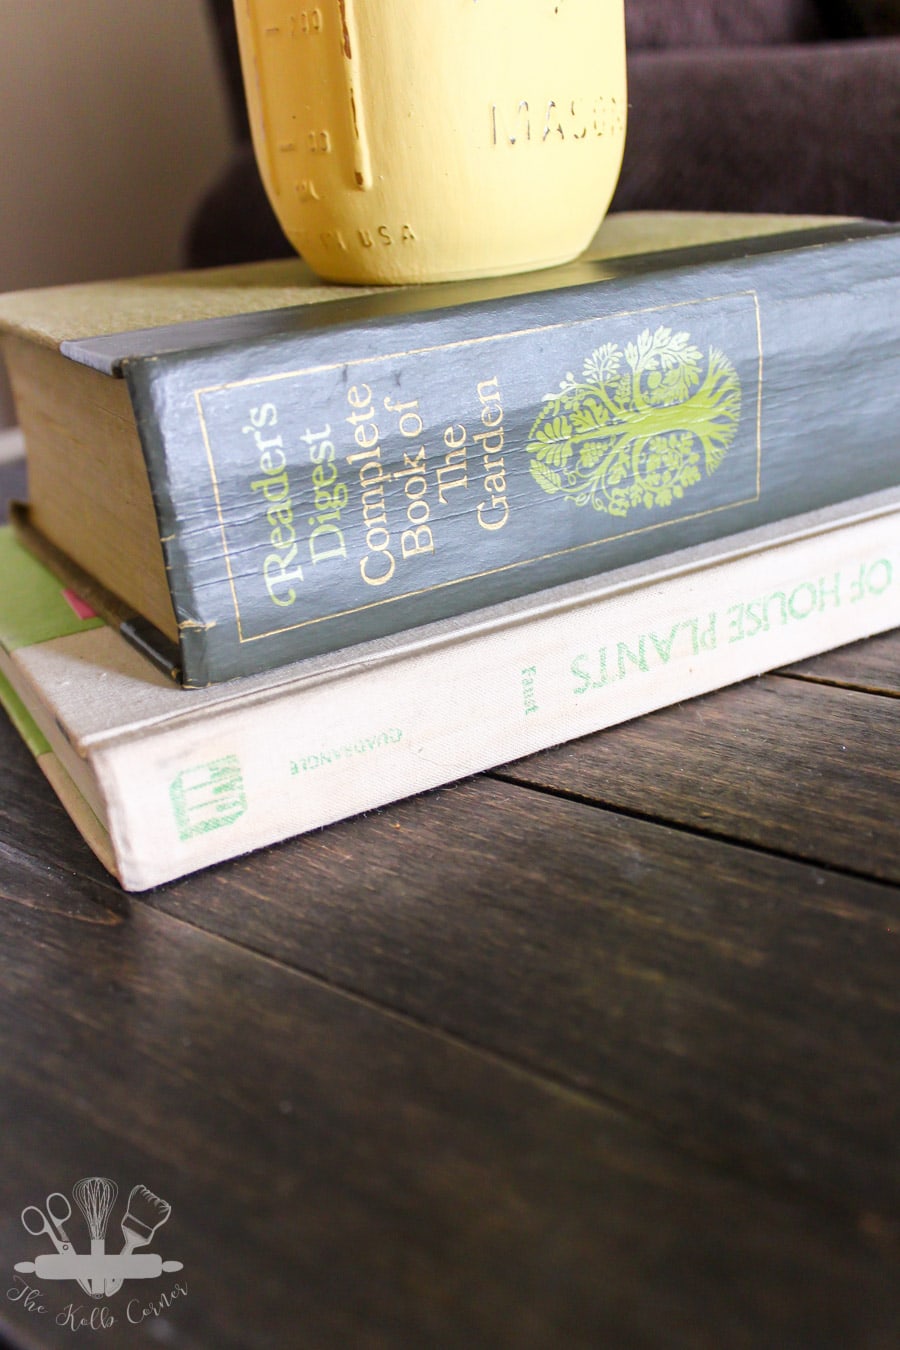
And the final product-a beautiful wood planked end table!
I’d say not bad for a $2.50 table, $9 in wood and paint and stain I already had.
Be sure to check out all of the other creative upcycle projects my fellow bloggers have come up with!
Your table came out great. I love the wood planking on the top versus the way it looked before! 100 times better!
Kate
Thank you Kate!
This is a gorgeous makeover! The wood top is so perfect and fitting. Fantastic job 🙂 Pinned!
Thank you!
Amanda, You did a great job on the table! Sometimes it takes a challenge to kick us in gear to get a project completed. Thanks for bringing your end table to the party this week! Pinned to share.
Thank you Laurie!
This is absolutely gorgeous! I know how it is to have a project sitting around in it’s unpretty state for too long. I am currently sitting on a floral couch that I have been meaning to reupholster for the last year and a half. Maybe someday 🙂
Yes!! Reupholstering furniture is intimidating. I have a project myself that’s been waiting. ONE day soon we will tackle them!!!
You’re so funny, Amanda!! You had me laughing when saying to focus on cutting wood instead of trying to have a conversation at the same time, I’ve been there too many times! Anyway, your table looks perfect and nobody would ever guess it came from a thrift store. Love the dark wood planks over the white
Thank you Pili! I should be grateful I didn’t lose a finger during the process…lol
What an improvement! Love the distressed finish! Thanks for linking up with us at The DIY Collective! Please come back and party with us next Thursday! xoxo! -Cassie @ Little Red Window
Thank you Cassie!
This is a great makeover. I really like the planked top and paint color. I bet kitty is enjoying the new table top because you just can’t fight it.
Yes he is, even as I am typing this he is lying on top of it. Crazy cats.
Amanda, I have two of those tables in my living room right now. My parents purchased new living room furniture sometime back in the ’70’s when I was a teenager. I remember shopping with my Mom. Ours are marble top. I’ve stared at them many times and pondered how I could update them because I have too much sentimental attachment to ever get rid of them.
I love what you did and $2.50!!!
Thank you Shirley! I actually stumbled across one just like it but with a drawer for $14 at goodwill right before starting this project. I am kicking myself now for not buying!
That’s amazing and for under $15! I love the transformation and I totally get letting your frustrations out on the boards – I’ve had a few projects like this too 🙂
Yes, it always seems something doesn’t go as planned with my projects.
What an amazing transformation! The stone top would have puzzled me, too. Your solution is perfect and looks so nice. I know your friends will give you tons of compliments on this piece when they see it in your living room.
Thank you Paula!
This is gorgeous! What a difference! I love the wood planked top and can’t believe you paid $2.50. That is why I love thrift stores. Thanks for organizing this fun challenge!
Thank you Michelle! Yes, for $2.50 I just couldn’t pass it up.
What a difference! I love how it turned out!
Thank you Maureen!