How to Make and Style a Decorative Tray
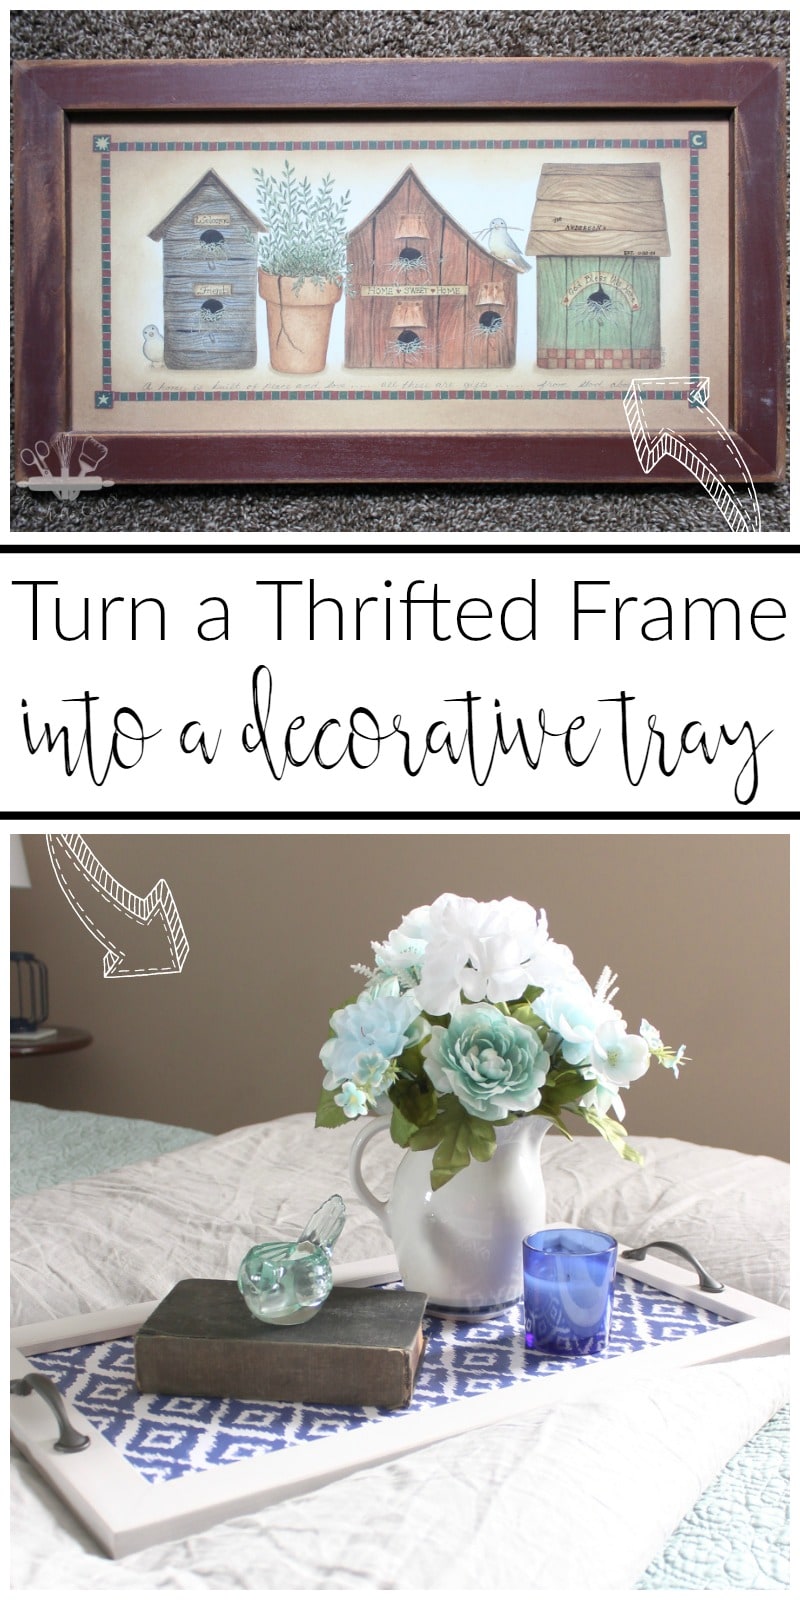
I’m showing you how to make and style a decorative tray, starting with a thrift store frame. Start with an otherwise plain old piece of artwork from a thrift store, and turn it into a decorative tray with just a bit of paint, scrapbook paper and drawer pulls.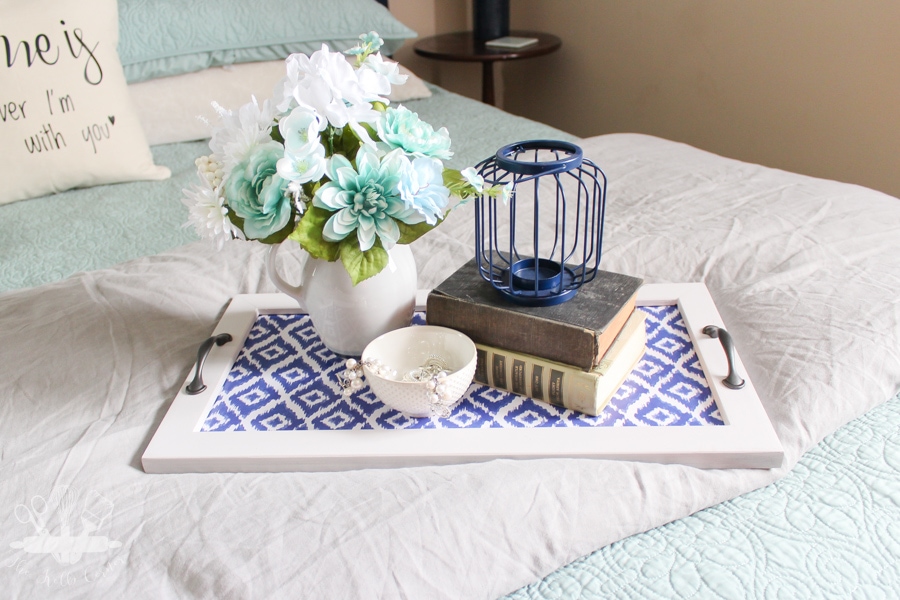
This post may contain affiliate links for your convenience. Read our disclosure policy.
It really compliments my new master bedroom and was so fun to style. Read on for the full tutorial on how to make and style a decorative tray!
I’ve teamed up with several other talented bloggers for another Thrift Store Upcycle challenge. Be sure to check out their posts at the bottom.
The Rules:
- Upcycle an item(s) from a thrift store, resale store, or garage sale into a new piece of decor.
- There’s no monthly theme.
- There’s no budget to stick to.
Meet the Hosts
Amanda | The Kolb Corner Kim | Made in a Day
Maureen | Red Cottage Chronicles Pili | Sweet Things
Debra | Shoppe No. 5 Marie | DIY Adulation Sue | A Purdy Little House
Chelsea | Making Manzanita Ann | Duct Tape and Denim Karen | Dragonfly and Lily Pads
Kimm | Reinvented Kathleen | Our Hopeful Home Megan | C’mon Get Crafty
Victoria | Dazzle While Frazzled Shirley | Intelligent Domestications
Michelle | Our Crafty Mom Jeannee | Shepherds and Chardonnay
Jennifer and Vicki | 2 Bees in a Pod Angela | Simply Beautiful by Angela
Ali | Home Crafts By Ali Denise | My Thrifty House
Make sure you follow our board on Pinterest for more upcycled decor inspiration!
How to Make and Style a Decorative Tray
Items you’ll need:
- thrift store frame
- Scrapbook paper
- Mod Podge
- Paint brush
- Paint
- Scissors
- 2 kitchen drawer pulls
- E6000 glue
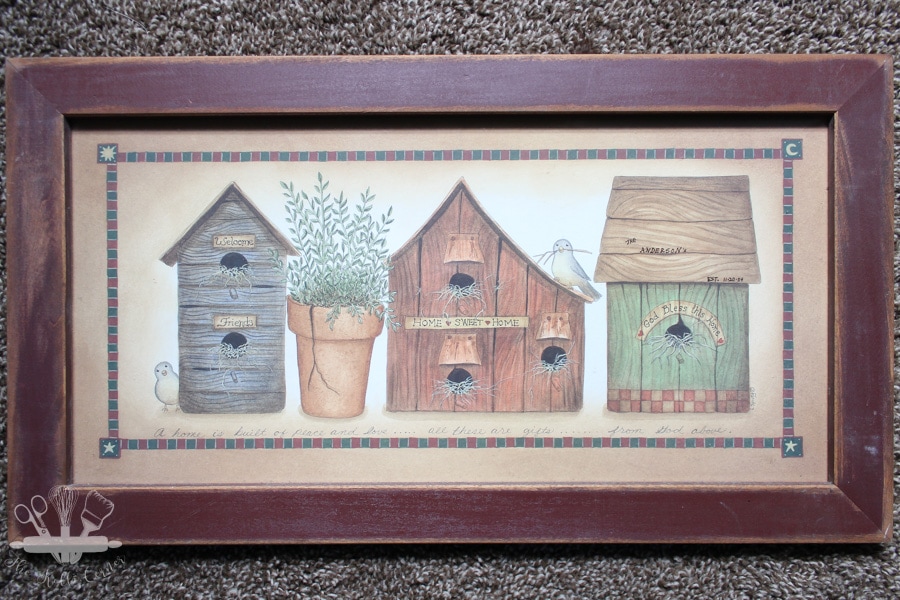
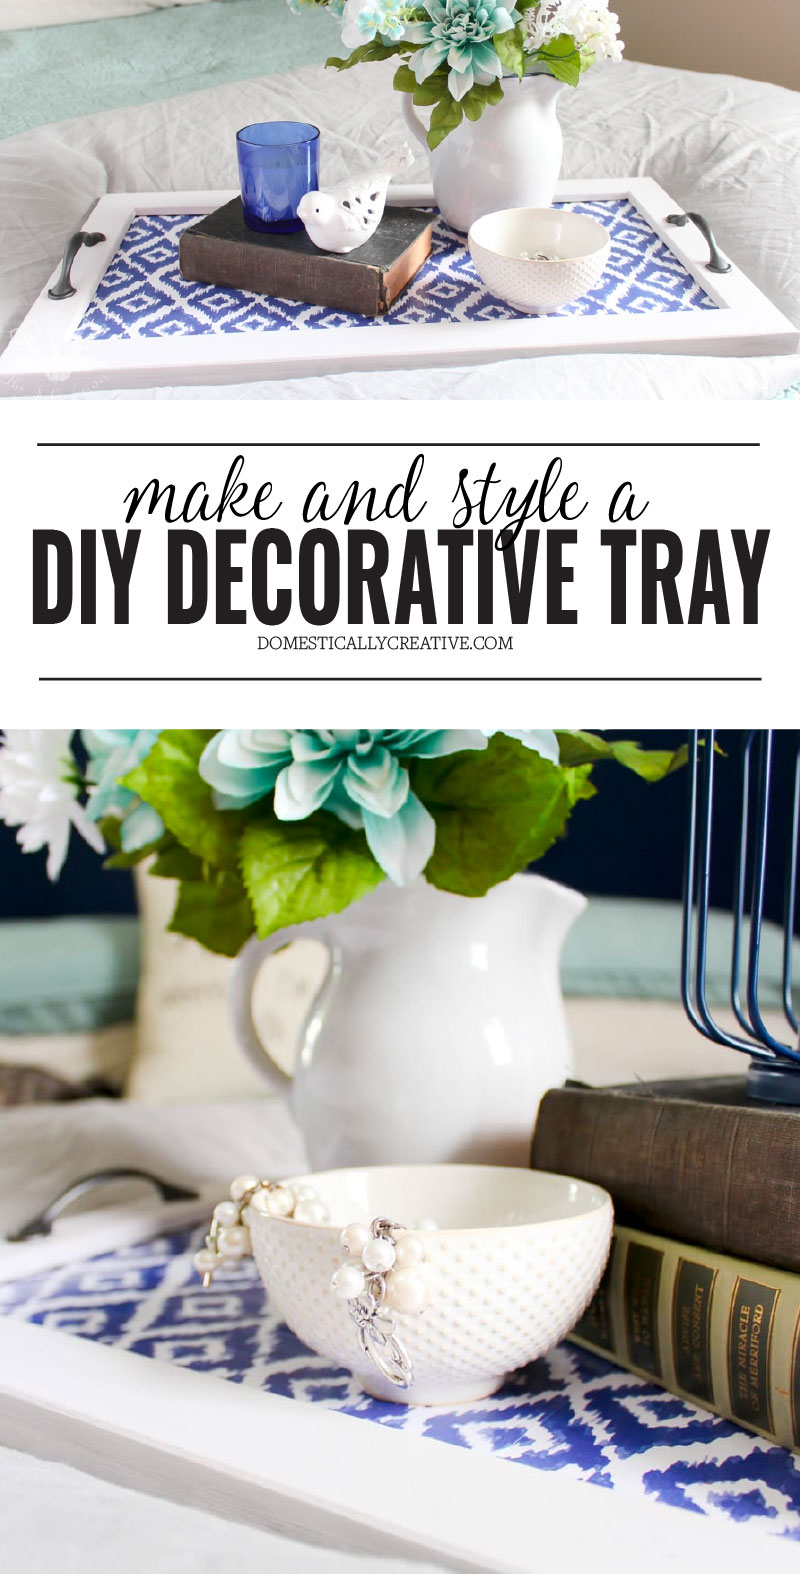
There are so many tutorials out there for creating a tray from a picture frame, so I’ll spare you most of the details. If you need a more in-depth tutorial, check out my friend Pili’s post here. One tip before we get started, make sure to choose a piece from the thrift store that has a substantial frame. Don’t get one that is flimsy or thin. For my project, I specifically wanted a plain, flat-sided frame but you could easily use one a little more decorative.
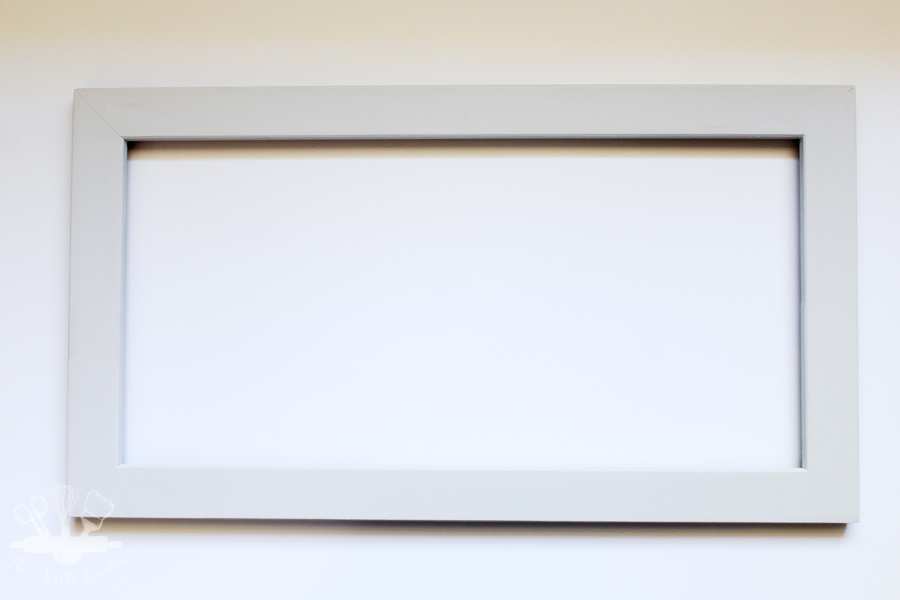
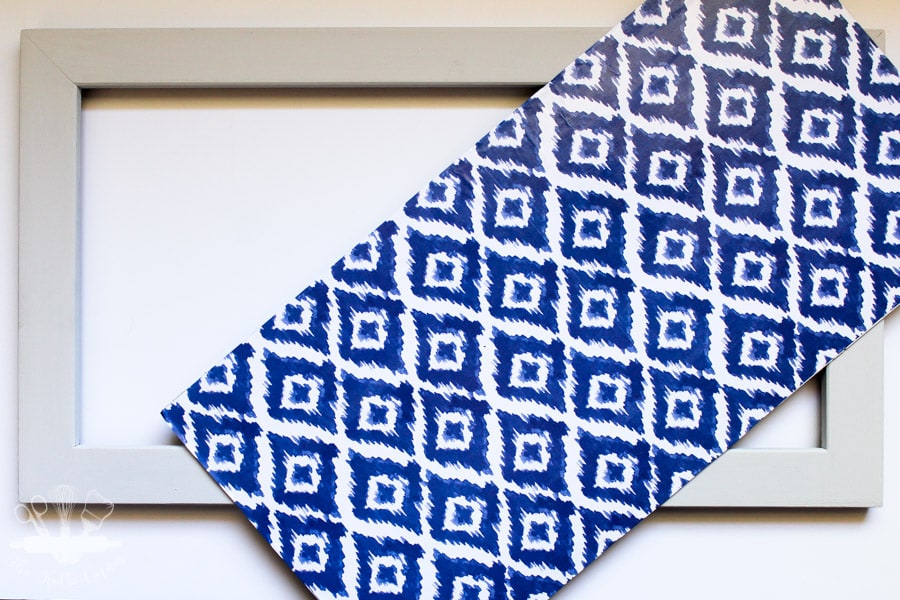
Basically, I took the picture frame apart and cleaned it really well. Then I gave the frame 2 coats of chalk paint. I took two pieces of scrapbook paper and attached them to the cardboard backing of the picture using Mod Podge. I also gave it a coat of gloss Mod Podge on top.
My intention was to assemble the picture frame back together with the glass, but clumsy me accidentally broke it. I think I was being too aggressive when I was trying to pop it out of the frame. Oops. Oh well, it works just fine without it.
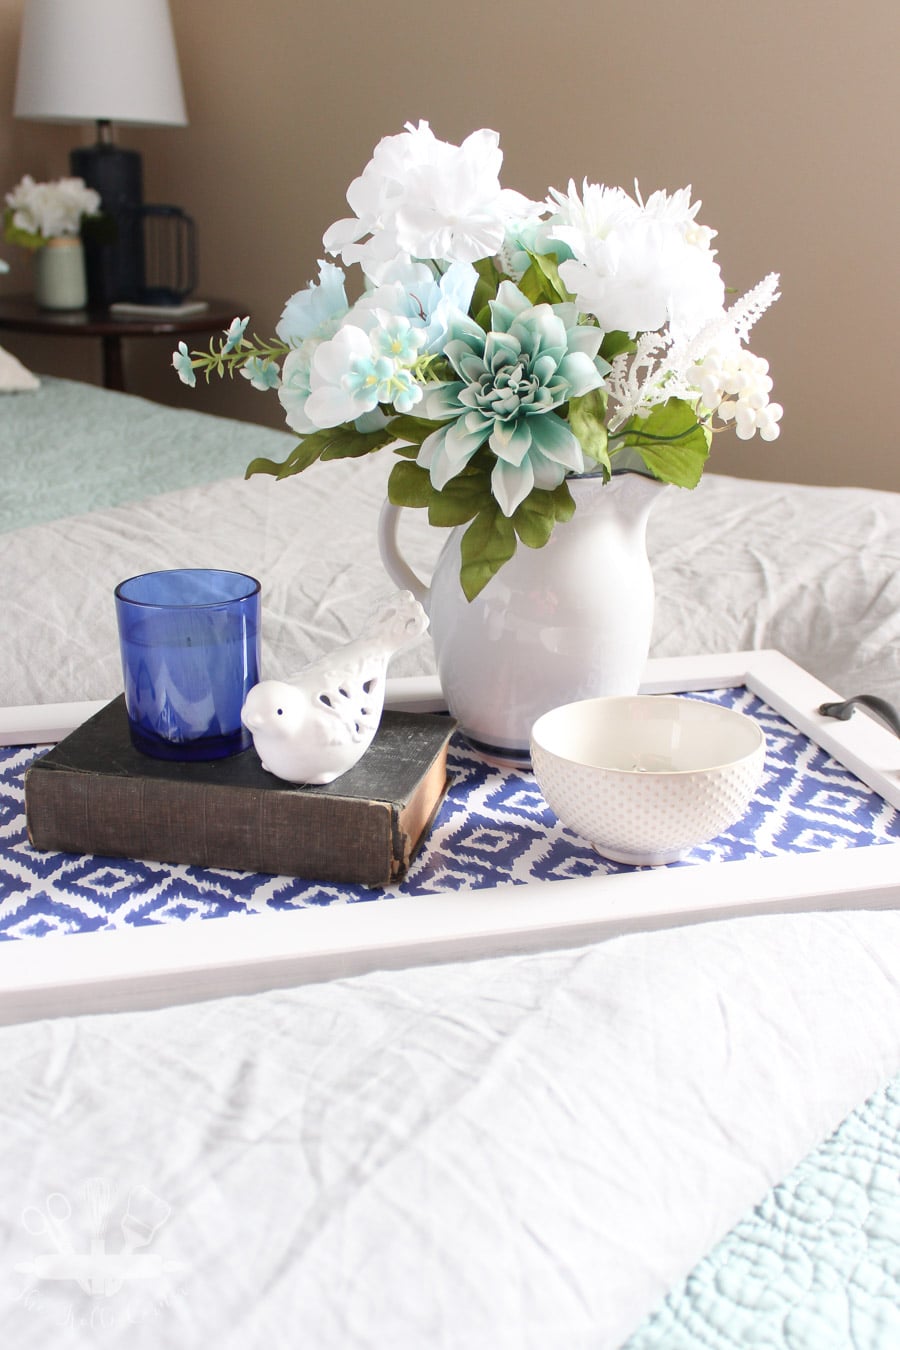
Then I glued down the kitchen drawer pulls on either side of the frame to give me something to lift and carry with. Cute right?
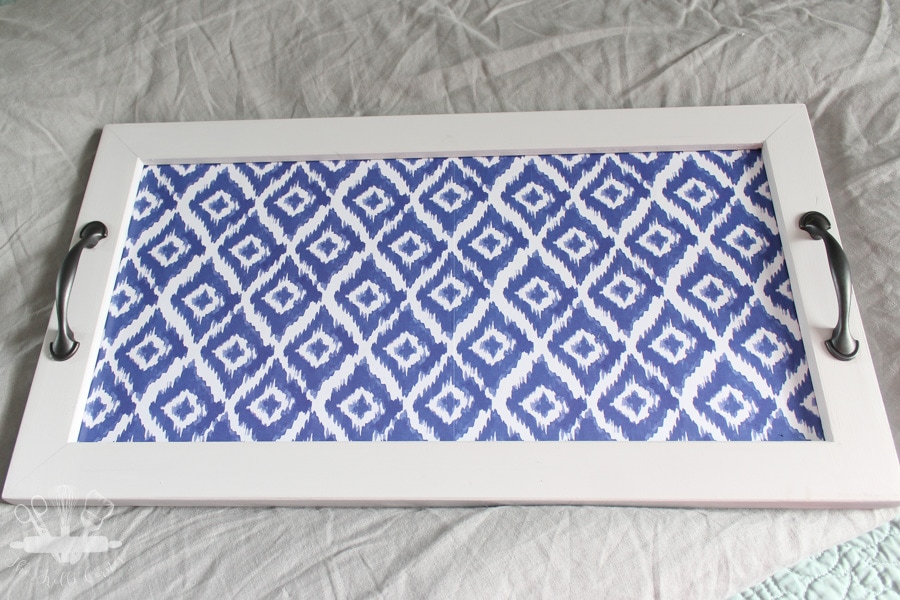
I am so in love with this scrapbook paper from Michael’s! I think I squealed a little bit when I saw it in the store. It works great in my new master bedroom too!
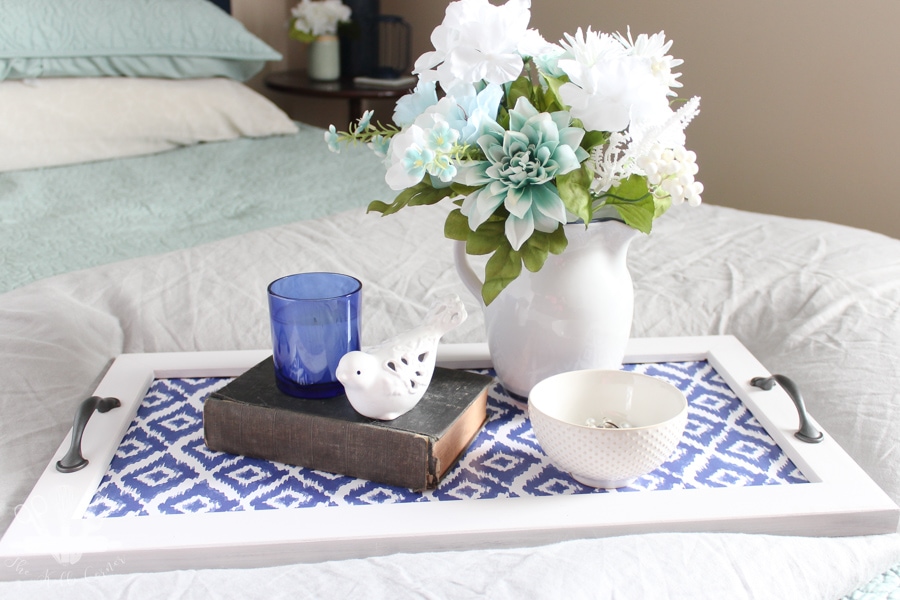
The most time-consuming part of this whole project was figuring out exactly how to style my new wooden tray. It wasn’t hard, but rather difficult to narrow down my selections. The excited over decorator in me wanted to put everything on the tray, but the college interior design training thankfully kicked in.
Tips to help you style a decorative tray
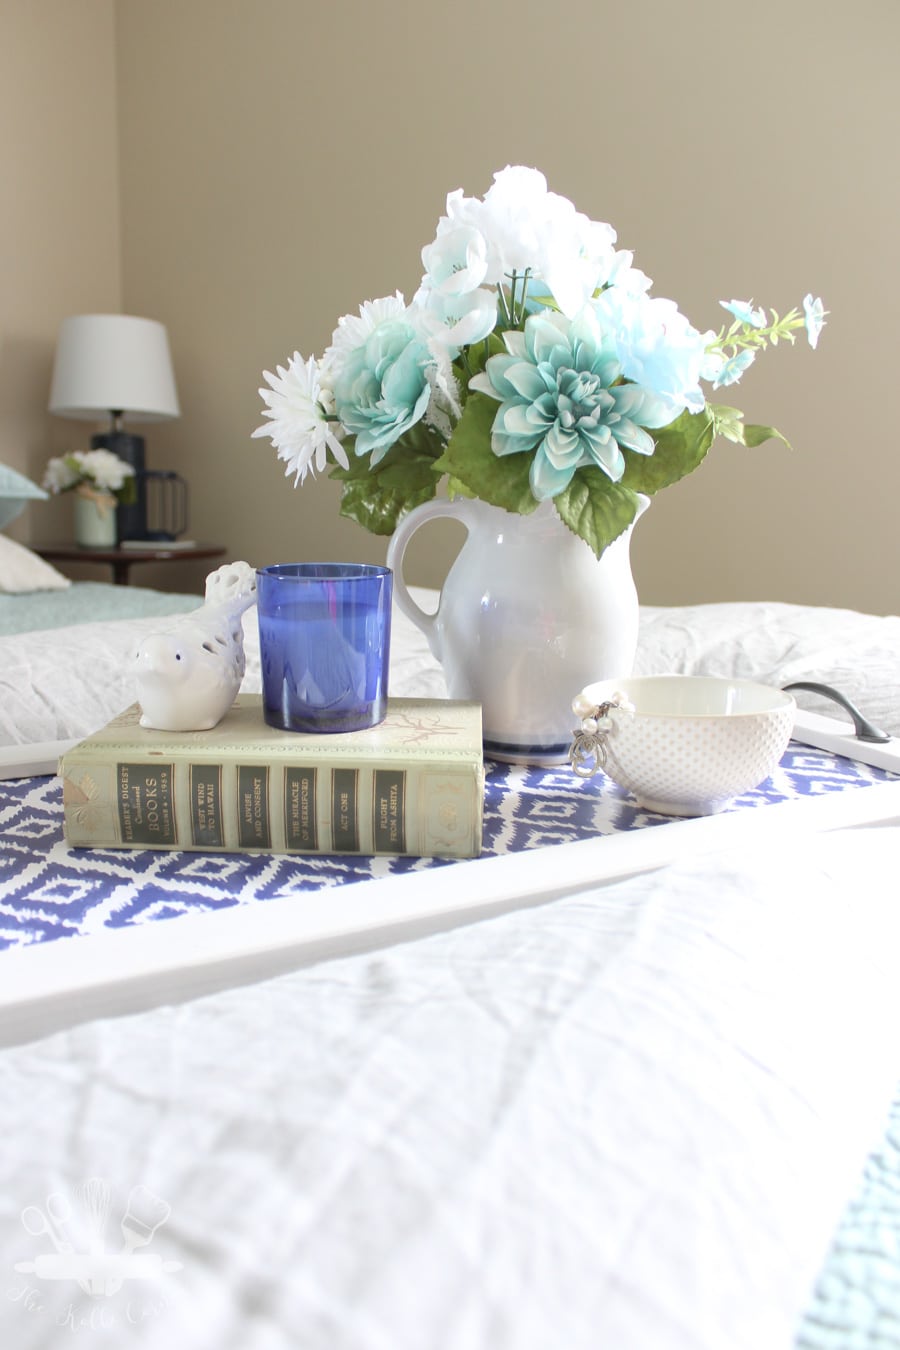
1. Add some height to a smaller piece of decor with a small stack of books. Choose books that have visually appealing covers that fit into the color scheme, or place them backward to show the aged paper.
2. Add some texture to the vignette with flowers in a vase (I happened to have faux on hand, but fresh would be gorgeous!)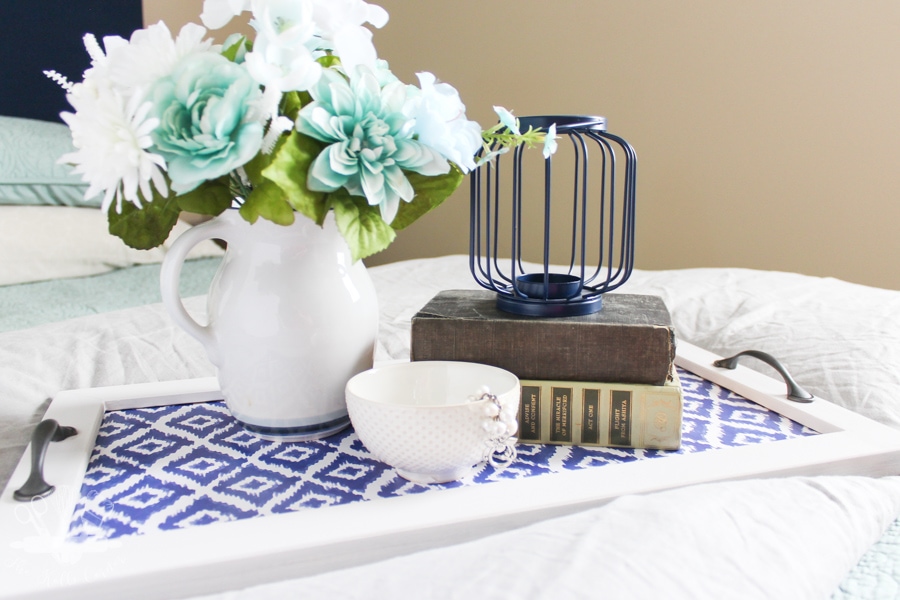
3. Use small decorative items to add depth and character.
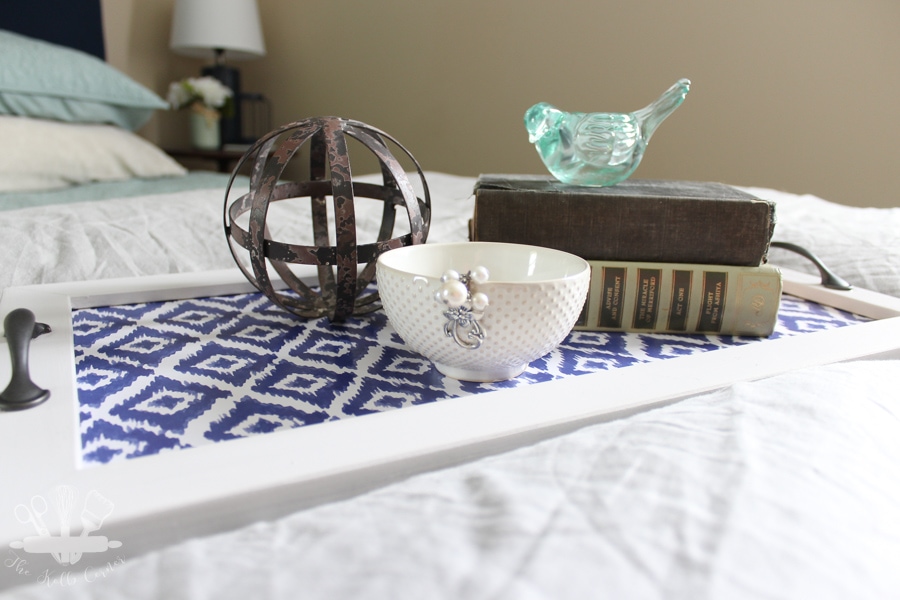
4. Use different material types like metal, glass, or ceramic, making each item stand out alone yet fit in with the whole look.
5. Remember the rule of 3. Group items in 3’s, whether you use only 3 items or 3 clusters of groups/items. Let me explain further.
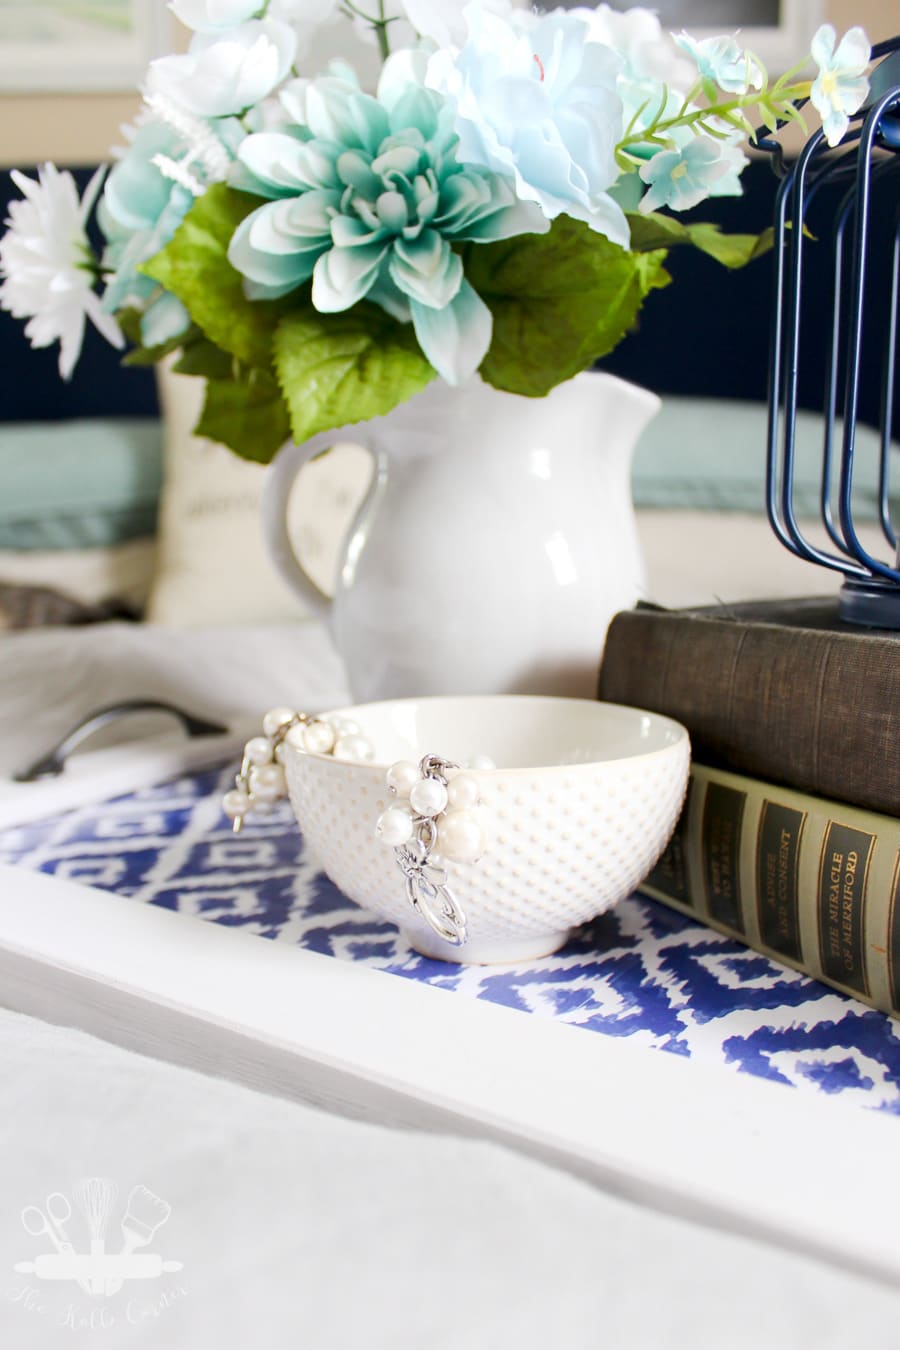
In this case, the books with the candle and bird would count as one item. The pitcher and flowers are another item, and finally, the ceramic bowl with jewelry is a third.
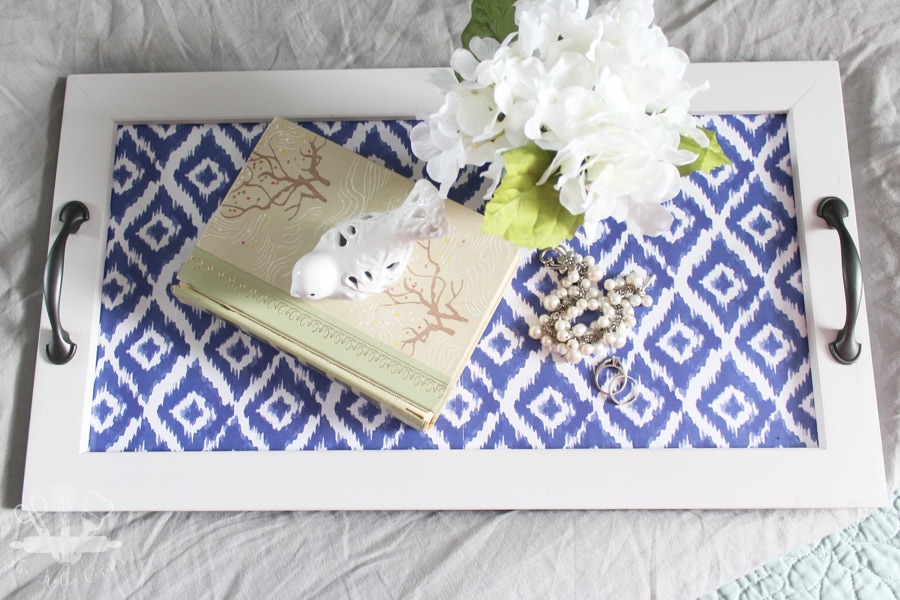
I could also style it like below. The book and bird are one item, the jewelry another and the flowers a third. There are fewer items, but they still follow the rule of 3.
6. Make sure the visual weight of the items is balanced. The lantern does not have as much visual weight as the pitcher, but by adding the books underneath it helps to balance it out. I also put the ceramic bowl in the middle since it’s the smallest in height and therefore has less visual weight than the other items.
Play around with it until it looks just right. Arrange, rearrange, and swap out items until you get exactly the look you are going for! And then, if you’re like me, change it again in a week because you are bored with it 🙂
For now, I love placing the decorative tray on my dresser so I have a place to toss my jewelry and other items. I placed a few little felt pads on the corners so it doesn’t scratch up the wood.

What do you think? What are your favorite ways to style a decorative tray?
Pin it for later
More Upcycle Project Ideas:
- Upcycled Farmhouse Bathroom Wall Storage
- Home Sweet Home Chalkboard Sign
- Upcycled Herb Drying Rack
- DIY Mason Jar Wall Vases
And now for more thrifty goodness!
Check out what my fellow upcyclers created below!
That’s such a Pretty, smart and creative way to reuse an out dated picture frame!
Thanks Jeannee!
Turned out so cute!!!! I love that pattern. You sound like me with the broken glass, I’m so clumsy! Hehe.
Thank you Chelsea! It wouldn’t be a DIY project without me getting impatient and breaking something 😉
I like all the different ways you styled this pretty tray! I always have a hard time keeping my styling simple, too 🙂
Thank you Emily!
I love the pattern you chose! Thanks for the styling tips I always get crazy at that point too. Sometimes looking at the final pics after I take them give me better perspective. I’ll be on the lookout for a great frame!
Kim
Thank you Kim! I want to make one for every room now lol
This tray looks so beautifully styled on your bed! I love it, and that fun ikat paper is just perfect.
Thank you Sue! I love that paper.
Your tray turned out so pretty! You might have just inspired me to make my own. I really like that scrapbook paper too.
Thank you Angela!
I just love this tray and it looks great on the dresser. The paper you picked is so pretty. I also appreciate the styling tips.
Thank you Debra!
Very pretty update to a boring, unloved frame. I love the pattern you chose!
Thanks Megan!
Oh my, that paper is gorgeous! I probably would have squealed a little too when I saw it. Your new tray is so pretty and thanks for those great tips!!
Thanks Shirley! I love it!
Very pretty, and lovely styling,too! Goes great in your bedroom:) xo Kathleen|Our Hopeful Home
Thank you Kathleen!
I love how bright and cheerful it is! I made a tray once with a frame but used planked wood for the bottom. I never thought about using modge podge and scrapbook paper–I love that idea to add a fun pattern 🙂
And great tips on styling!
I think a planked bottom would be beautiful!
Super pretty! Love the ikat pattern you used. And you styled it like a pro! Visiting from Thrift Store Challenge.
Thank you!
No matter how you style the tray it looks beautiful! The scrapbook paper is so pretty, it reminds me of the typical Mallorquinean fabric which has a really similar pattern.