DIY White Wicker Spring Wreath
Add some color to your front door with this simple DIY white wicker spring wreath. Grab the tutorial and supplies list below!
This post may contain affiliate links for your convenience. Read our disclosure policy.

The best way to add a welcoming touch to your front door, and most inexpensive way to change it up for the season, is by adding a wreath! Make it even more affordable by creating your own with a simple wreath form and some faux florals from the craft store. That’s exactly what I did to create this white wicker spring wreath.
A quick note before we get to the tutorial. My white wicker wreath form came from a $5 grab bag of wreaths from Michael’s in the Fall of 2020. They were wreaths leftover from their spring collection, and I just removed the existing floral from the wreath form. I have not been able to find this exact wreath form anywhere ONLINE, but I have seen them in store at Michael’s. You can find natural ones labeled as rattan, or you could use a grapevine wreath and spray paint it.
DIY White Wicker Spring Wreath
Supplies needed:
- White wicker wreath (or you could paint a grapevine wreath)
- Floral stems–I used fuschia peonies, purple snapdragon and white/greenery mixed picks
- Wire cutters
- Hot glue gun
- Floral wire
For this DIY spring wreath project, I am using a few different florals from Micheal’s. Feel free to use whatever style of flowers you’d like!

The first step to creating a beautiful DIY wreath is to separate each floral stem from the bush (unless you are using picks, then leave those together). To do this, simply snip each stem from the main stem using wire cutters.

Next, do a test arrangement of the florals on the wreath form. This way you can get an idea of how everything looks together!
Then start tucking each floral stem into the wreath. Start with the smaller, leafier items and then build on those with the bigger blooms.
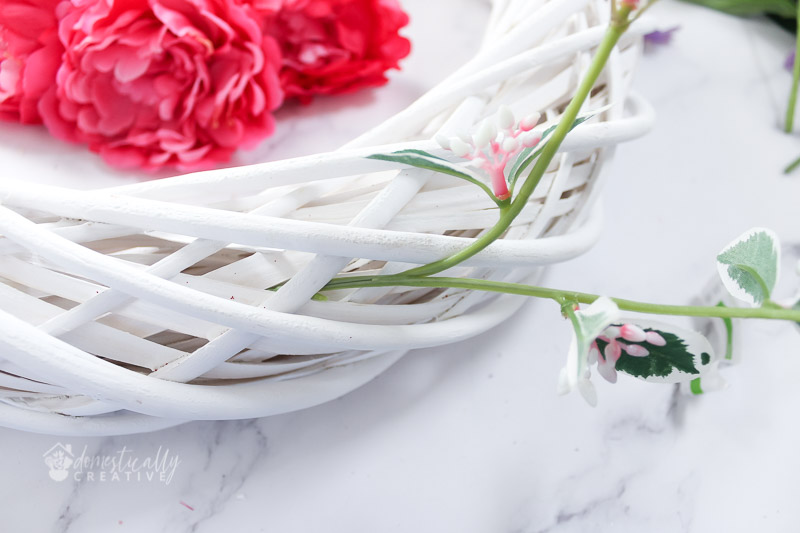
Here you can see I added everything but the fuchsia peony centerpiece, simply by weaving each floral stem into the wreath. If the stem is not long enough to weave into the wreath form, or it doesn’t seem secure, you may need to use some floral wire to secure the stems. I ended up needing floral wire to hold the big green leaves in the center in place.

You can also use a hot glue gun if needed to secure any blossoms that may not have a long stem to tuck into the wreath. For this wreath I used a small amount of hot glue, and also secured with a bit of floral wire after the glue dried.

Adjust, bend and fluff the florals as needed to get the look just right for your spring wreath. If any pieces tend to stray off their path, use some floral wire to put them in place.

You could add a bow to the top of the wreath if desired.
The last step is to hang this new DIY white wicker spring wreath on your front door for all to admire! Isn’t she beautiful?
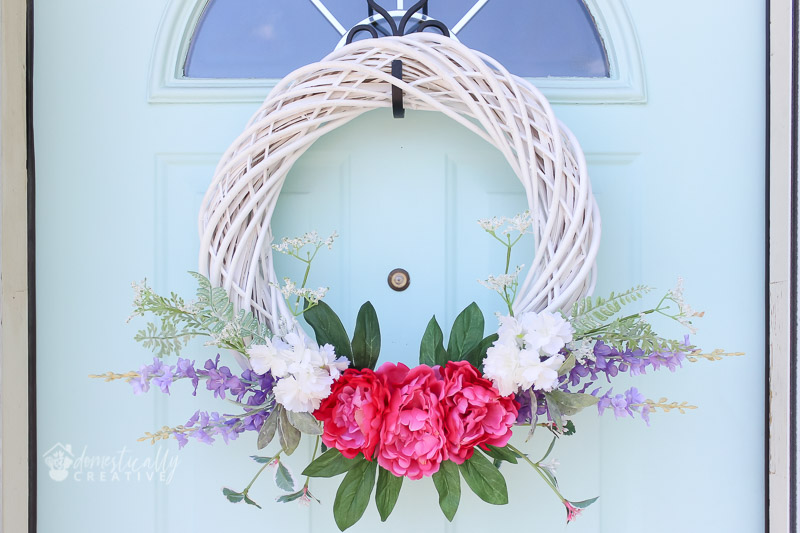
When you are making a wreath for each season, it’s important to take the color of your door into account. You wouldn’t want to use a lot of the same color flowers as your door or they could become lost.
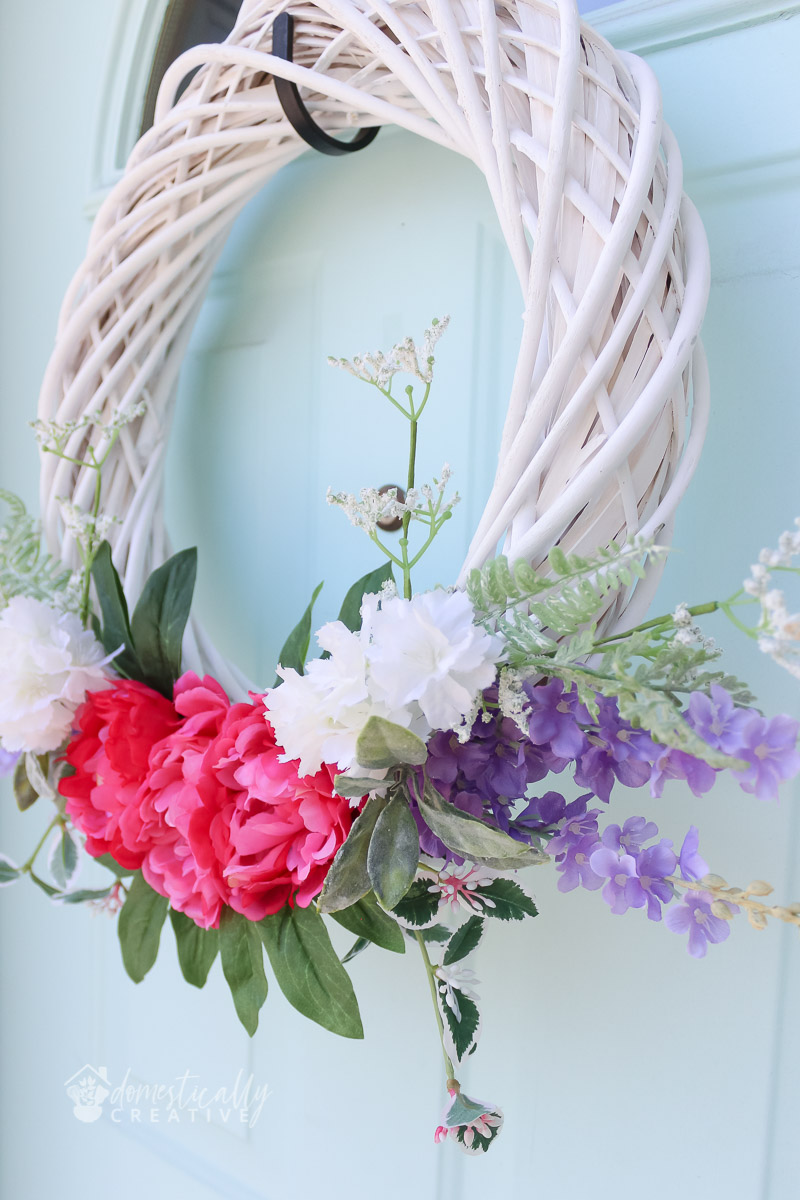
For this baby blue door, the white wreath with bright colored flowers works perfectly! The colors really pop against the door AND the white wreath.

Here are some of the other wreaths I’ve created for this baby blue door:
Here are more Spring wreaths I’ve made in the past too:
- Burlap and Felt Flower Spring Wreath
- DIY Spring Floral Wreath
- Spring Berry Wreath
- DIY Spring Inspired Wreaths
Love this? Don’t forget to pin it for later!
